Page History
...
Clicking on this choice brings up the “Setup Okta Verify” window. In this window, “Select your device type” by clicking the icon that matches the brand of mobile phone that you will be using. (If you would like to go back and choose a different authentication method, click on “Back to factor list” located in the bottom left-hand corner of the center window.)

When you click on the brand icon, the window will expand at the bottom to display instructions to “Install Okta Verify”.
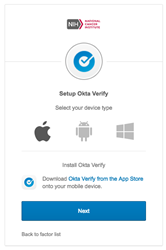
Okta Verify is a mobile app that needs to be downloaded to your cell phone. The window contains a link to your cell phone brand’s app store page for Okta Verify. This will allow you to easily identify Okta Verify in your app store to download on your cell phone.

Once the app is downloaded, click on the blue “Next” button on your computer and tap on the “Add Account” button in your cell phone app. (If asked, allow the app to access your cell phone camera and allow it to send push notifications).
The Okta app will open a camera screen, and your computer screen will display a QR code (square-shaped barcode).
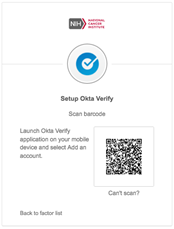
Point your cell phone towards your computer screen and align the cell phone camera display with the square of the QR code.
The Okta Verify app will scan the QR code and connect your cell phone to your Okta account. You will see a new entry in the connections list in your cell phone app.
On your computer, you will be directed back to the “Setup Multifactor Authentication” screen.
While initially you will be logged into your account following these steps, the next time you log into your account, you will be using a “push” to authenticate. Please take note of the following steps:
● ● When you enter your username and password, you will see a window for Okta Verify with a button to “Send Push”. Click on this button and a “push” pop-up alert will be sent to the app on your mobile phone asking you to approve the connection.
● ● Tap on the “Approve” button to authenticate.
● ● Following the authentication, the application will load.
● ● The next time you log in to the application, an Okta Verify window will appear asking whether to send a push to the phone number on record.
● ● Click to proceed with the push, then tap on “Approve” in the popup alert from the Okta Verify app.
Return to Step 8 in “First-Time Login Steps” to finish setup.
...