Page History
...
- Log in as described in Logging In via the GUI. The Dashboard appears.
- Select a method:
- If you are not familiar with the data destination, browse for it, as described in Browsing for Data via the GUI. Navigate to and right-click the location where collection in which you want to register your data file. Click Add DatafileData File. The Register Data File page appears.
- If you are familiar with the data destination, select this method: In the left panel, click Register > Data File. The Register Data File page appears.
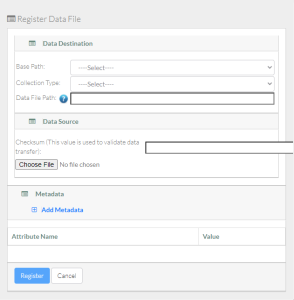
If you browsed to the data destination, that portion of the page has only the Data File Path field, with a system-generated collection path already specified.
If the Base Path and Collection Type fields are available, specify the data destination:
Select the base path specified by your group administrator.
The systemAn information icon (
 ) appears next to the Base Path field and the system begins to populate values in the Collection Type field and the Data File Path field. (If you are a group administrator and want the Collection Type field to list more collection types, contact NCIDataVault@mail.nih.gov.)
Consider examining the valid hierarchies for the selected base path. To do so, click the information icon next to the Base Path field. A Valid Hierarchies chart appears indicating the collection type or types allowed within each collection type. In the chart, a check mark indicates each collection in which you can register data files.
To close the Valid Hierarchies chart, click elsewhere on the page.
Include Page shared step - select collection type shared step - select collection type
- Specify the data source:
Consider specifying a checksum for validation of data transfer.
Include Page shared info - checksum option shared info - checksum option Include Page shared step - select data file shared step - select data file
Include Page shared step - specify data file path shared step - specify data file path - Consider hovering over the information icon () for each attribute. A tooltip appears with information about that attribute.
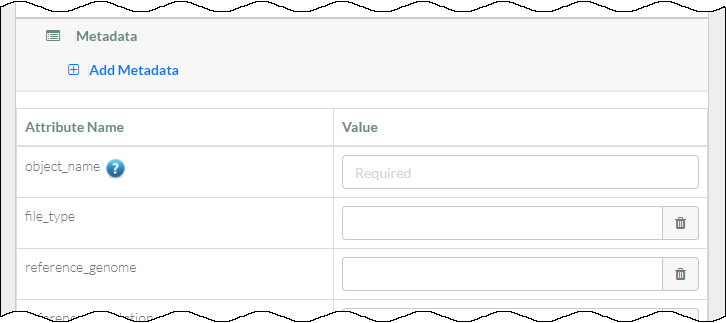
- Specify the file metadata:
Include Page shared step - add metadata shared step - add metadata Include Page shared step - specify attribute values shared step - specify attribute values
Include Page shared step - register file shared step - register file
...