Page History
| Include Page | ||||
|---|---|---|---|---|
|
This page includes the following topics:
| Table of Contents | ||
|---|---|---|
|
Configuring the CTP Server
| Info | ||
|---|---|---|
| ||
|
To configure the CTP server
...
After installing the CTP client and server, to activate the user authentication in file submission, modify config.xml in the CTP_Client\CTP directory. By default, both the username and password are set to "client". Specify the username and password in ExportService and DatabaseVerifier sections as follows:
| Code Block |
|---|
<DatabaseVerifier

     class="org.rsna.ctp.stdstages.DatabaseVerifier"

     name="DatabaseVerifier"

     password="client"

     root="roots/DatabaseVerifier"

     url="https://127.0.0.1:1111"

     username="client"

     password="client"/>

   <ExportService

      name="HTTP Export"

     class="org.rsna.ctp.stdstages.HttpExportService"

     root="roots/http-export"

     username="client"

     password="client"
url="https://127.0.0.1:2222"/> |
On the CTP server, a new user must be created with the same username and password defined in config.xml of the CTP_Client\CTP directory. A "User Manager" in the CTP server given the "import” role can perform this task. The following figure shows the page on which the user manager creates new users: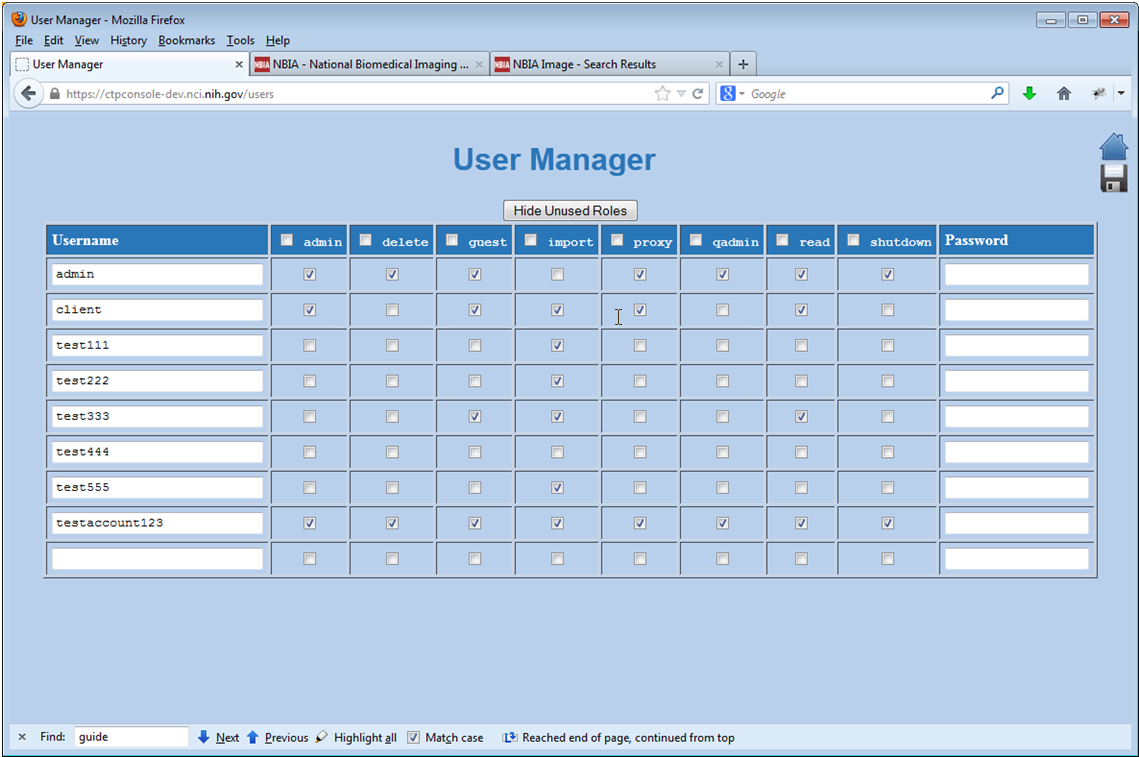
...
| Multiexcerpt include | ||||||
|---|---|---|---|---|---|---|
|
...
While installing NBIA, make sure the following points outside of the NBIA Installation folder to avoid wiping the database.
| Code Block |
|---|
application.base.path.linux = REPLACE_THIS e.g  /usr/local/apps/ncia6_0
application.base.path.windows = REPLACE_THIS e.g /usr/local/apps/ncia6_0
ctp.server.storage.service.index = REPLACE_THIS  e.g usr/local/apps/ncia/CTP-Server/CTP/Storage
ctp.server.storage_service.root = REPLACE_THIS e.g usr/local/apps/ncia/CTP-Server/CTP/Storage/root |
...
After installation, check your CTP server. In the config.xml file belonging to the CTP server, make sure that the root points to a directory outside of CTP Server. "Root" field is where the CTP submission files are stored.
| Code Block |
|---|
<StorageService
root="/data/dataset_d01/root" [Change This]
</StorageService> |
...
Note that if Tomcat and CTP are not installed as services, they must be manually started/re-started. The following files start the respective servers.
On Windows:
Note: <installed-directory> = application.base.path.windows
- Tomcat:
<installed-directory>/apache-tomcat-7.0.68/bin/startup.bat - CTP:
<installed-directory>/CTP-server/CTP/ctp.bat
On Linux:
Note: <installed-directory> = application.base.path.linux
- Tomcat:
<installed-directory>/apache-tomcat-7.0.68/bin/startup.sh
- CTP:
<installed-directory>/CTP-server/CTP/ctp.sh
Creating an LDAP Account for NBIA
The way that NBIA is configured during installation determines the way NBIA administrators create users. All new users must already exist in LDAP to use NBIA. The NBIA administrator can use the NBIA User Authorization Tool to add new NBIA users using their LDAP login names.
During installation, if install.properties specifies the option database.re-create=true, the administrator creates users in the following way.
- Create an LDAP account with the login name
nciadevtestand a password. - Log into NBIA using these credentials.
- Select Admin > User Authorization Tool.
- Add users to NBIA.
- Assign roles to users.
During installation, if install.properties specifies the option database.re-create=false, the administrator uses his or her existing account, then selects Admin > User Authorization Tool and adds users to NBIA.
If this is a upgrade to a new version of NBIA, all users should still exist in the NBIA database. Administrative users and other existing users can use their existing credentials to log in to NBIA.
...
If this is a new installation of NBIA or if the NBIA database has been wiped out by using the installation property “database.re-create=true”, then the default admin username in the database is “nciadevtest”. You must add this username to LDAP so that you can use the default administrative user to log in and create other users for NBIA.
An alternative method to adding the username to LDAP is to replace the login name “nciadevtest” in the csm_user table with the admin’s LDAP username. The administrative user can then use his or her own LDAP account to log in to NBIA and access the User Authorization Tool.
Example:
Assume the LDAP username is "aLoginName". Run the following SQL in MySQL/MariaDB:
update nbiadb.csm_user set login_name = 'aLoginName' where login_name='nciadevtest';
...