Page History
...
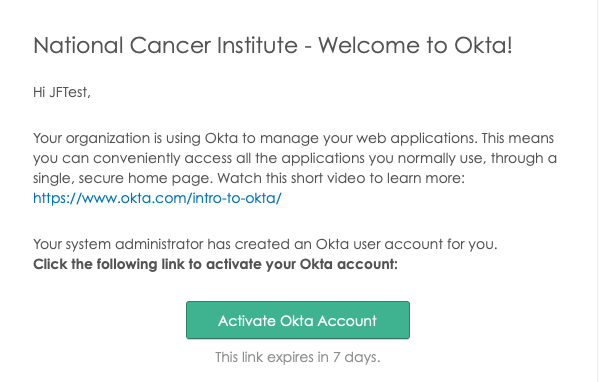
- In the email notification received from Okta, select the "Active Activate Okta Account" button. This will launch the Okta account creation page.
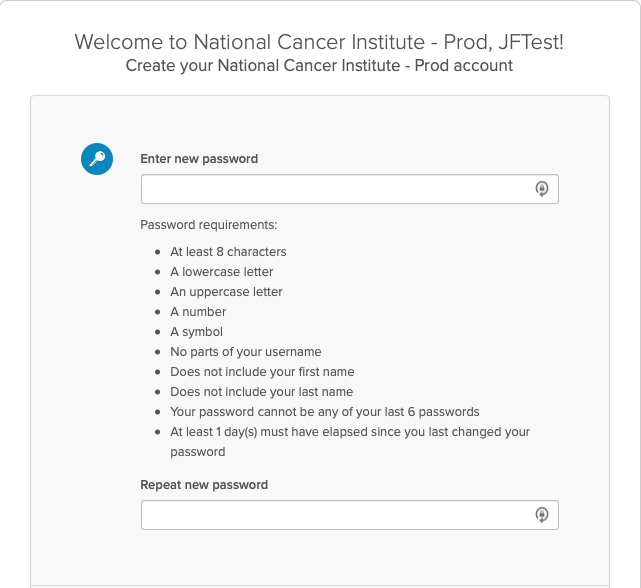
- On the Create your National Cancer Institute - Prod account creation page, follow the steps to create a password and choose a security image. Select the "Create My Account" button.

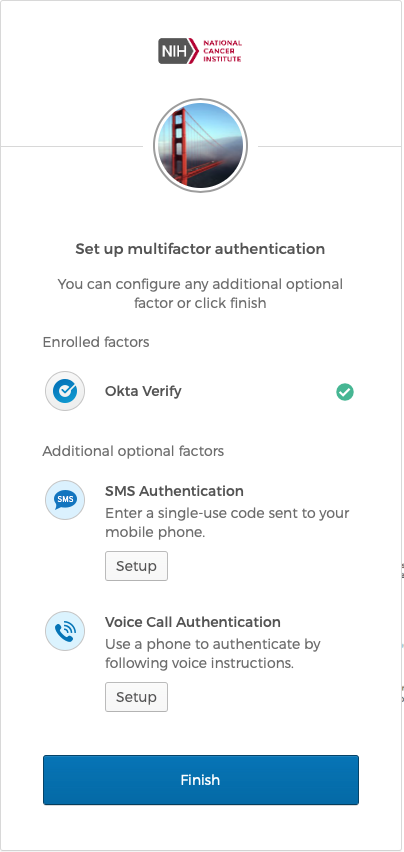
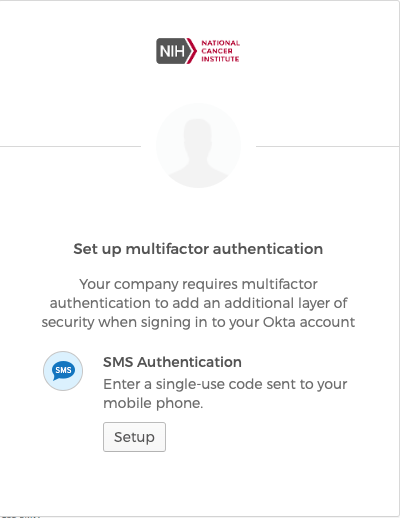
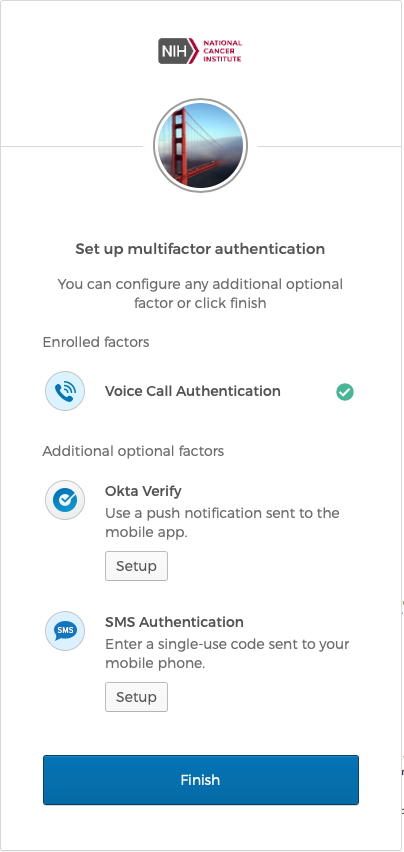
- The Okta “Set up multifactor authentication” window launches next displaying the three multifactor authentication methods available:
● Okta Verify - "Use a push notification sent to the mobile app."
● SMS Authentication - "Enter a single-use code sent to your mobile phone."
● Voice Call Authentication - "Use a phone to authenticate by following voice instructions."
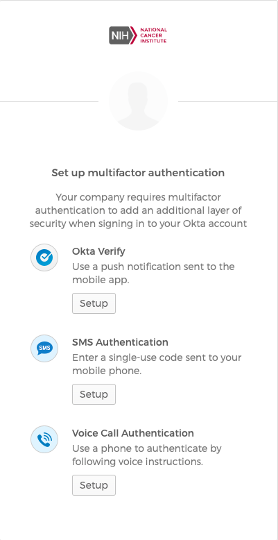
- Choose "Setup" on the desired authentication method.
...
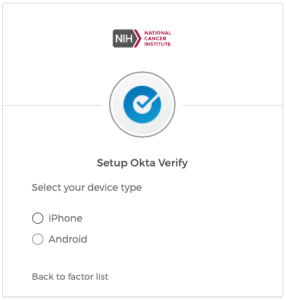
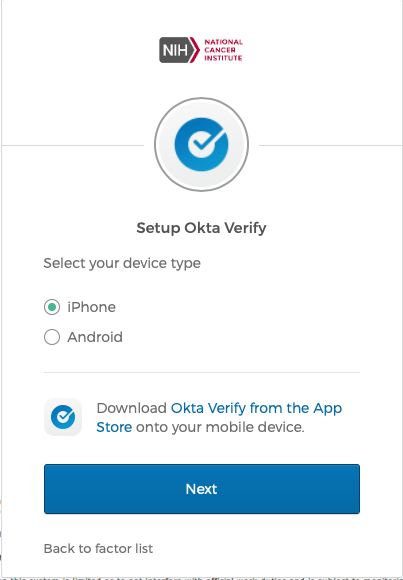
On the “Setup Okta Verify” window, select the brand of mobile phone being used and select "Next". You will then be prompted by Okta to download the Okta Verify app. (Select "Back to factor list" to choose a different authentication method).

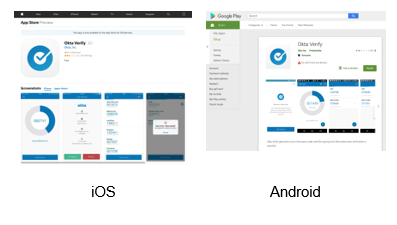
Okta will display a notification to download the Okta Verify app from the manufacturers App Store. Download the app on the mobile phone to continue configuring Okta Verify.
Once the Okta Verify app is downloaded on the mobile device, select “Next” in Okta, and tap on the “Add Account” button in the Okta Verify mobile app. (If asked, allow the app to access your mobile phone camera and allow it to send push notifications).
The Okta Verify app will open a camera screen, and your computer screen will display a QR code (square-shaped barcode).
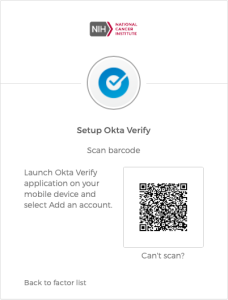
Capture the QR code with your mobile phone.
The Okta Verify app will scan the QR code and connect the mobile phone to your Okta account. An "Account Added" confirmation will display in Okta, and a new entry in the "Connections" tab will be added in the Okta Verify app.
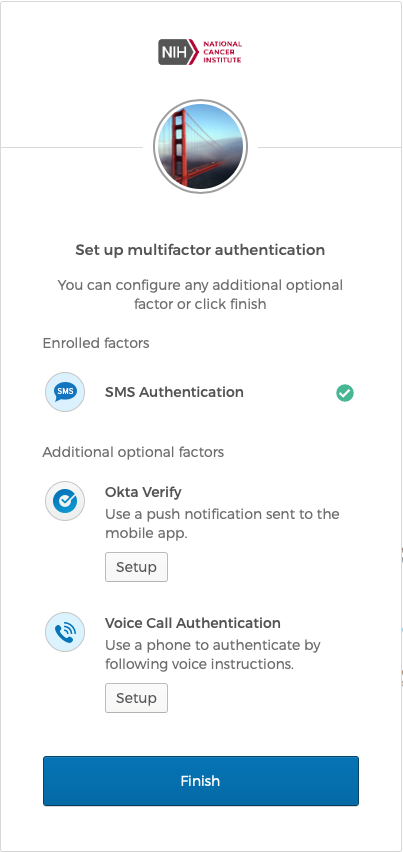
Okta will return to the “Set up multifactor authentication” page.
- Select "Finish", or continue to setup additional multifactor authentication methods if desired.
Any subsequent logins to Okta will will use a “push” to authenticate. Please take note of the following steps:
● Upon entering a username and password, a window for Okta Verify with a button to “Send Push” will be displayed. Selcting "Send Push" will send an alert to the Okta Verify app on the mobile device configured with the Okta account to approve the login request.
● In the Okta Verify app, tap on the “Approve” button to authenticate.
● Following the authentication, the application will load.
...
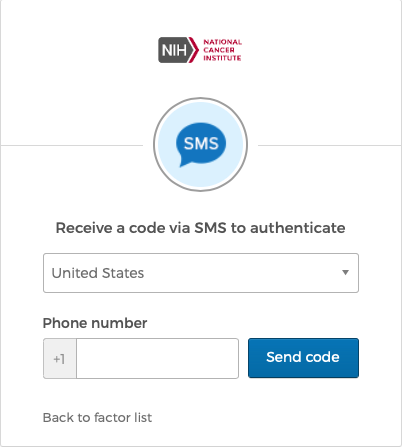
- On the "SMS Authentication" window, select "Setup".
- Use the dropdown picklist to choose the country of your location (United States is selected by default). The choice of country automatically populates the appropriate country code prefix for the Phone number text box. (Select "Back to factor list" to choose a different authentication method).
- Enter the phone number of the desired mobile phone, select “Send code”.

- A text message stating "Your verification code is xxxxxx." will be sent to the phone number provided.
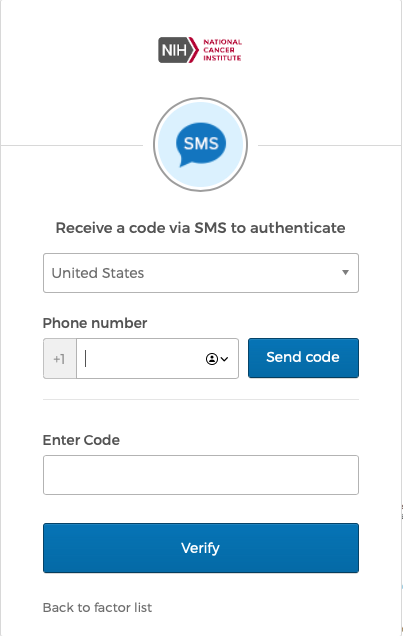
- Enter the code in the "Enter Code" textbox and select "Verify".
- Select "Finish" or continue to setup additional multifactor authentication methods if desired.
Any subsequent logins to Okta will use SMS Authentication to authenticate. An SMS Authentication window will appear asking to approve the sending of a text message to the number provided (With the exception of the last 4 digits, the number will be masked).
...
On the “Follow phone call instructions to authenticate” window, choose the country of your location (United States is selected by default). The choice of country automatically populates the appropriate country code prefix for the "Phone number" text box. (Select "Back to factor list" to choose a different authentication method).
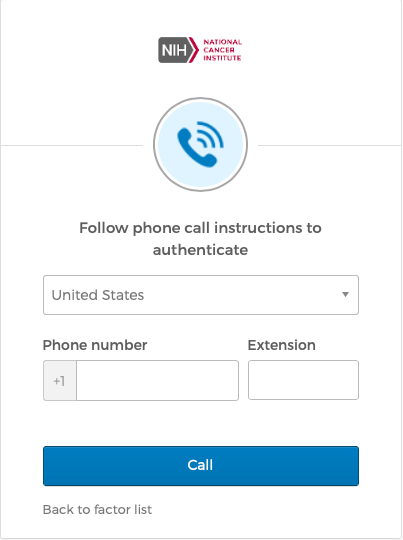

Enter the phone number and extension (if applicable), select “Call”.
A phone call will be initiated to the phone number provided with a recorded message.
Enter the code given and click the "Verify" button.
Select "Finish" or continue to setup additional multifactor authentication methods if desired.
Any subsequent logins to Okta will use Voice Call Authentication to authenticate. A Voice Call window will appear asking to approve a phone call to the number provided (With the exception of the last 4 digits, the number will be masked).
...
Determine the configuration that best fits your situation and decide which of the authentication method(s) that you want to use, and which phone number you want to use with each.
When the Okta “Set up multifactor authentication” window launches, configure the desired multifactor authentication per the instructions above.
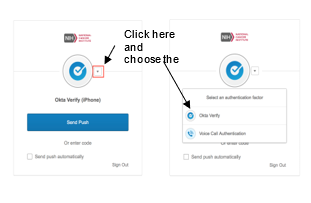
The next time you log into the application, one of the authentication methods will be selected by default, but you may choose another method you have set up. Click on the down-arrow icon next to the Okta symbol in the window and choose a different authentication method from the picklist.
Okta Password Expiration
As with most user profile passwords, Okta passwords require periodic updating to maintain compliance with security policy. NIH Users also need to update their Okta password as per the update schedule, even if they choose to only use iTrust to login to the applications.
Users will receive an email alerting them when it is time to update their Okta password.
...