Page History
| Page info | ||||
|---|---|---|---|---|
|
| Infotip | |||||||
|---|---|---|---|---|---|---|---|
| |||||||
|
| Panel | ||||
|---|---|---|---|---|
| ||||
|
| Wiki Markup |
|---|
{scrollbar:icons=false} |
This guide explains how to use caBIG® Annotation and Image Markup (AIM) on the ClearCanvas Workstation. The information presented explains key procedures for creating and working with AIM annotation objects. The intended audience for this guide is a biomedical researcher familiar with the AIM information model.
...
- https://cabig.nci.nih.gov/tools/AIM
- {multi-excerpt-include:
Wiki Markup Multiexcerpt include nopanel true MultiExcerptName ExitDisclaimer PageWithExcerpt wikicontent:Exit Disclaimer to
|name=ExitDisclaimer|nopanel=true}Include
Setting AIM Data Service Options
The purpose of AIM on the ClearCanvas workstation is to connect to multiple AIM Data Services that can accommodate the AIM 3.0 information model. As a result, these data services are collectively known as the AIM 3.0 Data Service.
...
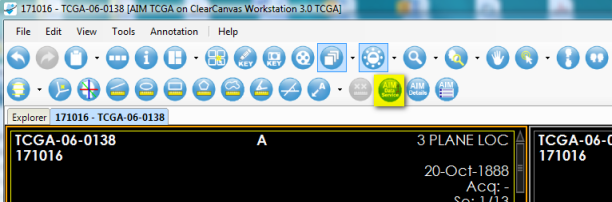
Figure 2. Access AIM Data Service Options from an Opened Study
Setting AIM Options
To access the AIM settings, on the ClearCanvas menu, select Tools > Options > AIM. When finished, click Apply to commit the changes. This is demonstrated in Figure 3.
...
Option | Description |
|---|---|
Send New Annotations to caGrid | If selected, the workstation will send new annotations to the assigned caGrid location. Also see #Setting Setting AIM Data Service Options. |
Store New Annotations Locally | If selected, the workstation will store a copy of new annotations in the AIM XML format on the local computer. A user can assign where the AIM annotation documents can be stored on the local computer. |
Required User Information | If selected, user credentials need to be entered before creating an AIM annotation document. |
Require Graphic Markup in Annotation | If selected, a user must create at least one graphical drawing on an image before creating an AIM annotation document. |
Templates Folder | If entered, the directory will be used to search for AIM template XML documents. |
Table 1. AIM Options Setting
Setting Toolbar Options
The ClearCanvas workstation allows a user to change the size of icons and show all icons on one screen. To do so, select Tools > Options > Toolbar. The recommended icon size is medium and you should select the Wrap long toolbars option. See Figure 4.
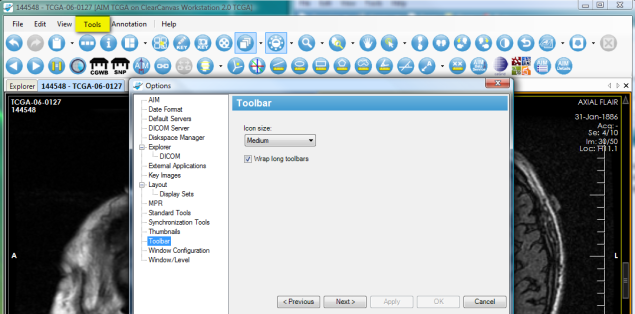
Figure 4. Setting Toolbar Option
Using AIM Tools
Table 2 describes four AIM tools that are available on the ClearCanvas workstation.
...
Table 2. Available AIM Tools
AIM Template
To activate the AIM template tool in Figure 5, click the AIM template tool button (#1). If you put the pin down (#2), you can detach the AIM Template tab by putting the mouse pointer at the header (#3) and dragging it out, as illustrated in Figure 6.
...
| Info | ||
|---|---|---|
| ||
When an AIM annotation is created, the following conditions are applied (based on AIM default settings described in #Setting Setting AIM Options)
|
Importing a New AIM Template
Import an AIM template XML document by clicking the AIM Template button, as shown in Figure 7. Windows Explorer opens a predefined folder described in #Setting Setting AIM Options.
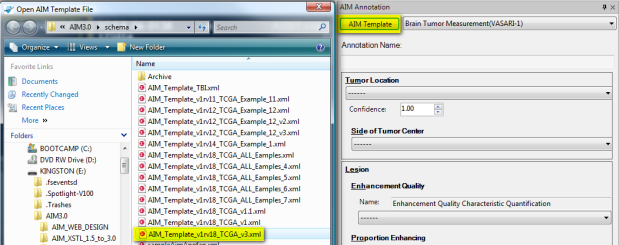
Figure 7. Importing an AIM Template
User Information
Author information as depicted in (Figure 8) can be changed. To use this feature, click the User Info button to activate the AIM User Information form. Enter appropriate information and click Save.
...
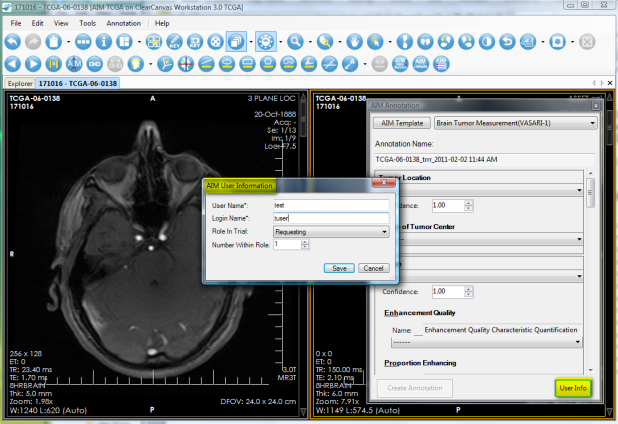
Figure 8. AIM User Information
Detailed Description of a Question
A detailed description of a question can be seen by placing the mouse pointer over the first three characters of each feature name, as shown in Figure 9.
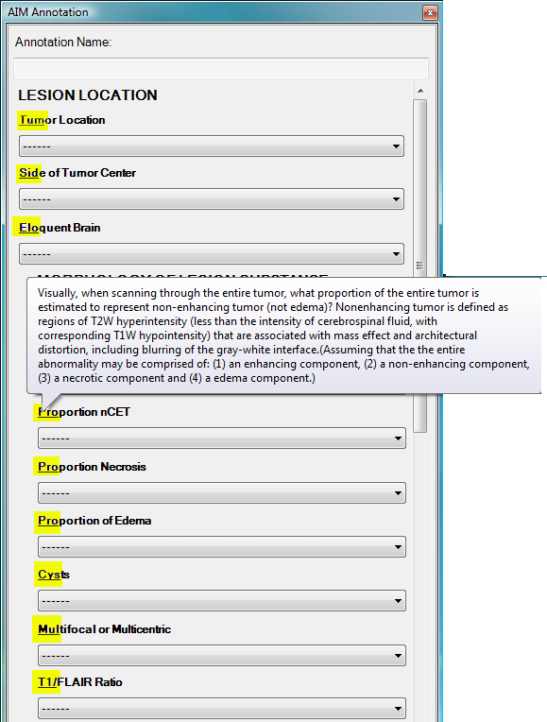
Figure 9. Detail Description of a Question
AIM Locator
The AIM locator, depicted in (Figure 10), allows users to see existing AIM instances available in a study. A list of available AIM instances is displayed below the Available AIM Annotations section, which is #2 in the following image. To access this feature and see an AIM annotation, click Show Study, which is #3 in the following image.
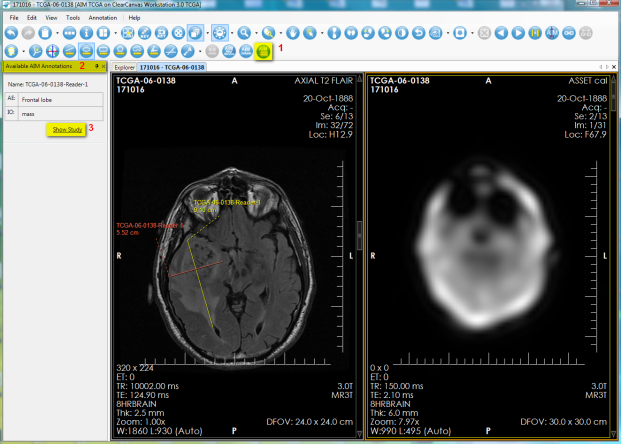
Figure 10. AIM Locator
AIM Annotation Details
The AIM annotation details, as illustrated by Figure 11, allow a user to examine detailed information captured in an AIM instance. To access this feature, you select an image containing an AIM instance and then click the AIM Details button, as shown in (#1). The AIM Annotation Details panel appears. This panel contains information tabs including Anatomic Entity, Imaging Observation, Calculations, and All Details. The All Details tab (shown in #3) allows a user to see information related to both Anatomic Entity and Imaging Observation and their characteristics.
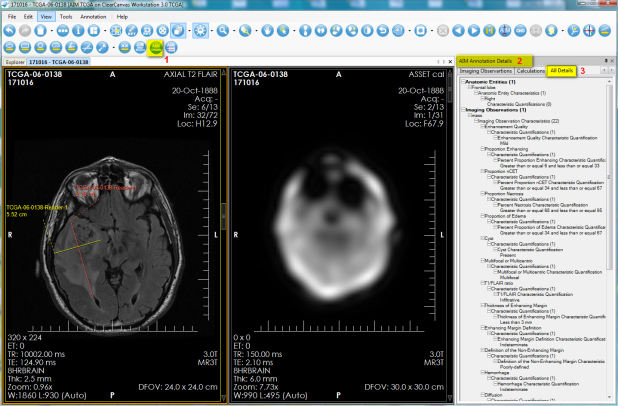
Figure 11. AIM Details
AIM Display Markups from Different Users
For a given image in an imaging study that has more than one reader interpreting and creating AIM annotations, the workstation can display every annotation while allowing you to turn off markups from a selected group of readers. Figure 12 depicts an image with three markups from three readers. The markup from reader named qwe-3 was turned off.
...
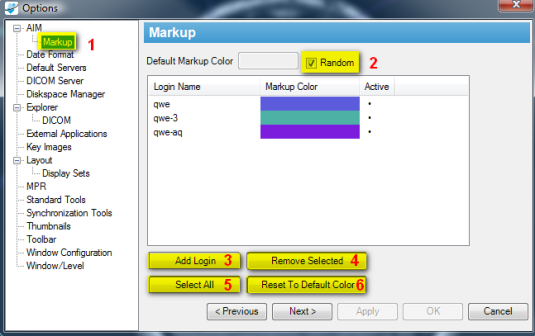
Figure 13. AIM Markup Display
Viewing AIM Data for Each Image Series
You can see AIM annotations for an imaging study grouped by image series in the Available AIM Annotations section. Figure 14 shows two different image series. The first, Axial FSE, includes one AIM instance. The second, Axial T1, includes three AIM instances.
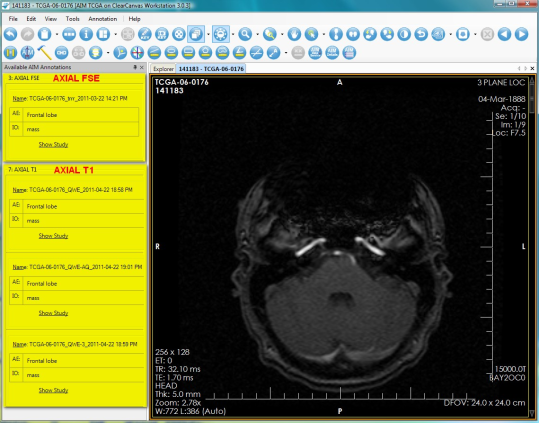
Figure 14. AIM Data in Each Image Series
Using Data Services
National Biomedical Imaging Archive (NBIA) Data Service
The NBIA Data Service (Figure 15) tab provides the ability to connect and retrieve studies from NBIA directly within the workstation. Holding the Ctrl key allows you to click on and select multiple studies. Right-clicking activates a feature that allows you to retrieve selected studies.
...
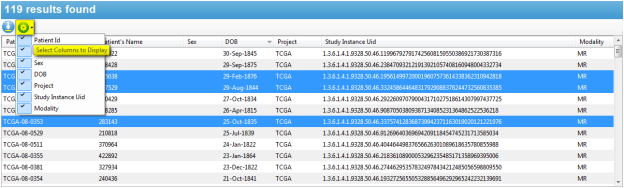
Figure 17. Select NBIA Data Service Display Columns
AIM Data Service
The AIM Data Service tab (Figure 18) provides the ability to connect and retrieve AIM XML documents from an AIM 3.0 Data Service (see #Setting Setting AIM Data Service Options). It also allows a user to retrieve both AIM documents and studies from NCI's NBIA. Right-clicking activates a feature that allows you to retrieve studies.
...
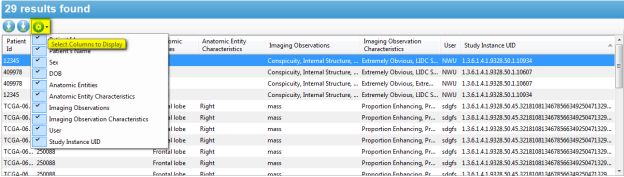
Figure 20. Select AIM Data Service Display Columns
Additional Information
Follow the links below for more information on how to set up AIM, information on the AIM Template Manager, and AIM Template Manager software.
- AIM Terms and Concepts
- AIM Template Manager User's Guide
- AIM Template Software Setup manual
- AIM Template Creator Software