Page History
| Panel | |
|---|---|
|
Introduction
This document is intended to show explains how to install CodaLab from start to finish in a linear fashionand is an alternative to the more detailed user manual on the CodaLab Wiki. CodaLab is under active development, so the procedures here are subject to change.
Your first step is to decide which virtual machine or computer you want to install MedICI.
Creating a Virtual Machine on Microsoft Azure\Ubuntu Server 18.04 LTS
...
This tutorial focuses on Ubuntu-based installations on Azure, although instructions on how to do this on Microsoft and Apple operating systems and in AWS are also included.
Create a
...
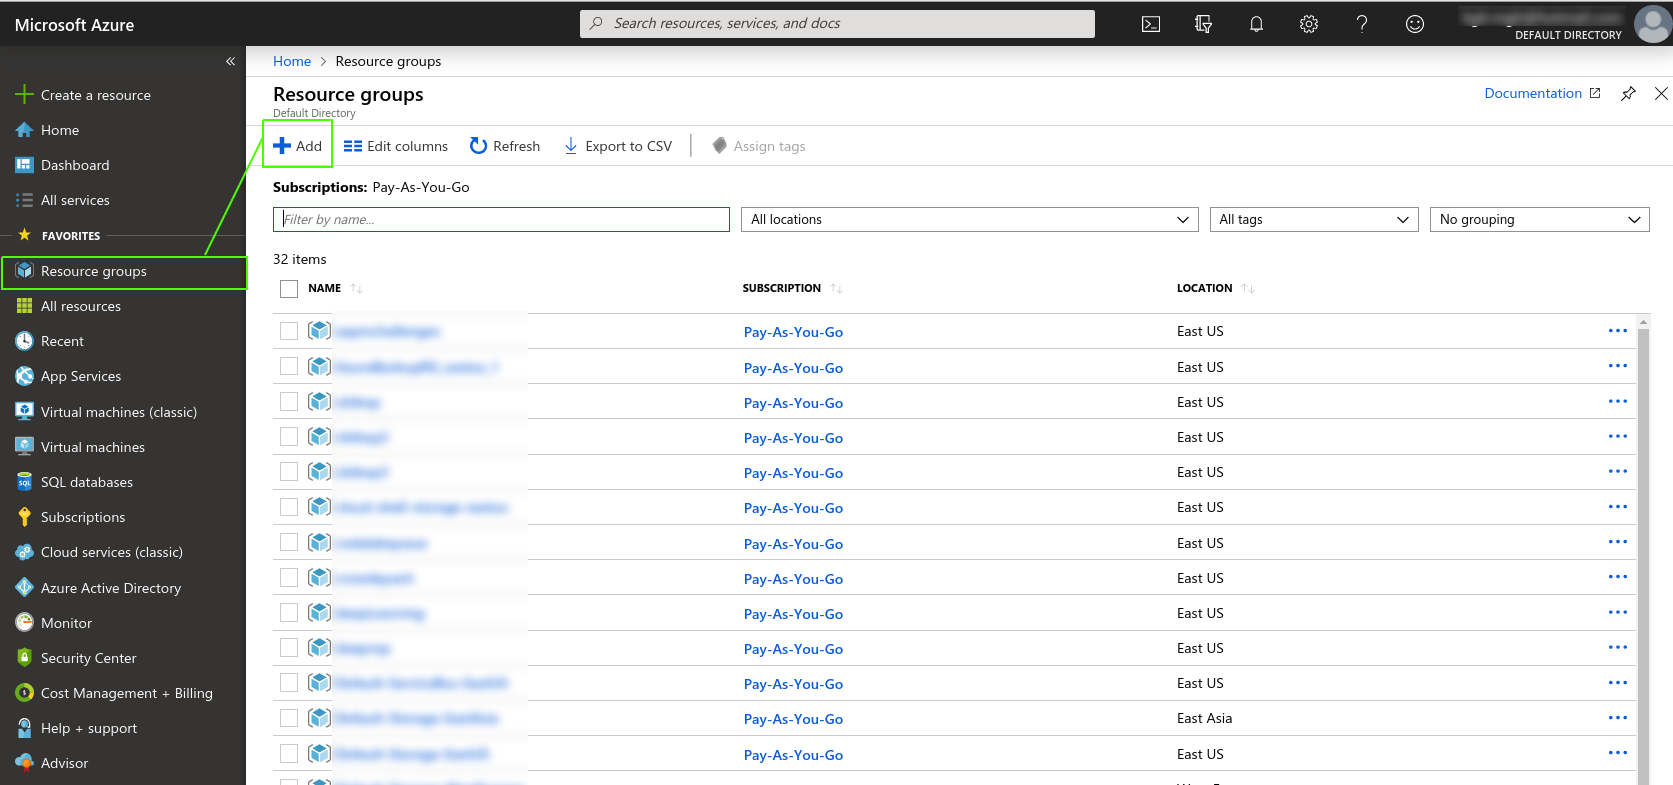
First create a VM in Azure or get yourself use a computer with Ubuntu Server 18.04 installed. Once you have an Azure acount account, go to the Azure home page here (https://portal.azure.com/#home). You should see a side-bar . A sidebar with many options or categories appears. You have the option to can create either a resource or a resource group and then add resources into it. This tutorial will demo with a uses the resource group method to demonstrate good organizational practices. First click
- Select Resource groups
...
- > add.
- Name the resource group and then decide how you will pay for this service.
...
- Click Review + create.
...
- Go to the resource group and add a VM:
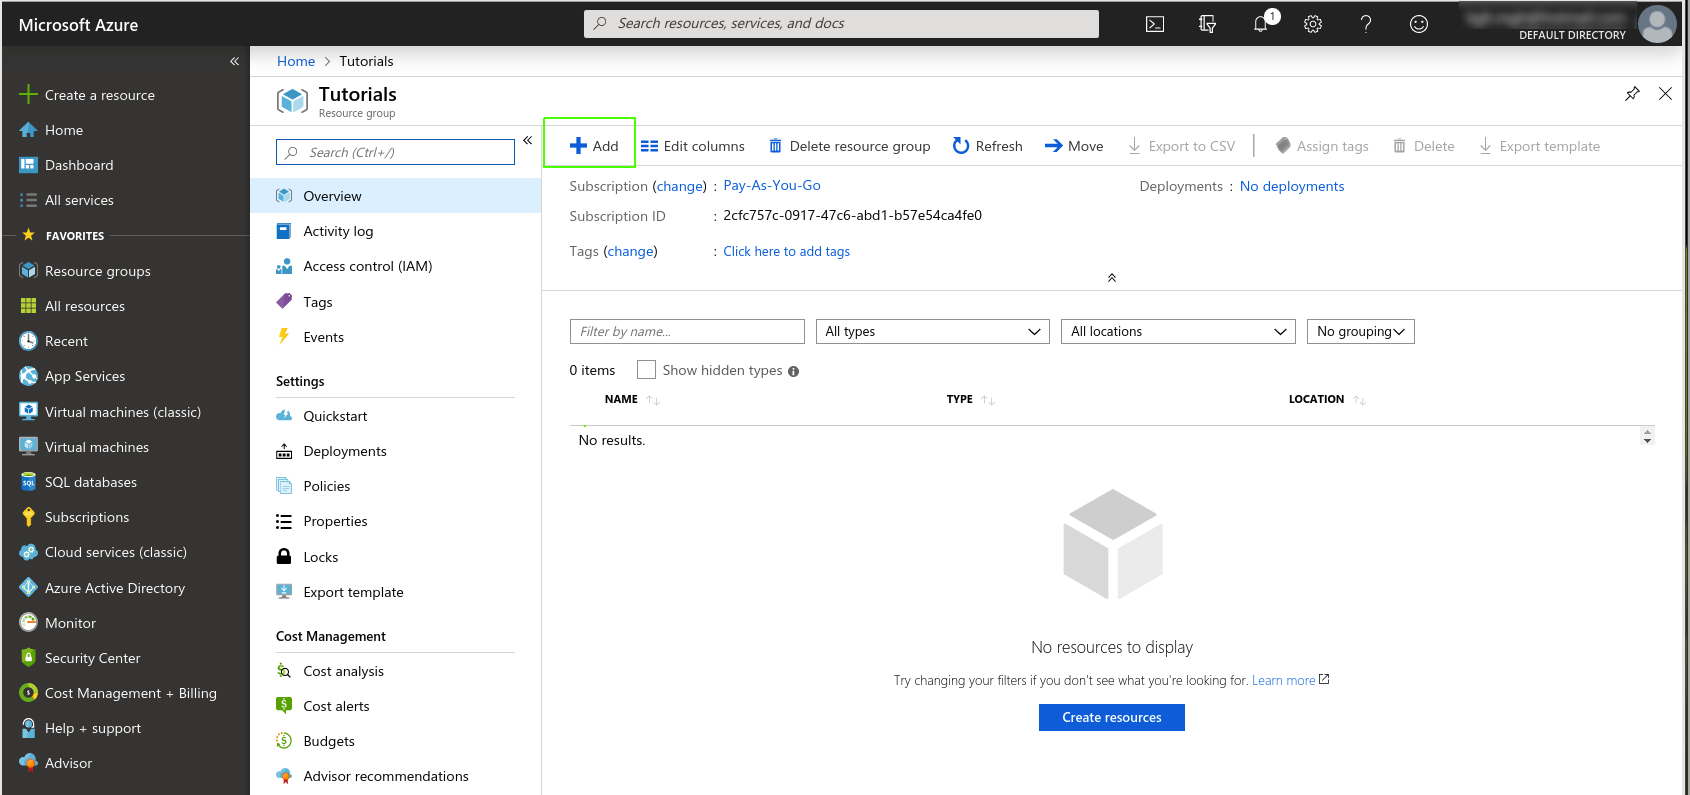
...
Choose Ubuntu Server 18.04 LTS
...
.
The VM creation page appears.Choose the following settings.
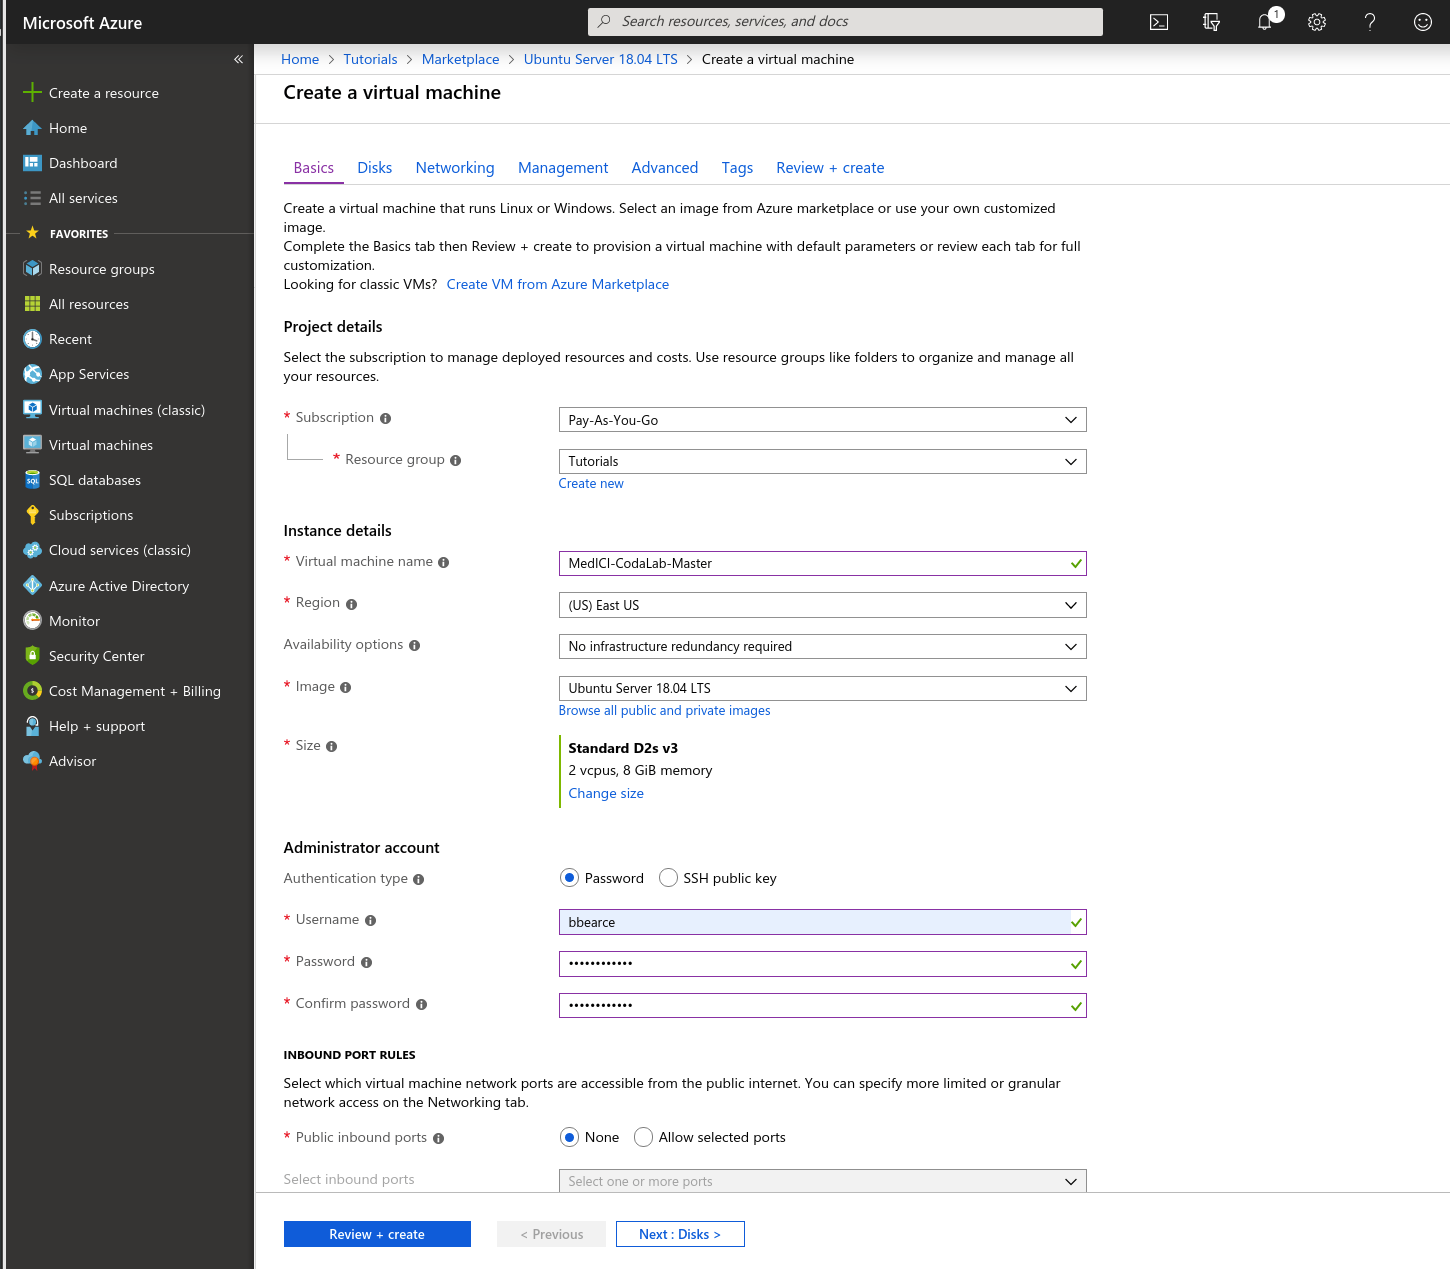
- Now
...
- click Review + create.
...
- Review the options
...
- and then click create. Azure starts creating the VM and then finishes
...
- , as shown in the following two images.


IP Address Config
...
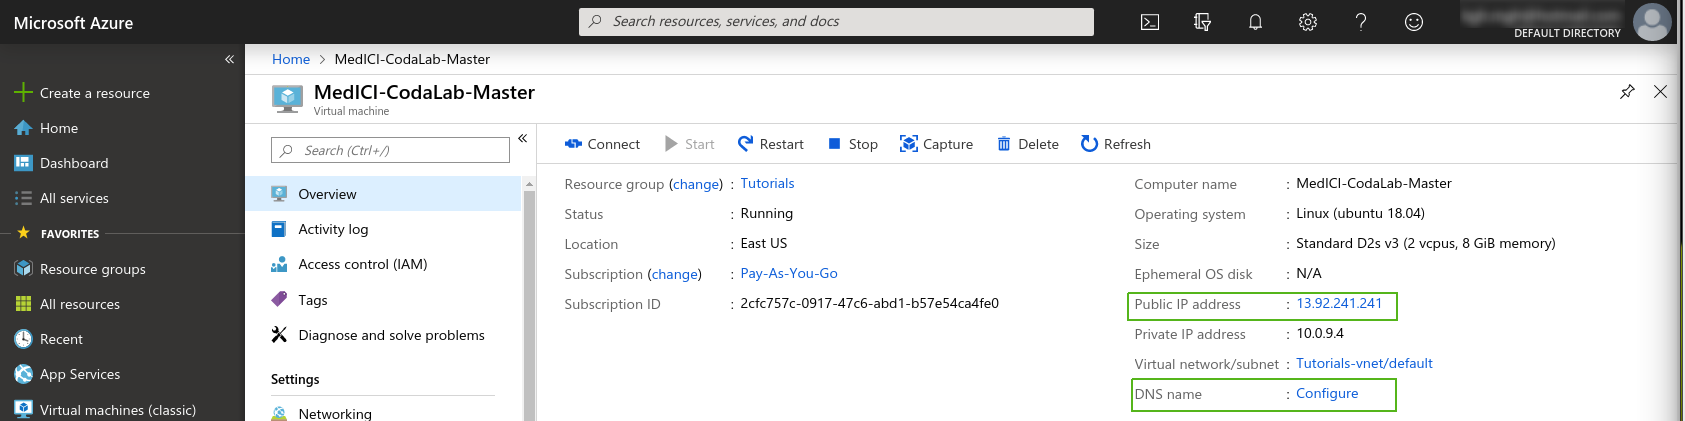
- Navigate to the VM by clicking Go to resource.
...
- Go to the resources home page
...
- to get the public IP address so
...
- that you can access the machine.
...
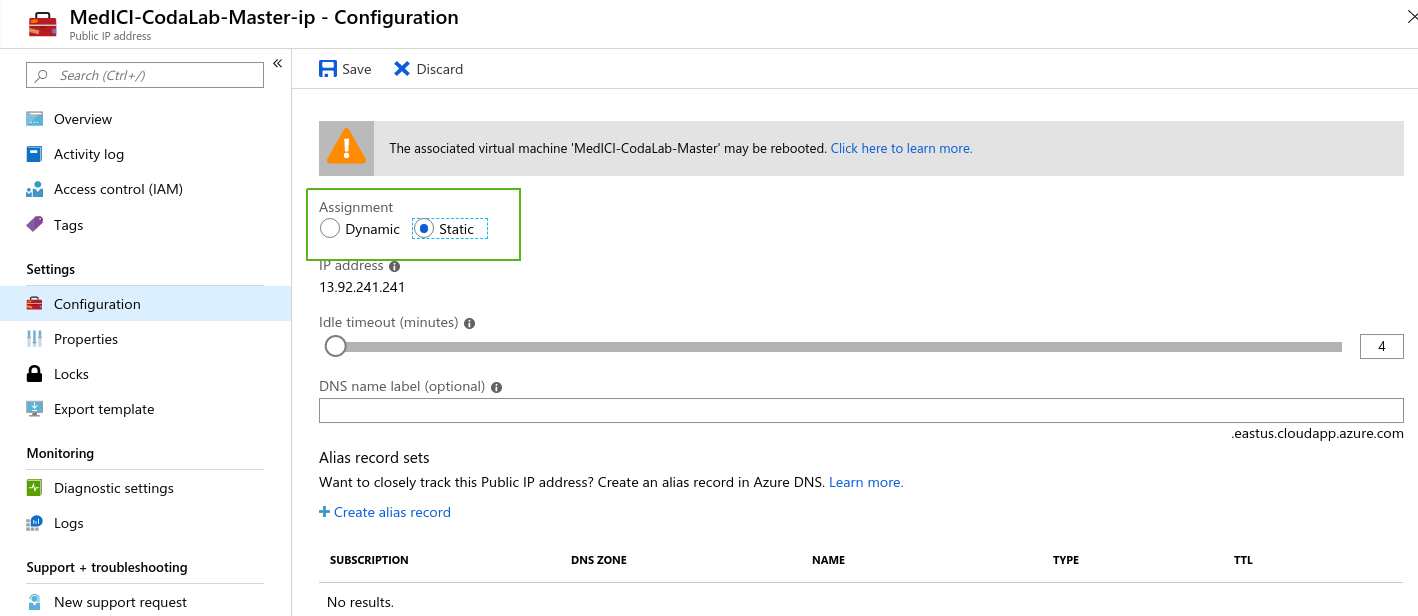
- Set the IP address setting
...
- toStatic.
...
- Make a note of the IP
...
- address. Click Configure to edit the DNS settings.
...
- Click Save.
SSH Port
We need to configure the machine to be ssh accessible (port 22) and open http (port 80) (https://medium.com/techinpieces/practical-azure-how-to-enable-ssh-on-azure-vm-84d8fba8103e). Go to the VM and click Networking. On the right find the button Add inbound port rule. Change Destination port ranges to 22, Protocol to TCP, Priority to 330, and Name to anything you’d like:
...
If you get a message regarding encryption keys, enter y\yes as this is the first time signing into this machine.
HTTP Port
On the right find the button Add inbound port rule. Change the Destination port ranges to 80, Protocol to TCP, Priority to 300, and Name to anything you’d you like:.

This step is necessary to access the site once you deploy itThis will be important later when we deploy the site. Without this you cannot access the site.
Installing CodaLab
CodaLab has documentation regarding their preferred installation configuration. The two best sources are herethe following:
- https://github.com/codalab/codalab-competitions/wiki
- https://codalab-competitions.readthedocs.io/en/latest/
The reason this is confusing is because the base code for codalab CodaLab can be setup set up on different cloud providers (Google Cloud, AWS, Azure). They have made docker The CodaLab team has made Docker images for AWS and Google cloud that in theory should just run once some settings are established. If you are familiar with docker this seems reasonable, but require a good working knowledge of Docker. For the purposes of MedICI documentation we will go down , it is recommended to follow the “Configure CodaLab from scratch (harder documentation)” procedure found in the first of the link above links.
Step 1 - Install Docker and Docker-Compose
Before we do any github cloning we need to clone GitHub, we must install docker and docker-compose. First docker:
This link details installing docker for Ubuntu: https://docs.docker.com/install/linux/docker-ce/ubuntu/. For someone not familiar with linux there is a lot going on on that page. So for a basic installation this is what I ran in order:
Docker
- $ sudo apt-get remove docker docker-engine docker.io containerd runc
- $ sudo apt-get update
- $ sudo apt-get install \
apt-transport-https \
ca-certificates \
curl \
gnupg-agent \
software-properties-common
...
Follow the Docker installation instructions to install on Ubuntu.
Docker
The following are the commands for a basic installation of Docker on Ubuntu.
| Code Block |
|---|
$ sudo apt-get remove docker docker-engine docker.io containerd runc $ sudo apt-get update $ sudo apt-get install \ apt-transport-https \ ca-certificates \ curl \ gnupg-agent \ software-properties-common $ curl -fsSL https://download.docker.com/linux/ubuntu/gpg | sudo apt-key add - |
...
$ sudo apt-key fingerprint 0EBFCD88 |
...
$ sudo add-apt-repository |
...
\ "deb [arch=amd64] https://download.docker.com/linux/ubuntu |
...
\ $(lsb_release -cs) |
...
\ stable" |
...
$ sudo apt-get update |
...
$ sudo apt-get install docker-ce docker-ce-cli containerd.io |
...
$ sudo docker run hello-world |
This creates the following result.
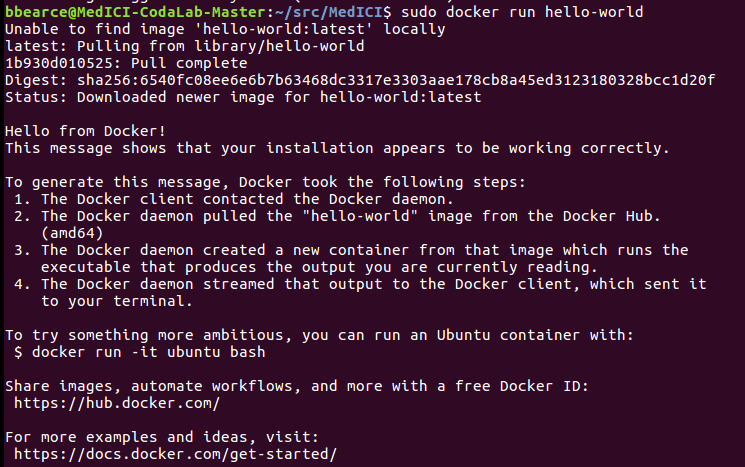
Now if we run ‘docker’the docker command, we should get see the options list telling that tells us how to use this command verifying it the command, which verifies that Docker is installed and we can use it.
Docker-Compose
Next Check to see if docker-compose . In is installed from the terminal on your new VM check to see if docker-compose is installed. If not which it is not for me then we need to install it. While it seems a ‘sudo virtual machine. If not, rather than use sudo apt install docker-compose’ should workcompose, the the CodaLab documentation from link “Configure CodaLab from scratch (harder documentation)” says says to go here and install it from dockers Docker's website. The command I’m actually running is this: sudo curl -L Use the following command.
| Code Block |
|---|
sudo curl -L "https://github.com/docker/compose/releases/download/1. |
...
25. |
...
5/docker-compose-$(uname -s)-$(uname -m)" -o /usr/local/bin/docker-compose |

Now we have to change the permissions in /usr/local/bin/docker-compose to use it: sudo chmod docker-compose:
| Code Block |
|---|
sudo chmod +x /usr/local/bin/docker-compose |
![]()
Run docker-compose in the terminal window. The options list appears that tells .Now if we run ‘docker-compose’, we should get the options list telling us how to use this command verifying it . This verifies that docker-compose is installed and we can ready to use it.
Step 2 - Get the Source Code
The latest and greatest code is located here: https://github.com/codalab/in the codalab-competitions . Both folder in the codalab repository (repo) in GitHub. Both sets of instructions want direct you to clone this repo repository locally to the VMvirtual machine. Before we get started I want to say since we Since we will be making our own customizations down the road we will fork the repo CodaLab has so generously provided and do two thingscustomizing our installation, fork the repository and do the following:
- Pull the latest changes from the master repo https://github.com/codalab/codalab-competitions into our your own repo periodically to make sure we you have the latest base code. (repo: https://github.com/QTIM-Lab/MedICI/)... If you need help doing this on your own, see forking a repo. Since I’ve already done it, just follow along and clone from , but you can just clone the QTIM-Lab/MedICI repo.
- Store our your customizations on github GitHub so we that you can clone from this repo for future projects.
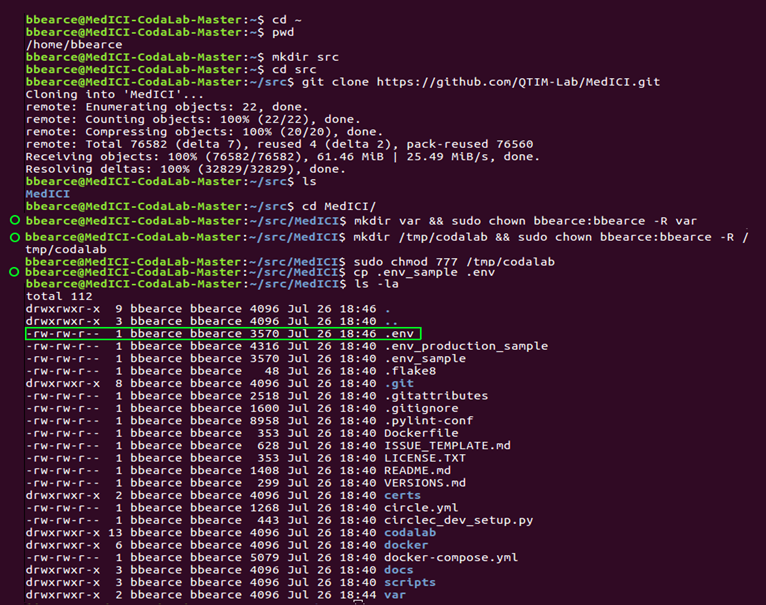
- Clone the MedICI project. This follows CodaLabs instructions but with our
...
- GitHub repo instead. Below is a picture of the commands I’ve executed from “Configure CodaLab from scratch (harder documentation)”. The green circles represent once inside the “src” folder, the changes that are not in the raw CodaLab github repo. This is the start of our customizations.
...
- Push these changes into
...
- your branch.
...
- At this point the app should be ready to deploy
...
- .
- Run
$ docker compose up -
...
d.You may encounter the following error:
...

The solution to this error is
...
to run with sudo or add
...
yourself to the docker group:
$ sudo docker-compose up -d
Or
https://docs.docker.com/install/linux/linux-postinstall/
$ sudo groupadd docker(this may be done already)$ sudo usermod -aG docker $USER(now restart the VM)
Now you should be able to run - Run
$ docker-compose up -d - The flag ‘-d’ means to run in detached mode. If you don’t use it, you will notice your command prompt is in a live feed mode telling you everything that is going on with this
- Run
...
- Docker.
Step 3 - Tweak
...
the .env file and Azure Storage
Using this documentation( [2] from earlier): The following documentation explains this step: https://codalab-competitions.readthedocs.io/en/latest/
Create a Storage Account
Below is the blob storage section for Azure:
You may sign up for an Azure account here, then then follow the directions below. You do not have to do this if you've already
...
set up S3
...
.
- Log on to the Azure Portal.
- From the Dashboard, click Storage accounts on the left.
- Click Add at the top of the page to create a new storage account.
- If you don't already have a subscription, create one now. The free trial requires a credit card, and deletes all your storage containers after 90 days, unless you upgrade to a different plan i.e. such as 'Pay as You Go'.
- Select the Classic storage account. Refer to the following image below for settings.
- In the dashboard, click All Resources/All Subscriptions and then click on click your username. Click Access Keys and Copy copy your account name and access key to .env under AZURE_ACCOUNT_NAME and AZURE_ACCOUNT_KEY.
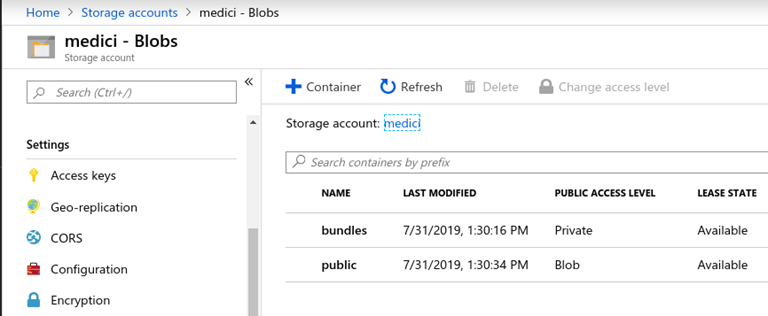
- Within that same user account, click on Containers and Add a new container.
- Create a new container named "bundles". Set the Access to "Private".
- Add another container named "public". Set the Access to "Public Blob".
- Make sure the DEFAULT_FILE_STORAGE .env option is set to codalab.azure_storage.AzureStorage.
This is the BLOB settings:
| Note |
|---|
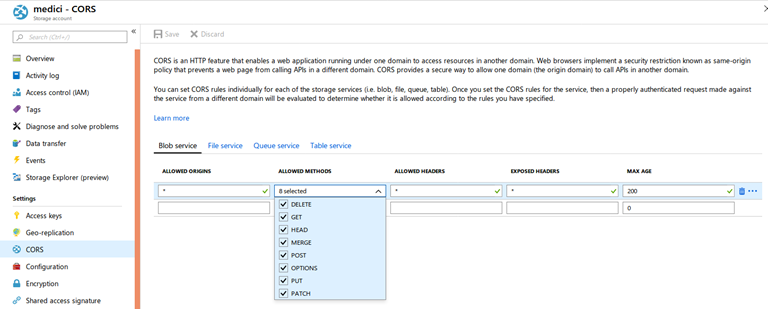
The CodaLab documentation leaves one final step out. We NEED to enable CORS. Click CORS in the above photo image in the previous procedure and add these settings (https://stackoverflow.com/questions/50785255/azure-storage-got-403-url-cors-not-enabled-or-no-matching-rule-found-for-thi):
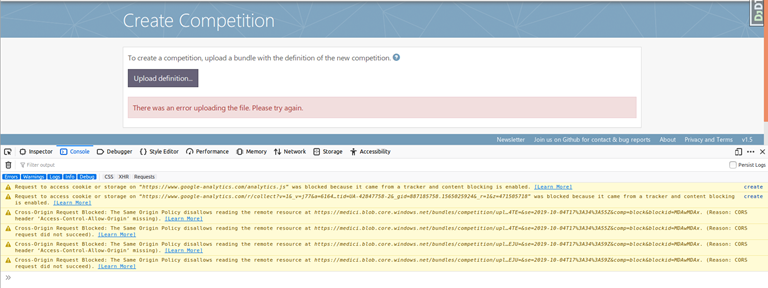
If you don’t, uploading a competition will give you present a CORS errors in the browser:
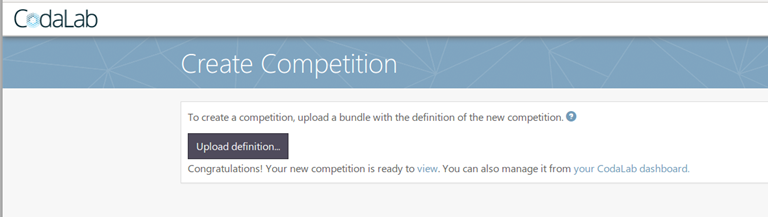
Once applied, uploading works: |
...
|
Adding a Custom Logo
Codalab Instructions here: https://github.com/codalab/codalab-competitions/wiki/Customizing-your-self-hosted-instance
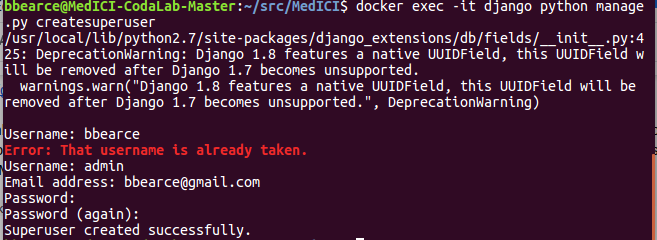
The only issue is that you can’t log into the customizer without being the super user. To make a superuser you need to log into the database as superuser. Django doesn’t have one by default and you need to To create a custom logo, follow the Codalab instructions but note that you must log in to the database as the super user to use the customizer module. Django doesn’t have a super user by default, so you must create it. To do so ssh into your VM , create a secure connection to the virtual machine that hosts the your site and run this command:the following command.
| Code Block |
|---|
$ docker exec -it django python manage.py createsuperuser |
You can now return to the CodaLabs instructions Now use CodaLabs instructions and navigate to http://your-instance.com/customizerLogin with the newly made credentials. Choose . Log in with your super user credentials and choose a new file to be as your logo.