Page History
...
First create a VM in Azure or get yourself a computer with Ubuntu Server 18.04 installed. Once you have an Azure acount go to the home page here (https://portal.azure.com/#home). You should see a side-bar with many options or categories. You have the option to create either a resource or a resource group and then add resources into it. This tutorial will demo with a resource group to demonstrate good organizational practices. First click Resource groups and then add.
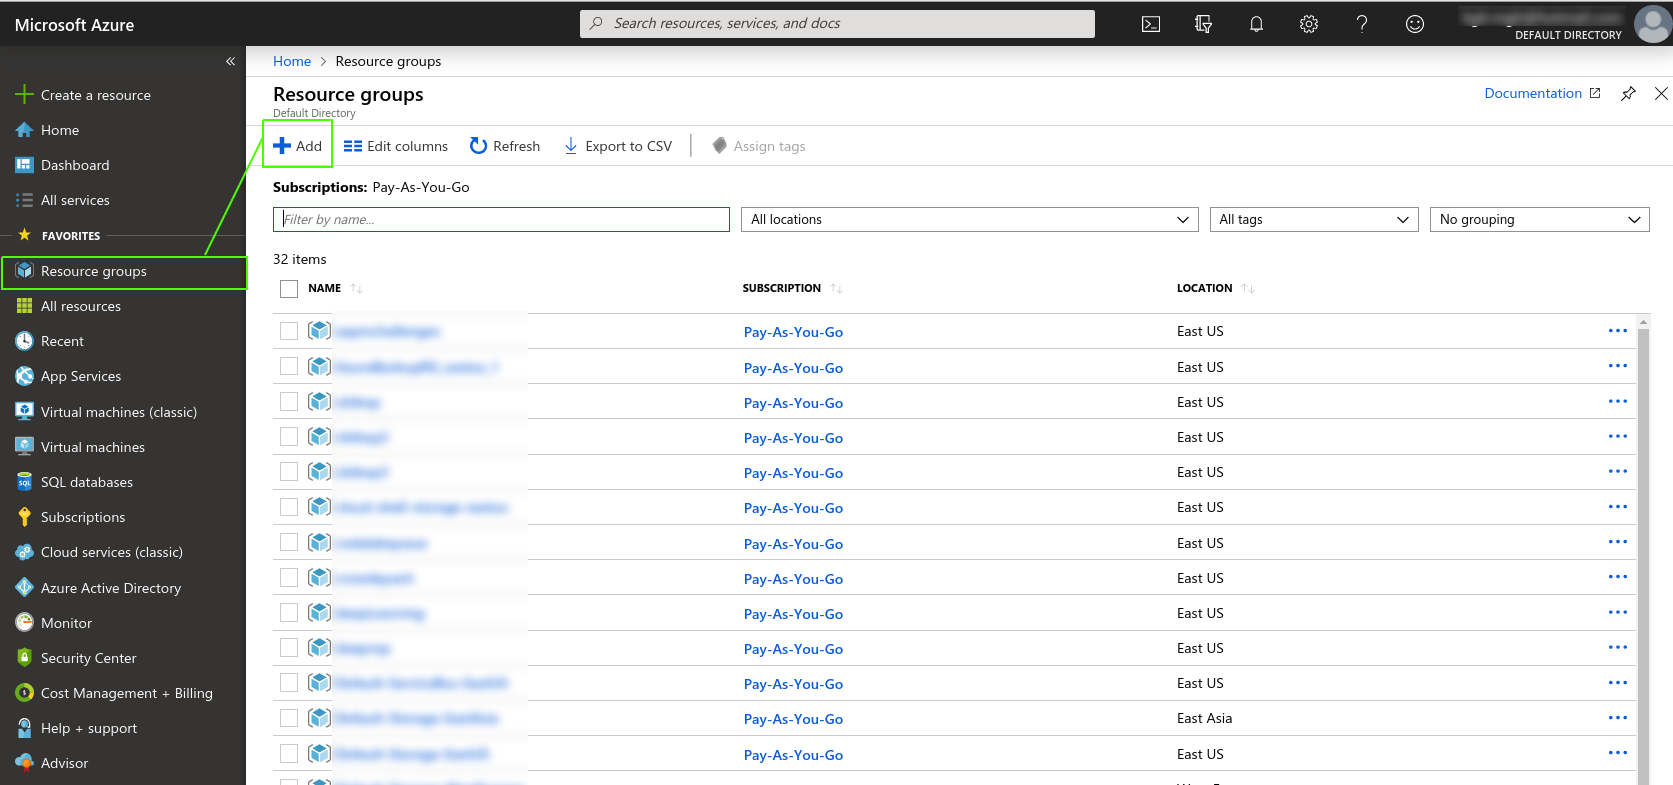
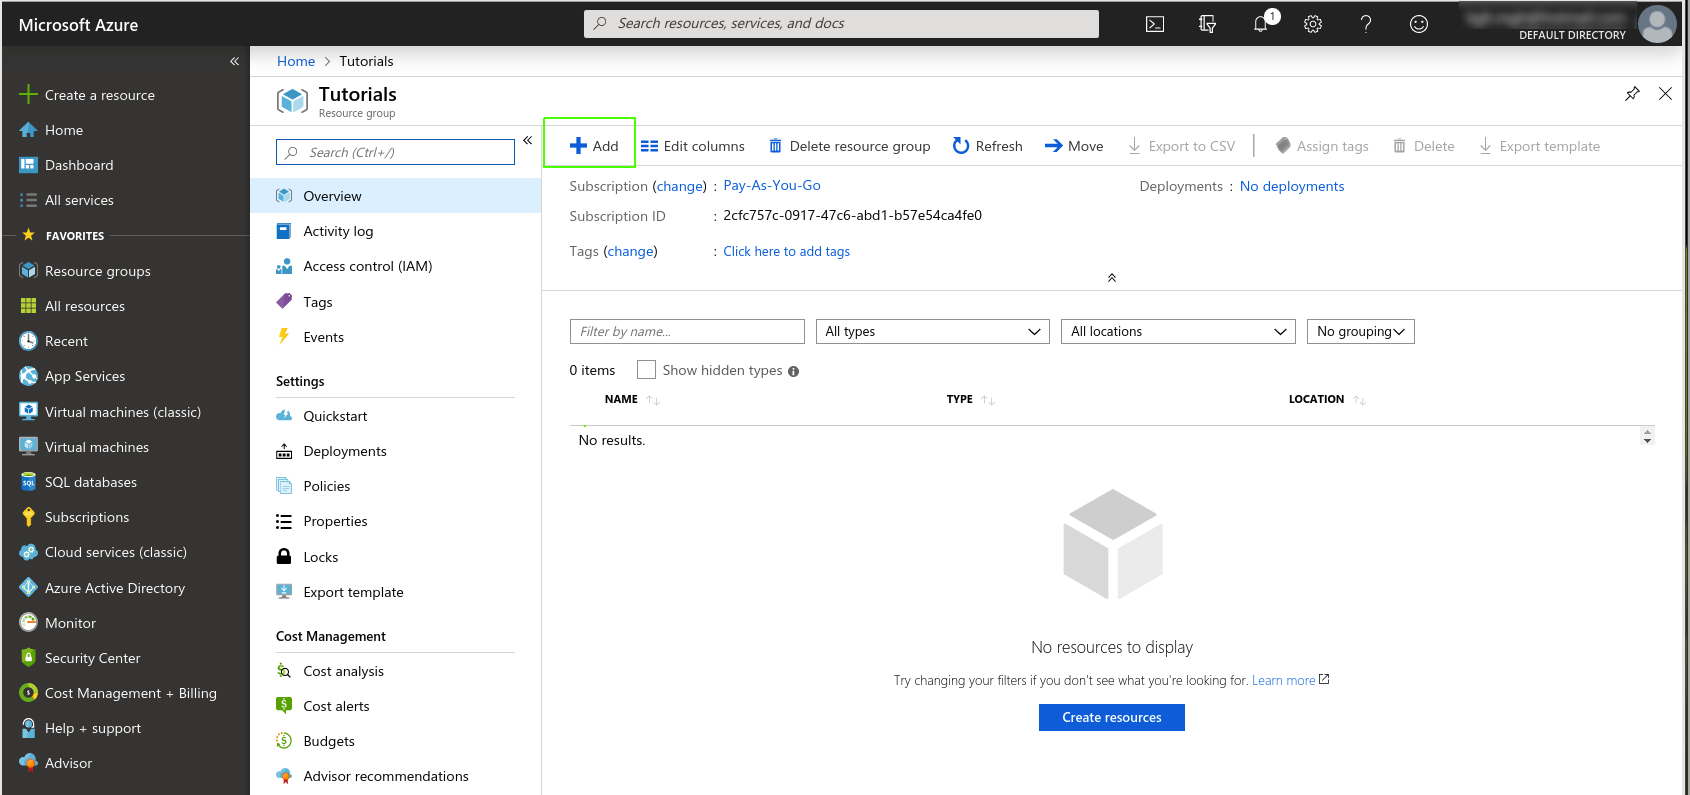
Name the resource group and then decide how you will pay for this service. After then click Click Review + create. Once that is complete, go to the resource group and add a VM:
I clicked on +Add and then was redirected to a bunch of choices of which Ubuntu Server 18.04 LTS was one of the choices. When I chose that I was brought to the VM creation page and I chose these settings:
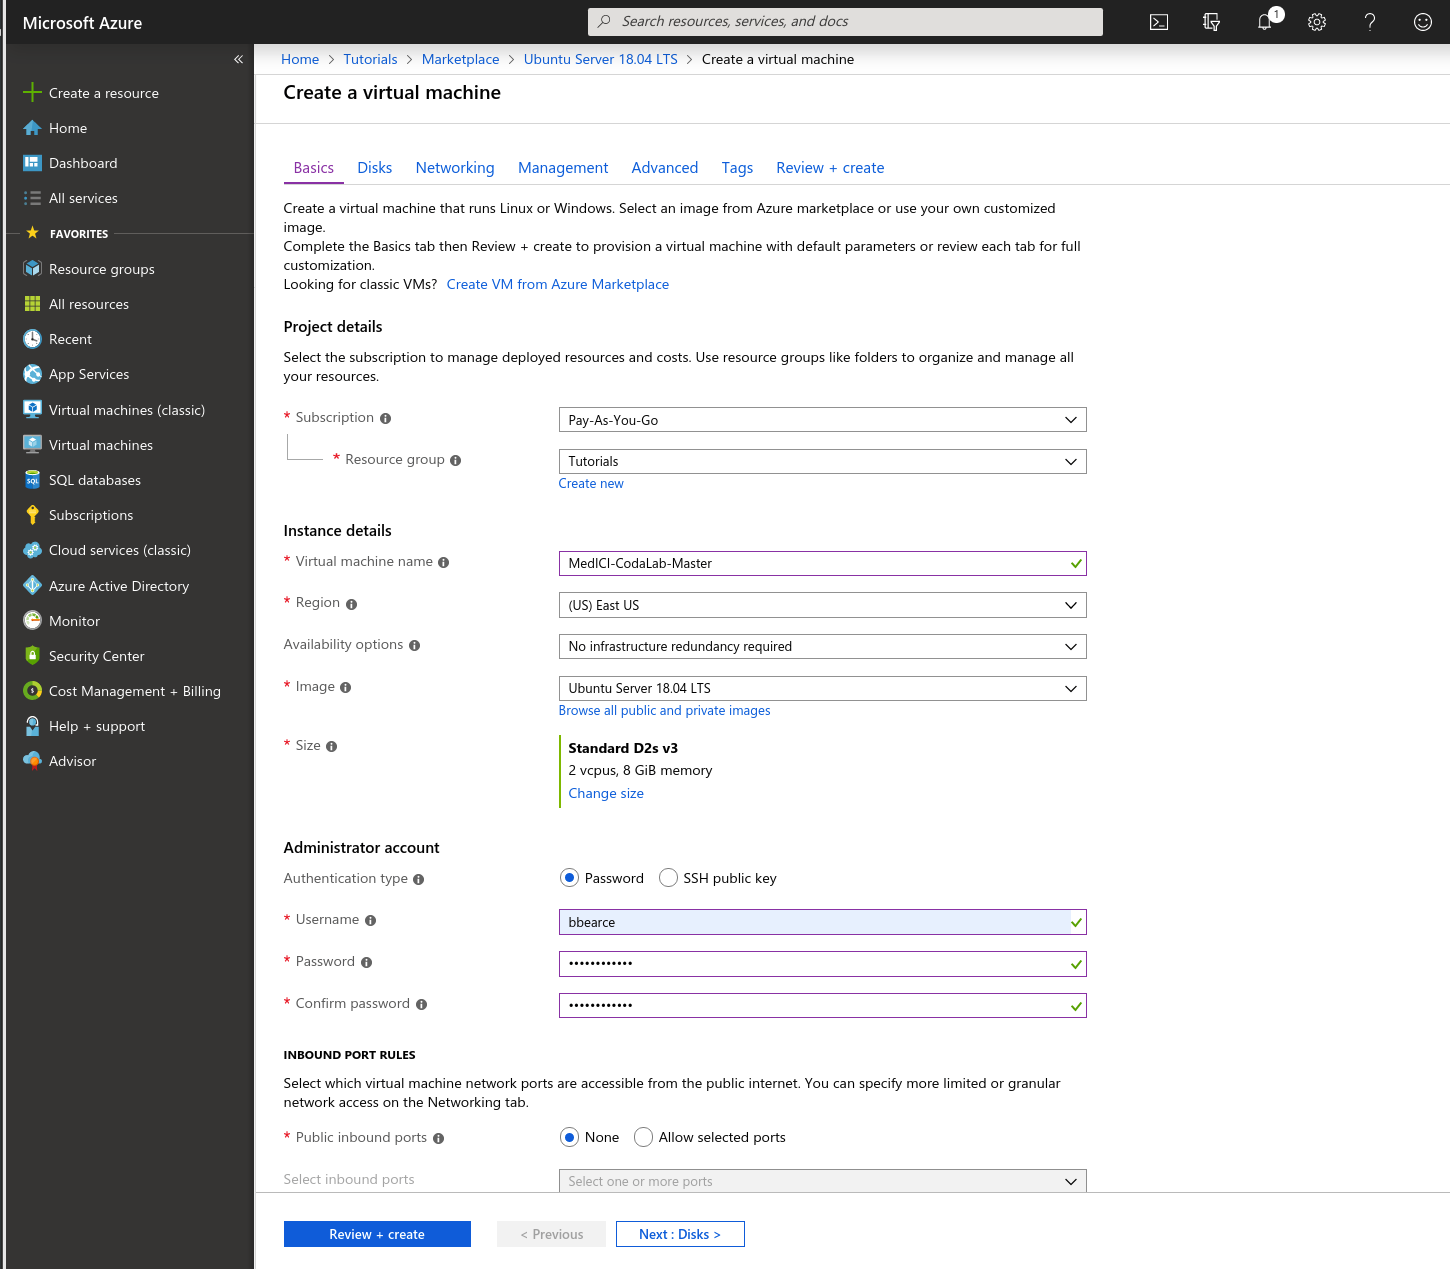
Now click Review + create. After reviewing the options you click create and Azure starts creating the VM. Azure starts creating the VM and then finishes:


IP Address Config
Now navigate to the VM by clicking Go to resource. Below is the resources home page and we will need the public IP address so we can access the machine.
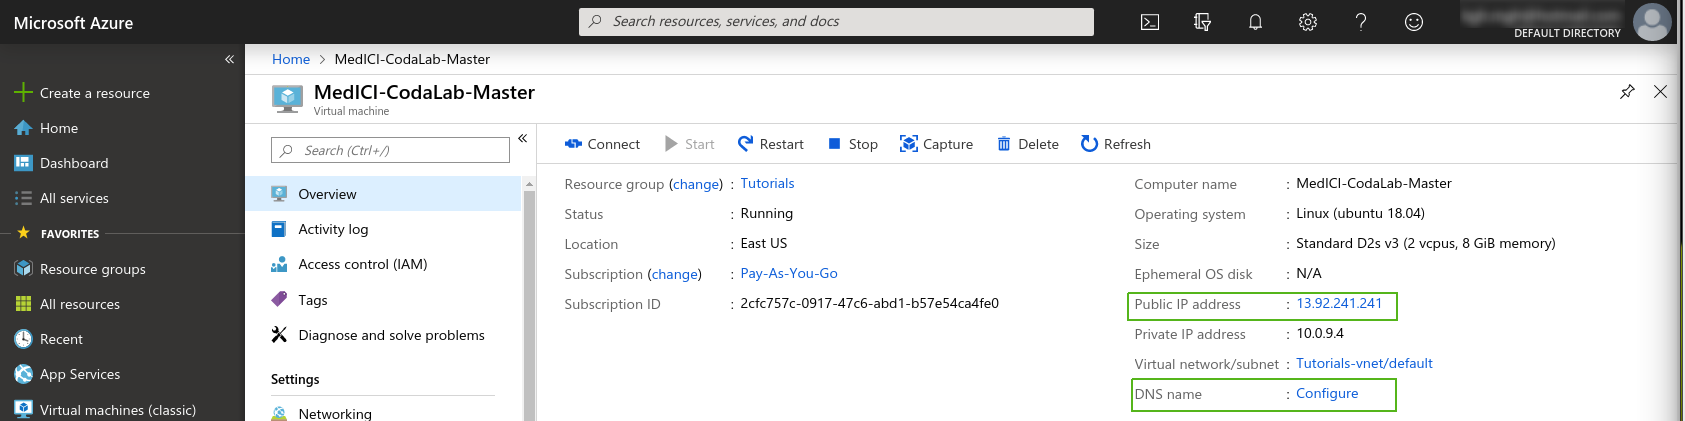
One thing we should do before continuing is to set the IP address setting from Dynamic to Static. Grab the IP and also click Configure to edit DNS settings. Change the Dynamic to Static option and click save.
...