Page History
...
Your first step is to decide which virtual machine or computer you want to install MedICI.
Installing on Microsoft Azure\Ubuntu Server 18.04 LTS
...
This tutorial focuses on Ubuntu-based installations on Azure, although instructions on how to do this on Microsoft and Apple operating systems and in AWS are also included.
Create a Virtual Machine
Create a VM in Azure or use a computer with Ubuntu Server 18.04 installed. Once you have an Azure account, go to the Azure home page. A sidebar with many options or categories appears. You can create either a resource or a resource group and then add resources into it. This tutorial uses the resource group method to demonstrate good organizational practices.
- Select Resource groups > add.
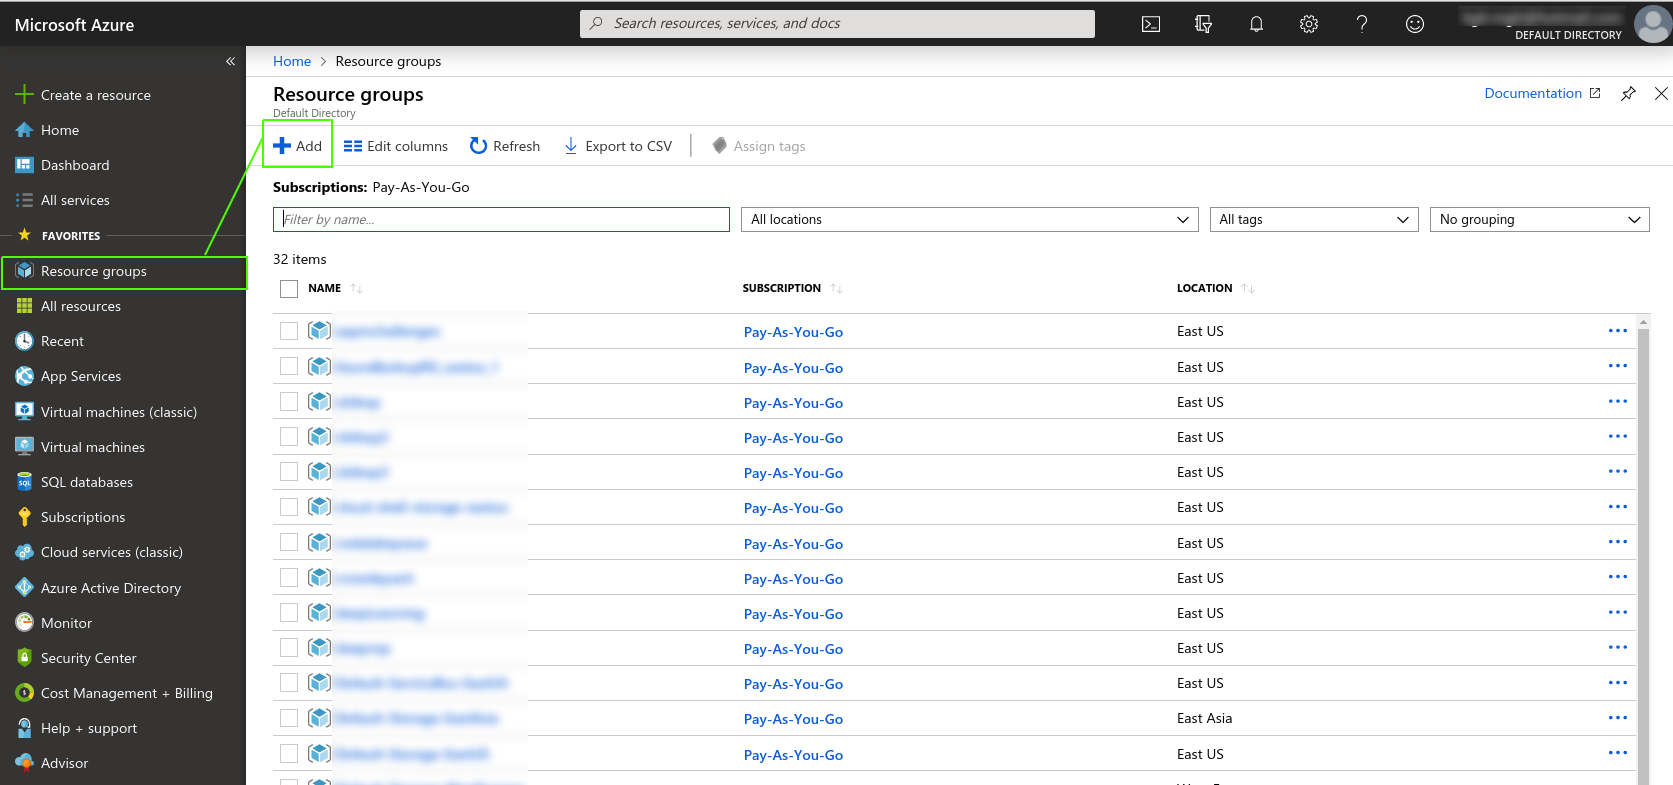
- Name the resource group and then decide how you will pay for this service.
- Click Review + create.
- Go to the resource group and add a VM:
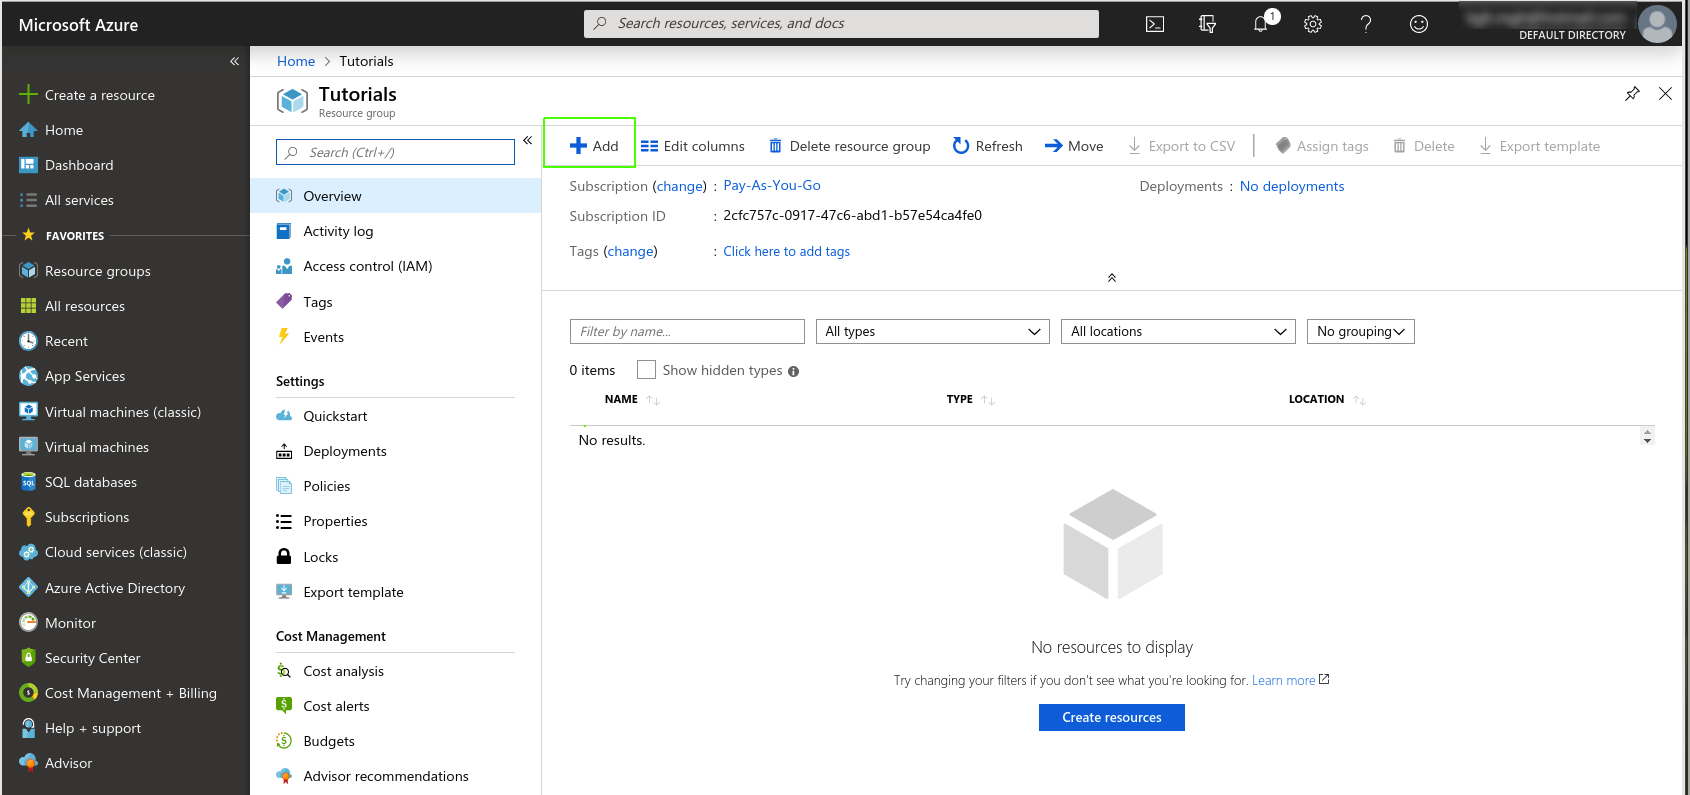
Choose Ubuntu Server 18.04 LTS.
The VM creation page appears.Choose the following settings.
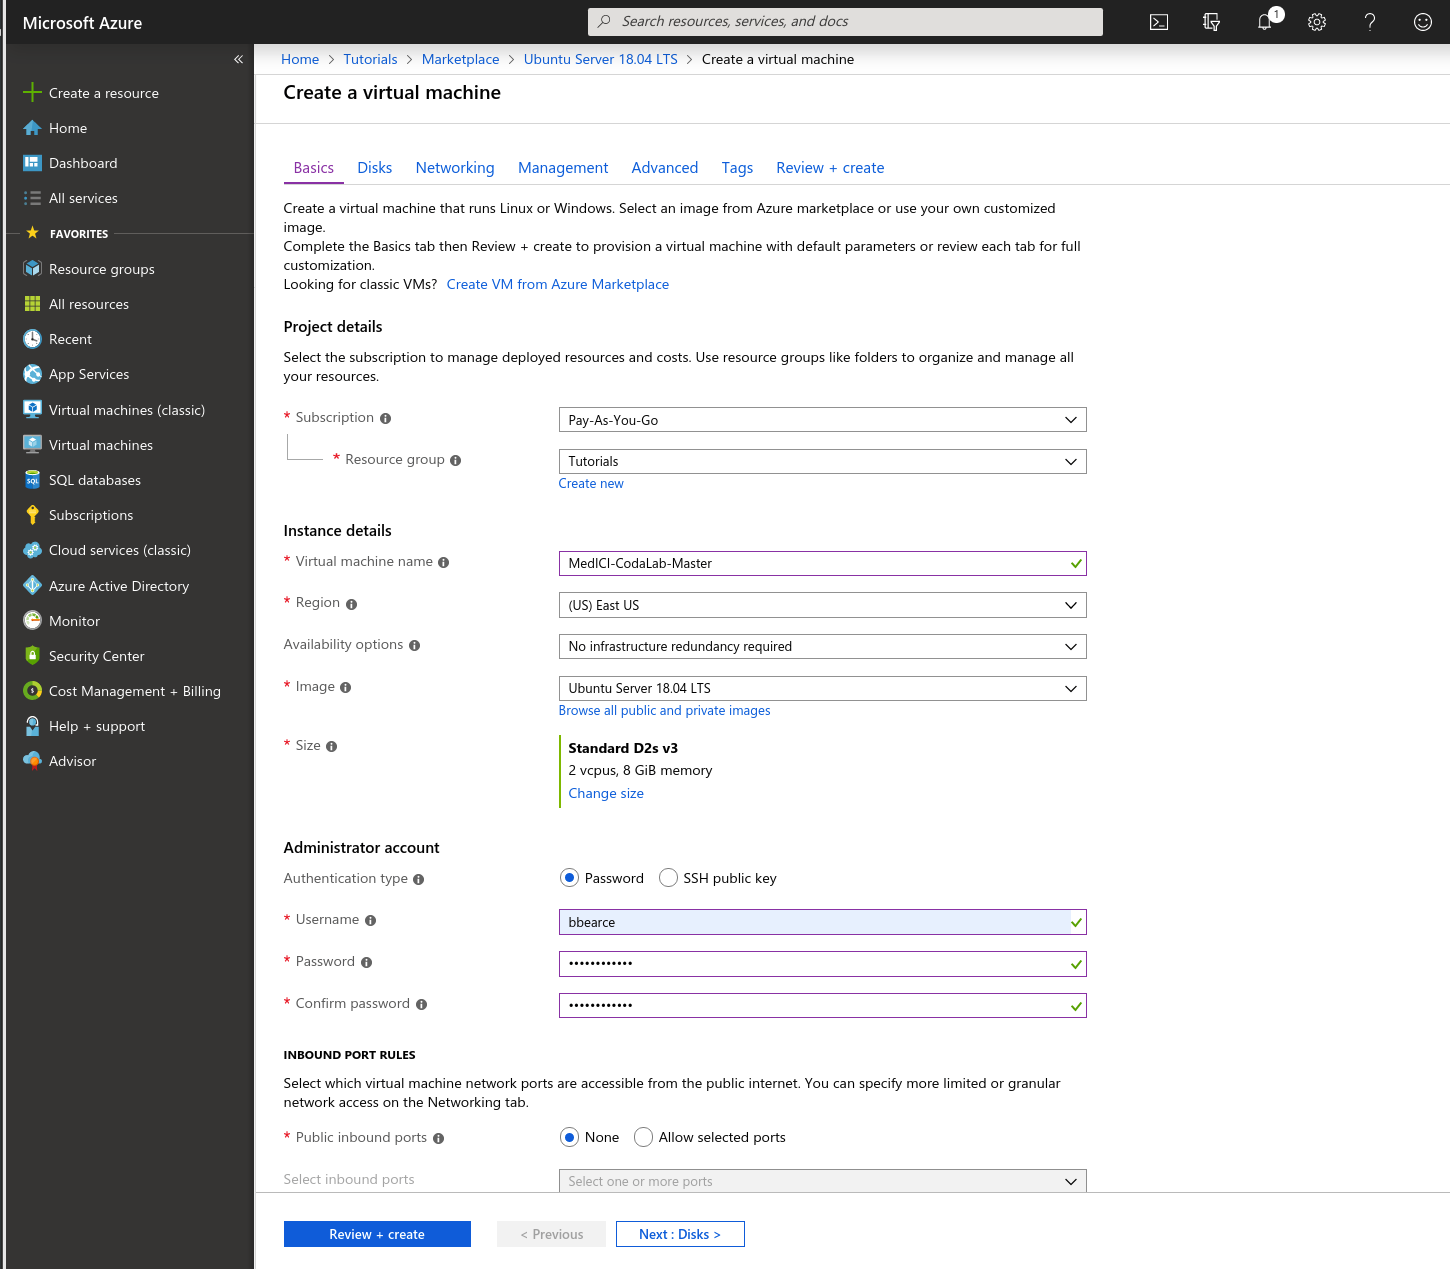
- Now click Review + create. Review the options and then click create. Azure starts creating the VM and then finishes, as shown in the following two images.


IP Address Config
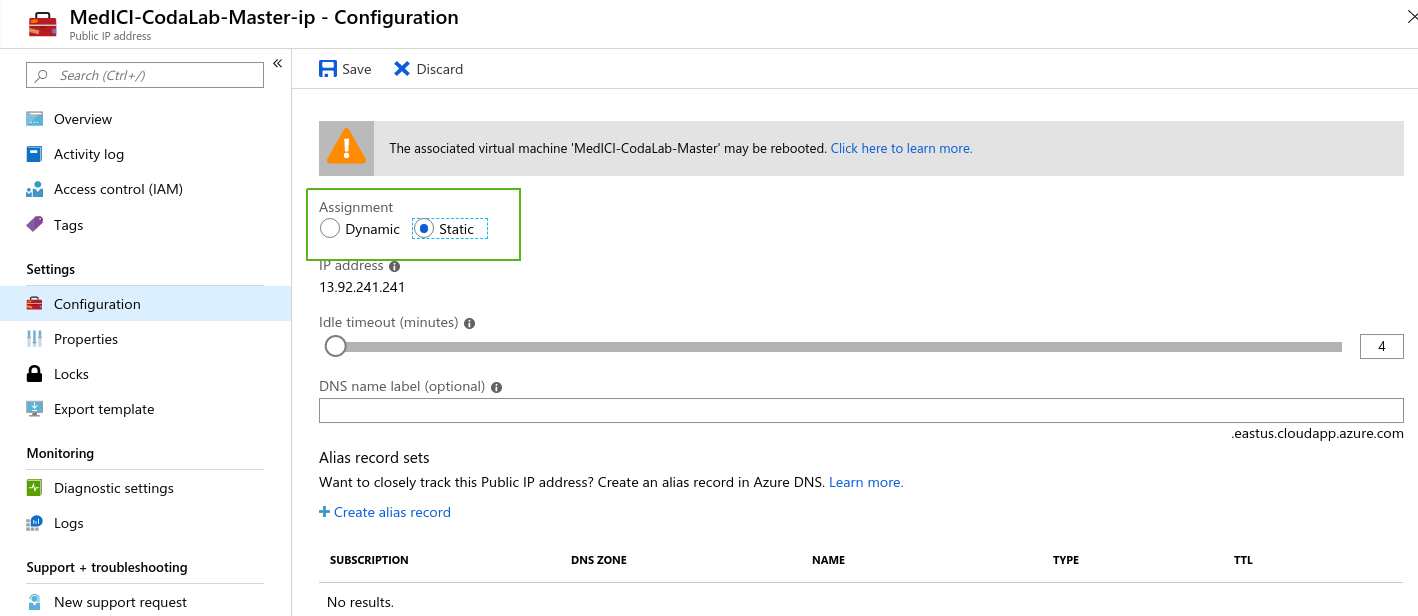
- Navigate to the VM by clicking Go to resource. Go to the resources home page to get the public IP address so that you can access the machine.
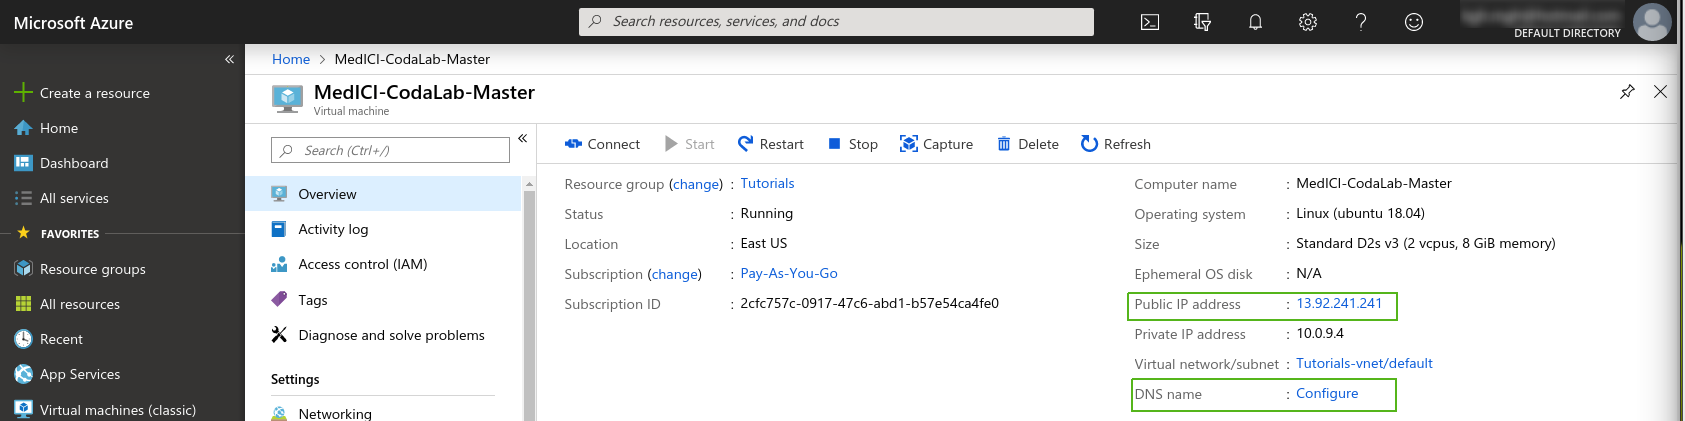
- Set the IP address setting toStatic. Make a note of the IP address. Click Configure to edit the DNS settings. Click Save.
SSH Port
We need to configure the machine to be ssh accessible (port 22) and open http (port 80) (https://medium.com/techinpieces/practical-azure-how-to-enable-ssh-on-azure-vm-84d8fba8103e). Go to the VM and click Networking. On the right find the button Add inbound port rule. Change Destination port ranges to 22, Protocol to TCP, Priority to 330, and Name to anything you’d like:
...
If you get a message regarding encryption keys, enter y\yes as this is the first time signing into this machine.
HTTP Port
On the right find the button Add inbound port rule. Change the Destination port ranges to 80, Protocol to TCP, Priority to 300, and Name to anything you like.
...
| Note |
|---|
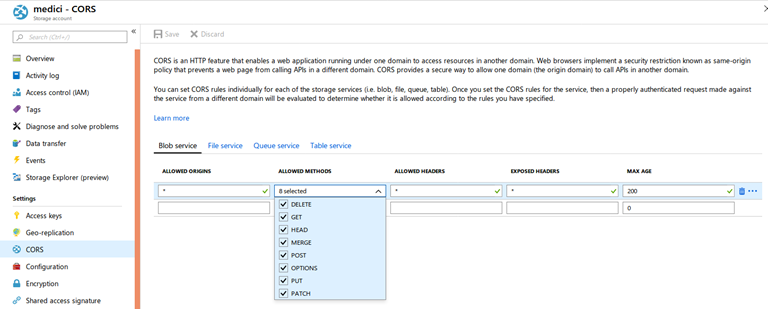
The CodaLab documentation leaves one final step out. We NEED to enable CORS. Click CORS in the image in the previous procedure and add these settings (https://stackoverflow.com/questions/50785255/azure-storage-got-403-url-cors-not-enabled-or-no-matching-rule-found-for-thi):
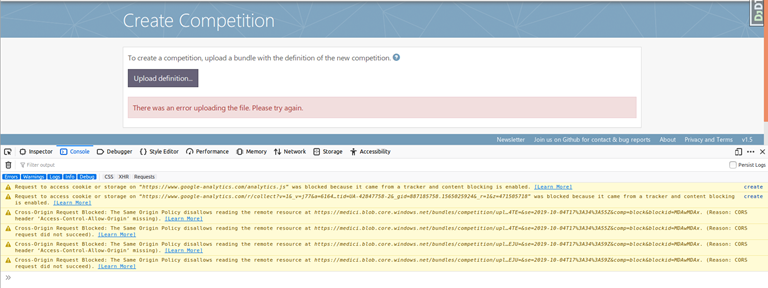
If you don’t, uploading a competition will present a CORS errors in the browser:
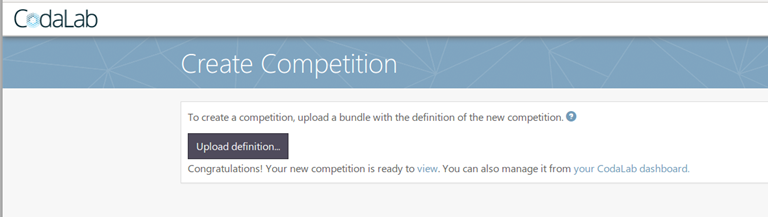
Once applied, uploading works:
|
Adding a Custom Logo
To create a custom logo, follow the Codalab instructions but note that you must log in to the database as the super user to use the customizer module. Django doesn’t have a super user by default, so you must create it. To do so, create a secure connection to the virtual machine that hosts your site and run the following command.
...