 |
Page History
...
| Panel | ||||
|---|---|---|---|---|
Topics in this guide include:
|
...
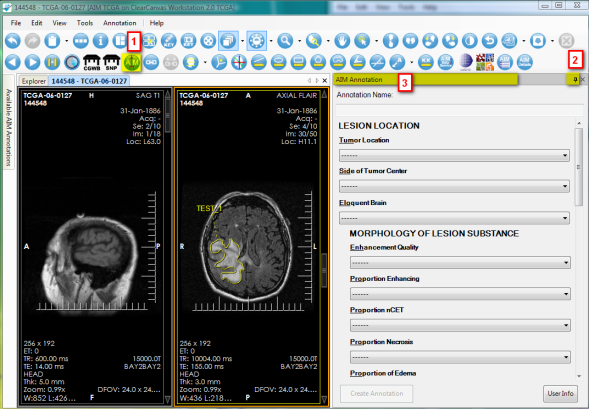
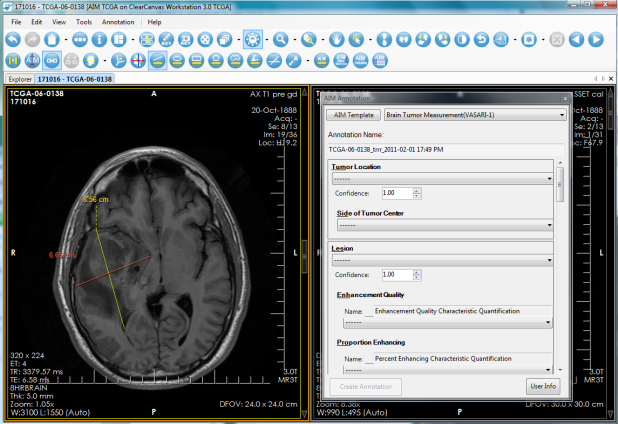
To activate the AIM template tool in Figure 5, click the AIM template tool button (#1). If you put the pin down (#2), you can detach the AIM Template tab by putting the mouse pointer at the header (#3) and dragging it out, as illustrated in Figure 5-1.
Figure 5. Activate AIM Template
Figure 5-1. Detached AIM Template Tool
| Info | ||
|---|---|---|
| ||
When an AIM annotation is created, the following conditions are applied (based on AIM default settings described in #Setting AIM Options)
|
Importing a New AIM Template
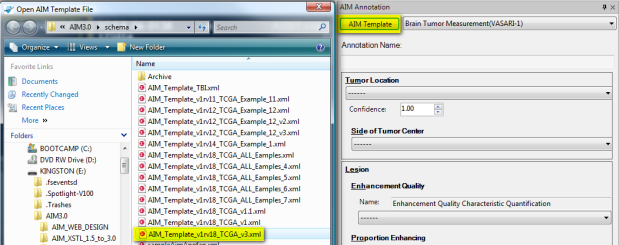
An AIM template XML document can be imported by clicking the AIM Template button, as shown in Figure 6. Windows Explorer opens a predefined folder described in the Setting AIM Options section.
Figure 6. Importing an AIM Template
...
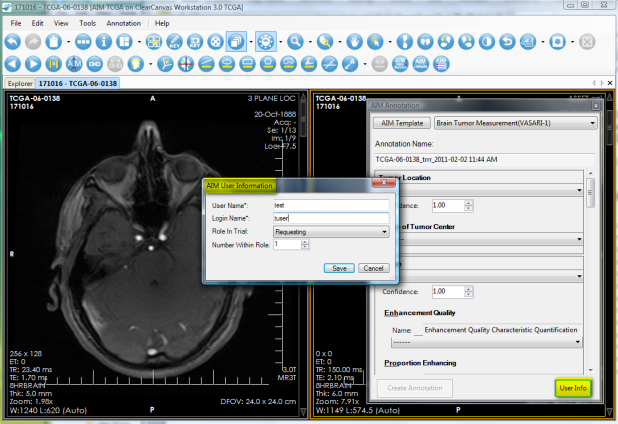
If you are sharing the workstation with another reader, you must change or at least verify that the information in the "User Info" section reflects your personal credentials.
Figure 7. AIM User Information
...
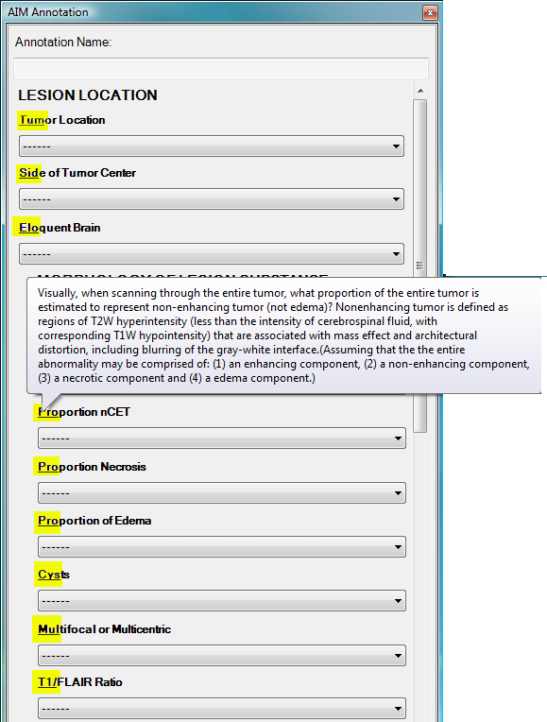
A detailed description of a question can be seen by placing the mouse pointer over the first three characters of each feature name, as shown in Figure 8.
Figure 8. Detail Description of a Question
...
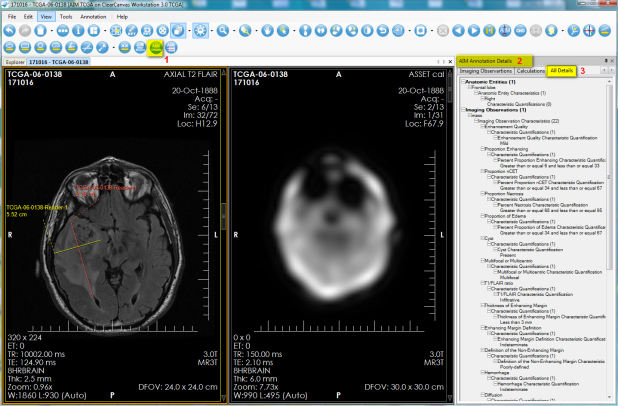
The AIM annotation details, as illustrated by Figure 10, allow a user to examine detailed information captured in an AIM instance. To access this feature, you select an image containing an AIM instance and then click the AIM Details button, as shown in (#1). The AIM Annotation Details panel appears. This panel contains information tabs including Anatomic Entity, Imaging Observation, Calculations, and All Details. The All Details tab (shown in #3) allows a user to see information related to both Anatomic Entity and Imaging Observation and their characteristics.
Figure 10. AIM Details
...
Users can enter search parameters (Figure 14) based on a single value or multiple values of Patient ID, Patient's Name, Sex, Birth Date, Project name at NCI, Slice Thickness, Study Instance UID, and Modality.
Figure 14. Search NBIA Data Service
Columns in the NBIA Data Service page can be selected or deselected to display or hide an available result. Fig 15 depicts that all available columns for the service have been selected.
Figure 15. Select NBIA Data Service Display Columns
...
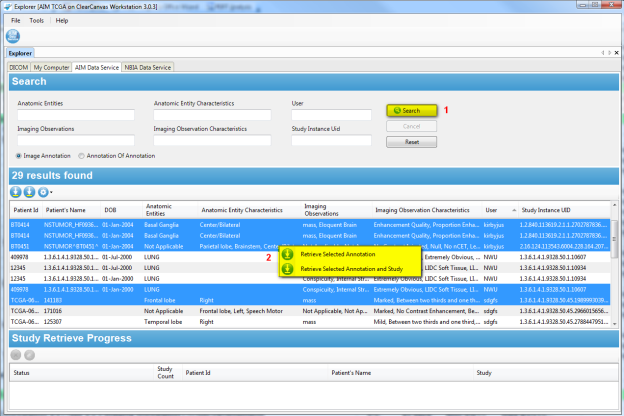
The AIM Data Service tab (Figure 16) provides the ability to connect and retrieve AIM XML documents from an AIM 3.0 Data Service (see #Setting AIM Data Service Options). It also allows a user to retrieve both AIM documents and studies from NCI's NBIA. Right-clicking activates a feature that allows you to retrieve studies.
Figure 16. AIM Data Service
...
A type of AIM XML document, Imaging Annotation, or Annotation Of Annotation, must be selected. The default value is Imaging Annotation.
Figure 17. Search AIM Data Service
...
