Page History
...
If you are sharing the workstation with another reader, you must change or at least verify that the information in the "User Info" section reflects your personal credentials.
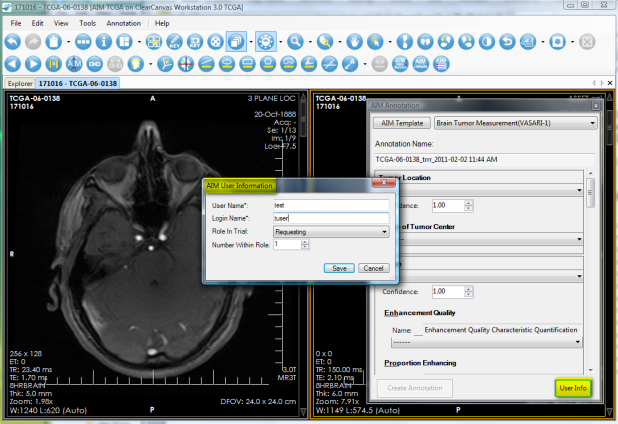
Figure 7. AIM User Information
...
A detailed description of a question can be seen by placing the mouse pointer over the first three characters of each feature name, as shown in Figure 8.
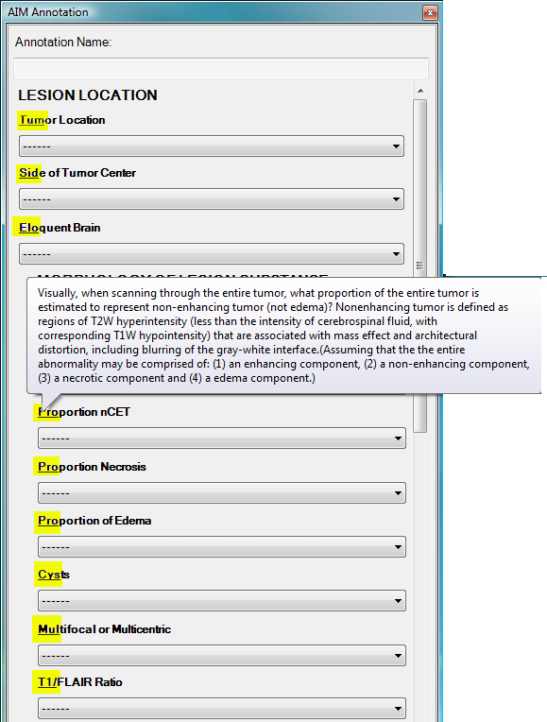
Figure 8. Detail Description of a Question
...
The AIM locator, depicted in (Figure 9), allows users to see existing AIM instances available in a study. A list of available AIM instances is displayed below the Available AIM Annotations section, which is #2 in the following image. To access this feature and see an AIM annotation, click Show Study, which is #3 in the following image.
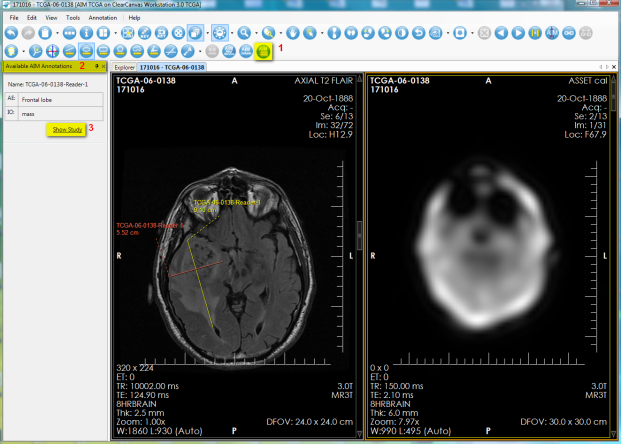
Figure 9. AIM Locator
...
The AIM annotation details, as illustrated by Figure 10, allow a user to examine detailed information captured in an AIM instance. To access this feature, you select an image containing an AIM instance and then click the AIM Details button, as shown in (#1). The AIM Annotation Details panel appears. This panel contains information tabs including Anatomic Entity, Imaging Observation, Calculations, and All Details. The All Details tab (shown in #3) allows a user to see information related to both Anatomic Entity and Imaging Observation and their characteristics.
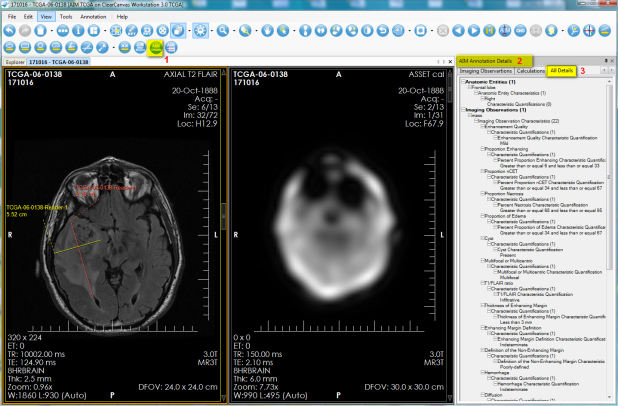
Figure 10. AIM Details
...
A right-mouse click on the image activates a pop-up menu with a " Visible AIM Users " option to turn readers' markups on or off.
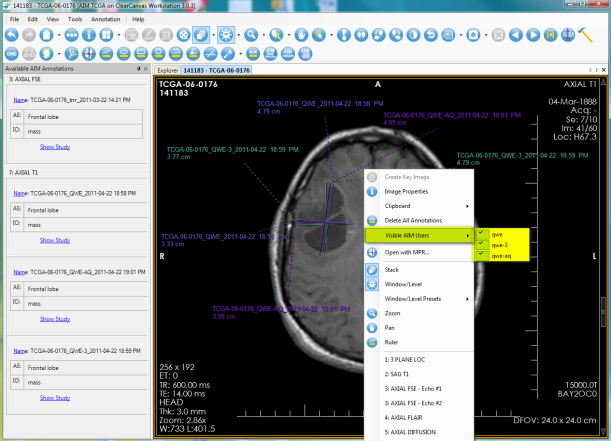
Figure 11. AIM Markup Display
By default, the workstation also displays annotations created by different users in different colors. Selecting Tools > Options > AIM > Markup allows you to change which colors are used for which user's AIM annotations (Figure 12). Selected by default, the "Random" checkbox (#2) assigns a random color to each user. If you do not select that option, you can override the random color with a different color. You can also override the color used to depict one or more users' AIM annotations. Change the default color by clicking the button to the left of the checkbox. A user's color may be changed by clicking the color next to their name and selecting a new color in the dialog that appears. Users not yet loaded into the list may be added to the list by clicking the Add Login button (#3). Selected users may be removed from the list (resetting their colors to the default) by selecting the Remove Selected button (#4). All users in the list may be selected by clicking the Select All button (#5). Selected users may have their color reset to the default color, either random or predefined as determined by the Random checkbox (#2), by clicking the Reset To Default Color button (#6).
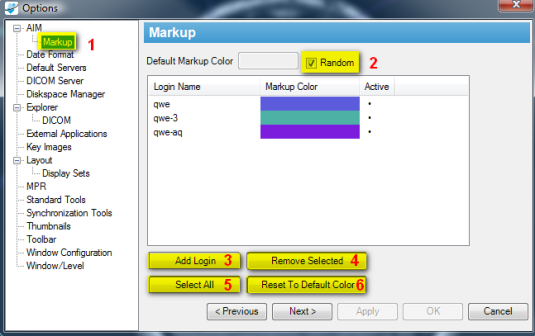
Figure 12. AIM Markup Display
...