Page History
...
| Panel | |||||||||
|---|---|---|---|---|---|---|---|---|---|
| |||||||||
|
| Tip | ||
|---|---|---|
| ||
Depending on the version you use, the screen layouts may be slightly different, however, the basic design and the steps are similar. |
...
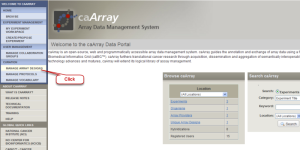
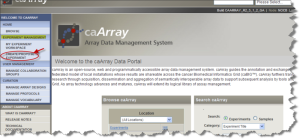
caArray Data Portal Welcome Page

Manage Array Designs Page
 - 1b
- 1b 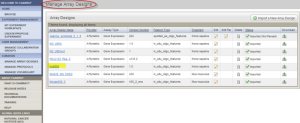
Steps 1.2
On the "Manage Array Designs" page, click the "Import a New Array Design" button. Another page, "New Array Design (Step 1)", opens. Fill out the "New Array Design" form with Description (Affymetrix Hu6800 Sample Arrya Design in the example); Selected Assay Type (Gene Expression is selected in the example); Provider (here Affymetrix); Version number (here 1.0); Feature Type (in_situ_oligo_features (MO) in the example); and Organism (Homo sapiens (ncbitax) in the example). Then click "Next".
*Manage Array Designs Page with Import a New Array Design Button"
 ,thumbnail
New Array Design (Step 1) Page with Form Completed
 - 3
- 3 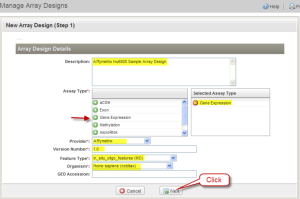
Step 1.3
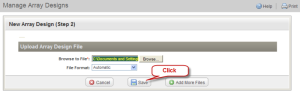
The page "New Array Design (Step 2)" opens. Click the "Browse" button. Browse to the location where the sample array design file (Hu6800.cdf) was unzipped. Then click "Save".
New Array Design (Step 2) Page with Browse Button

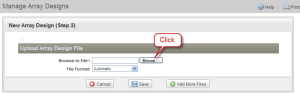
New Array Design (Step 2) Page with Save Button

Step 1.4
On clicking the "Save" button, window opens with a message to confirm the file has been uploaded. Click "Close window and go to Manage Array Designs". The "Manage Array Designs" re-opens, listing the newly uploaded file. (Please note that for large array design files, the importing process might take a while. An array design can only be used when it is fully imported.)
Window with Message Confirming Upload of Hu8800 File

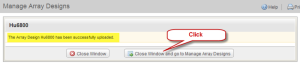
*Manage Array Designs Page Listing the Uploaded Hu8800 File"
Step 2 Experiment Data File Upload
...
Welcome Page with CREATE/PROPOSE EXPERIMENT Button Selected

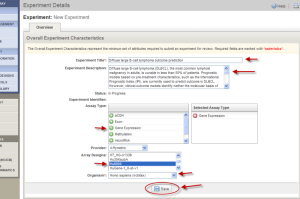
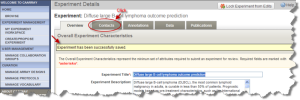
Overall Experiment Characteristics Window with Completed Form

Step 2.2
Fill out the form with the Experiment Type (Diffuse large B-cell lymphoma outcome prediction in the example); Experiment Description; Selected Assay Type (here Gene Expression selected); Provider (here Affymetrix); Array Designs (here Hu8800 selected in the example); and Organisim (Homo Sapiens ncibtax in the example). You can use your own description or use the sample text below. Make sure the "Array Designs" field is selected with the right platform (here Hu8800, highlighted in blue). Click the "Save" button.
...
Experiment Details Page with Message Confirming the Experiment has been Saved

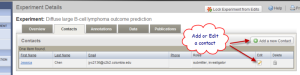
Experiment Details Page Showing Contact Information and Buttons to Add or Edit

Step 2.4
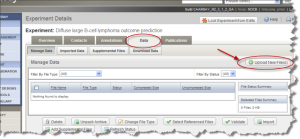
Click the "Data" tab. Then Click the "Upload New File(s)" button. The "Experiment Data Upload" window opens.
Experiment Details Page Data Tab with Upload New File(s) Button Selected

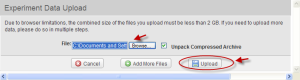
Experiment Data Upload Window with Browse and Upload Buttons

Step 2.5
In the Experiment Data Upload Window, browse to the location where the sample experiment Data file (caArray_golub-00095_files.zip) was saved and click on the "Upload" button.
...
Message Showing the File Upload is Complete with Close Window Button Selected

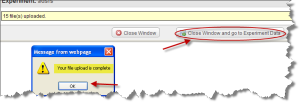
Step 2.7
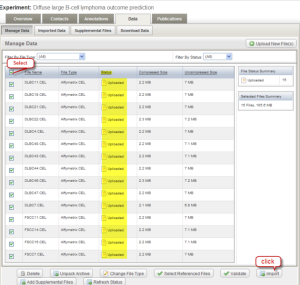
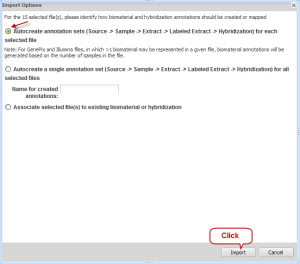
On the Data tab of the Experiment window, make sure the column "STATUS" displays the word "Uploaded" for each file. Select the check boxes for all experiment data sets and then click the "Import" button. A new window "Import Options" opens. Select the first option, "Autocreate annotation sets..."; then click the "Import" button.
Data Tab of Experiment Window with Status Displaying "Uploaded" and Files Selected for Import

Import Options Window with First Option and Import Button Selected

Step 2.8
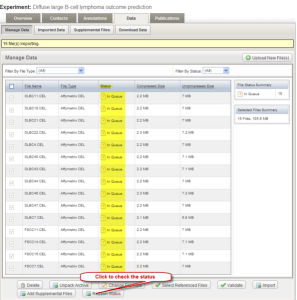
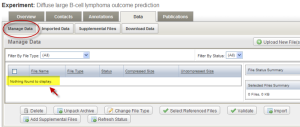
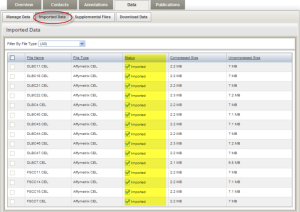
Depending on the speed of the machine and the size of the data, it may take a few minutes for the sample data to be imported. Check the status of the import by clicking the "Refresh Status" button. The initial status is shown as "In queue". When the import is complete, no data will be displayed under the "Manage Data" tab. Click the "Imported Data" tab to view imported data file. If you have completed all these steps, Congratulations! You have just successfully created an experiment and deposited your microarray experiment data into the caArray.
Data Tab of Experiment Window with Refresh Status Button

Manage Data Tab Showing No Data to Display

Imported Data Tab Showing the Imported Data File

Step 2.9
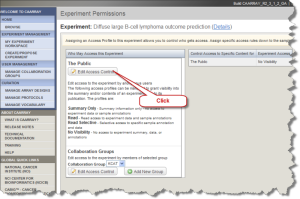
To make the experiment data public others can view your data, click the "My Experiment Workspace" button (Fig2.13). Locate the experiment of interest on the "My experiment Workspace" page. Click the "Permissions" icon. The "Experiment Permissions" page opens. Click on the "Edit Access Control" button in the left panel.
My Experiment Workspace Page with Permissions Button


Experiment Permissions Page with Edit Access Control Button Selected

Step 2.10
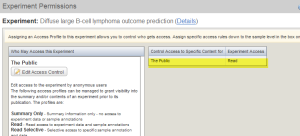
In the access control window, select "Read" from the drop down list. Then click the "Save" button. Your experiment is now set to be accessible by the pubic.
Access Control Window with Read Selected and Save Button


Experiment Permissions Window Showing the Public has Read Access

Step 3 Verification of Data Sharing on caGrid
...