Page History
...
Log in as described in Logging In via the GUI. The Dashboard appears.
Select data for transfer, using one of the following options:
- Browse for the data, as described in Browsing for Data via the GUI. The top of the detail panel displays the size of the selected collection.
- Search for the data, as described in Searching for Data via the GUI (or run a saved search from the Dashboard). The search results page appears. In the selection column, select each item you want to transfer. When performing a detailed search, the total size (of selected collections or data files) appears above the table.
Include Page shared step - initiate download shared step - initiate download Select dbGaP.
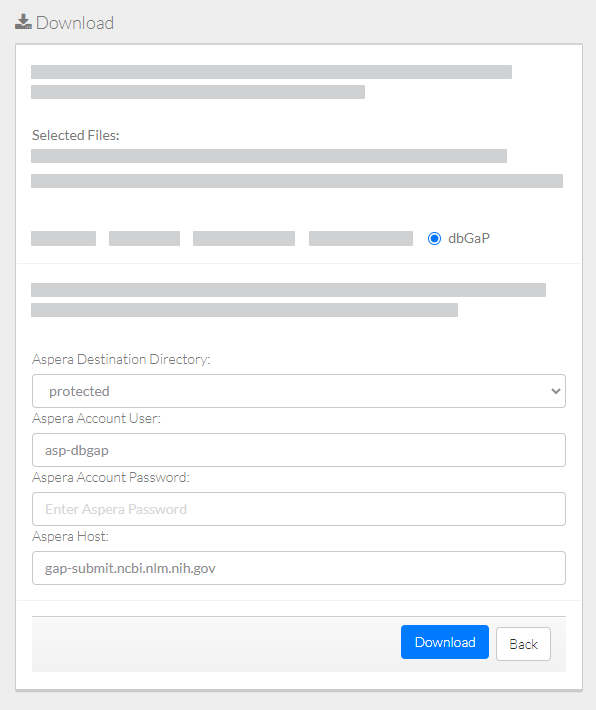
Specify Aspera information:
- Destination directory
- Account password
Keep the default account user name and host name.
Click Download. The system responds as follows:
The system begins to transfer the data based on your selections and displays the task ID link.
To view the progress of this transfer, click that link. The Collection Download or Data Object Download Task Details page appears. For instructions, refer to Viewing the Details of a Download Task.
- Depending on your event subscriptions, the system might send you an email notification of the transfer status. For instructions on subscribing, refer to Subscribing to Download and Registration Notifications.
...
Include Page shared step - click Download shared step - click Download