For efficient management of trial results, the CTA needs to maintain contact with the PIO contact for each trial. In the PA application, you can track one or more PIO contacts.
How to Add or Edit the PIO Contact
- In the main menu, under Dashboards, click Results Reporting. This link is visible only to users with the Results Abstractor role. The Results Reporting Dashboard displays a list of trials.
- Navigate using one of the following ways:
- In the list of trials, click the NCI trial identifier link for the trial you want to edit. A page appears with several sections, including the Assigned PIO section.
- In the panel next to the pie chart, under Add/Update Designee or PIO Contact, type the trial ID and click Search. The Add/Update Contact Information page appears with multiple sections, including the Assigned PIO section.
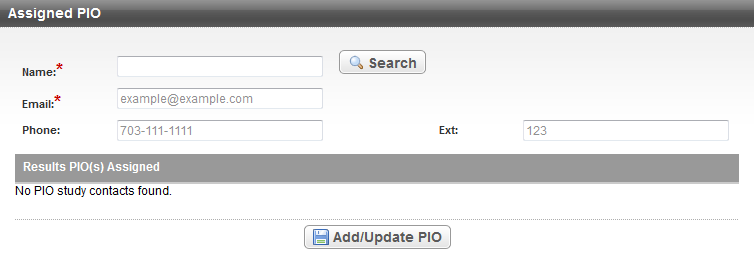
In the Assigned PIO section, provide the contact information. Enter the appropriate information in the fields. The following table describes the fields. An asterisk (*) indicates a required field.
Field Instructions Name* Click Search, and follow the instructions in Searching for Persons in PA.
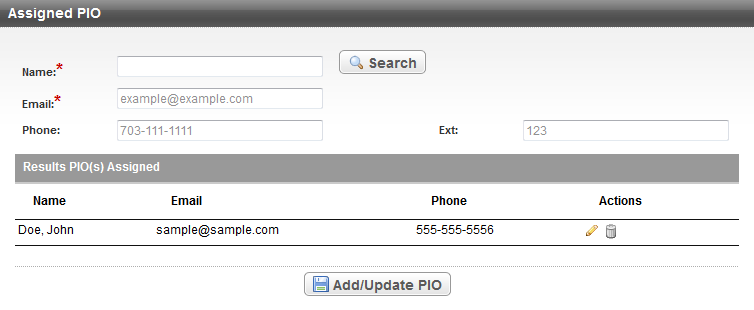
Email* Type the email address of the contact. You can enter up to 200 characters. Phone Type the phone number of the contact. You can enter up to 200 characters. Ext If the contact's phone number has an extension, type it in this field. You can enter up to 200 characters. - Click Add/Update PIO. The system saves the information that you have entered and displays it as a new row. The system also resets the form.
If you want to add another PIO contact, provide the new contact information and click Add/Update PIO. Repeat as needed.
To edit a contact, click the edit icon (
 ) in the row of the contact you want to edit. The system populates the fields of the Assigned PIO section with the contact you have selected. Edit those fields and click Add/Update PIO.
How to Remove a Contact
- Click the trash can icon (
 ) in the row of the contact you want to remove. The system asks you to confirm the removal.
 - Click OK.