While reviewing the results of a trial, you might need to make some record changes. The PA application allows you to track and manage these record changes.
How to Add or Edit Record Changes
- In the main menu, under Dashboards, click Results Reporting. This link is visible only to users with the Results Abstractor role. The Results Reporting Dashboard displays a list of trials.
- Navigate using one of the following ways:
- In the list of trials, click the NCI trial identifier link for the trial you want to edit. A page appears with several sections, including the Record Changes section.
- In the panel next to the pie chart, under Results Cover Sheet, type the trial ID and click Search. The Cover Sheet page appears with multiple sections, including the Record Changes section.

- To add an entry, in the Record Changes section, click Add. The Add/Edit Study Record Change dialog box appears.
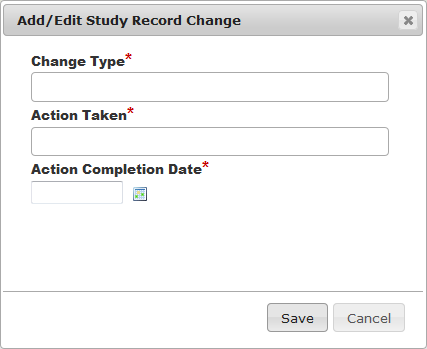
Enter the appropriate information in each field. The following table describes the fields. All fields are required.
Field Instructions Change Type*
Type a description of the change. Examples include Eligibility Criteria and Addition of Arms. Also consider discrepancies in Status, Status Dates, or Accrual. You can enter up to 2000 characters. Action Taken* Type a description of the action taken to address the change. You can enter up to 2000 characters. Action Completion Date*
Type or select the date on which the action was taken. If you type the date, use the following format:
MM/DD/YYYY
- In the Add/Edit Study Record Change dialog box, click Save.
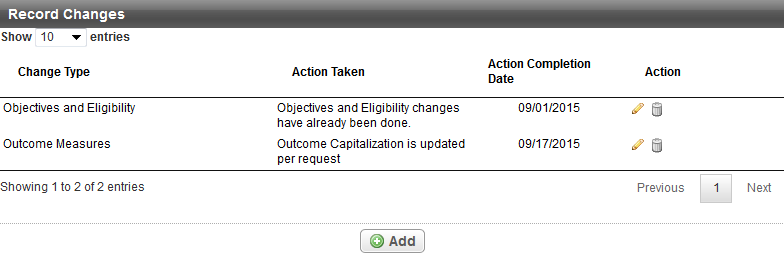
To edit a record change, click the edit icon (
 ) in the row of the record change you want to edit. The Add/Edit Study Record Change dialog box appears. Edit the values and click Save.
How to Delete a Record Changes Entry
- Click the trash can icon (
 ) in the row of the entry you want to delete. The system asks you to confirm the deletion.
 - Click OK.