Version 1.0.2
Introduction
This installation guide outlines the supported configurations and technical installation instructions for LexGrid Vocabulary Services for caBIG©, referred to as LexBIG for the remainder of the guide. Directions for configuring administrating the installation are also included in this document.
All of the examples and screenshots included in this chapter are Windows specific. If you are using a different platform, then modify the information as appropriate for your system.
Overview of LexBIG
The LexBIG package represents a compressive set of software and services to load, publish, and access vocabulary. Cancer Centers can use the LexBIG package to install NCI Thesaurus and NCI Metathesaurus content queryable via a rich application programming interface (API). LexBIG services can be used in numerous applications wherever vocabulary content is needed.
LexBIG is intended to address the needs of the following groups:
- Vocabulary service providers - Describes organizations currently supporting externalized API-level interfaces to vocabulary content for the caBIG™ community.
- Vocabulary integrators - Describes organizations within the caBIG™ community that desire to integrate new vocabulary content to be served to the caBIG™ community.
- Vocabulary users - Describes the caBIG™ community interested in utilizing vocabulary services within the context of other caBIG projects.
Target Audience
The LexBIG Installation and Administrator guide is intended to provide detail instructions for installing and administrating LexBIG software. The details and configuration information contained are written for skill levels of a typical system or database administrator.
LexBIG Components
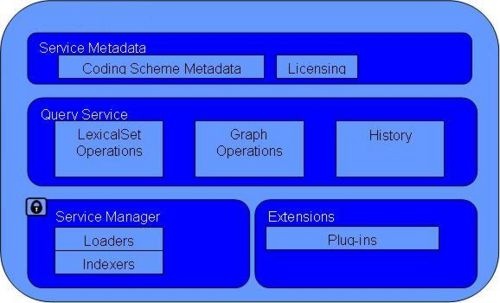
- Service Management consists of programs to load, index, publish, and manage vocabulary content for the vocabulary server.
- Application Programming Interface (API) is comprised of methods to support Lexical Operations, Graph Operations, and History Operations.
- Documentation consists of detailed JavaDocs and Programmers Guide.
- Examples are provided as sample source code for common vocabulary queries.
- Test Suite is provided to validate the LexBIG installation.
Note
Additional information about the LexBIG API is provided in the LexBIG Programmers Guide located at:
{LEXBIG_DIRECTORY}/docs/LexBIG_Programmer_Guide.pdf
Document Text Conventions
The following table shows various typefaces to differentiate between regular text and menu commands, keyboard keys, and text that you type. This illustrates how conventions are represented in this guide.
Convention | Description | Example |
|---|---|---|
Bold and Capitalized Command | Indicates a Menu command | Click the Open command. |
Capitalized command>Capitalized command | Indicates Sequential Menu commands | Admin > Refresh |
| Used for filenames, directory names, commands, file listings, source code examples and anything that would appear in a Java program, such as methods, variables, and classes. |
|
Boldface type | Options that you select in dialog boxes or drop-down menus. Buttons or icons that you click. | In the Open dialog box, select the file and click the Open button. |
Italics | Used to reference other documents, sections, figures, and tables. | caCORE Software Development Kit 1.0 Programmer's Guide |
Italic boldface type | Text that you type | In the New Subset text box, enter Proprietary Proteins. |
Note | Highlights a concept of particular interest | This concept is used throughout the installation manual. |
Warning | Highlights information of which you should be particularly aware. | Warning Deleting an object will permanently delete it from the database. |
{} | Curly brackets are used for replaceable items. | Replace {LEXBIG_DIRECTORY} with its proper value such as |
LexBIG Minimal System Requirements
- Internet connection
- 2 GB RAM
- Tested Platforms (Similar Hardware Specification for Operating System)
LexBIG has been tested on the platforms shown in the following table.
| Linux Server | Linux Server | Windows |
|---|---|---|---|
Model | HP Proliant DL 380 | Penguin | Dell Latitude |
CPU | 2 x Intel® Xeon™ Processor 2.80GHz | Dual AMD Opteron 248 processors (64 bit) | 1 x Intel® Pentium™ Processor 2.00GHz |
Memory | 4 GB | 16Gb | 1.5Gb |
Local Disk | System 2 x 36GB | 250 GB Raid 1 disk | System 1 x 80GB |
OS | Red Hat Linux ES 3 | Fedora Core 3 (64 bit) | Windows XP Professional |
LexBIG Software and Technology Requirements
Required Software - Not Included in LexBIG
You must download and install the required software that is not included with LexBIG (listed in the following table). The software name, version, description, and URL hyperlinks (for download) are indicated in the table.
Software Name | Version | Description | URL |
|---|---|---|---|
Java Software Development Kit (SDK):Java 2 Standard Edition (J2SE) | j2sdk1.5.0_04 or higher | The J2SE Software Development Kit (SDK) supports creating J2SE applications | http://java.sun.com/javaee/downloads/ |
MySQL Database* | MySQL (4.1.16) or higher | MySQL 4.1 Community Edition | http://dev.mysql.com/downloads/mysql/4.1.html |
PostgreSQL* | 8.x or higher | Open source relational database management system | http://www.postgresql.org/ |
* MySQL or PostgreSQL installation is required.
Note
Software that is included with the LexBIG is listed in Appendix I.
Optional Software
Optional software to use with the LexBIG is listed in the following table. The included (Incl.) column indicates (with a Yes) if the software is packaged with the SDK. No indicates that you must supply the software. A hyperlink is included for your reference to appropriate sources.
Software Name | Version | Description | URL | Incl. |
|---|---|---|---|---|
Eclipse IDE | 3.1.x | An open platform for tool integration which provides tool developers with flexibility and control over their software technology used for product development. This tool can be optionally used to review Java source code. | http://www.eclipse.org/downloads/index.php | No |
Note
Drivers for MySQL and PostgreSQL included with the LexBIG installer. These drivers are placed in the {LEXBIG_DIRECTORY}/runtime-components/extLib directory.
LexBIG Documentation
The following documentation is part of the LexBIG install package.
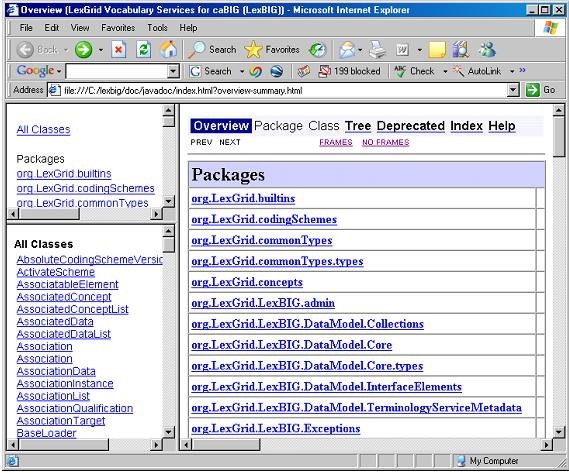
- Javadoc - The full API is described using Javadocs. Your JavaDocs will be generated to the {LEXBIG_DIRECTORY}\doc\javadoc directory. Use a web browser to open the index.html file to start browsing documentation. For more information on Javadoc see http://java.sun.com/j2se/javadoc/.
- LexBIG Programmer Guide - A guide describing LexBIG API and general approaches for common vocabulary uses.
Note
LexBIG Components are listed in Appendix I.
Installing LexBIG
Preliminary Considerations
Before You Begin
The LexBIG has been tested with the operating systems and hardware specified on page 4 of this guide. While LexBIG is expected to run on many variations of hardware and software similar to the test platforms, results cannot be guaranteed.
LexBIG Object Model
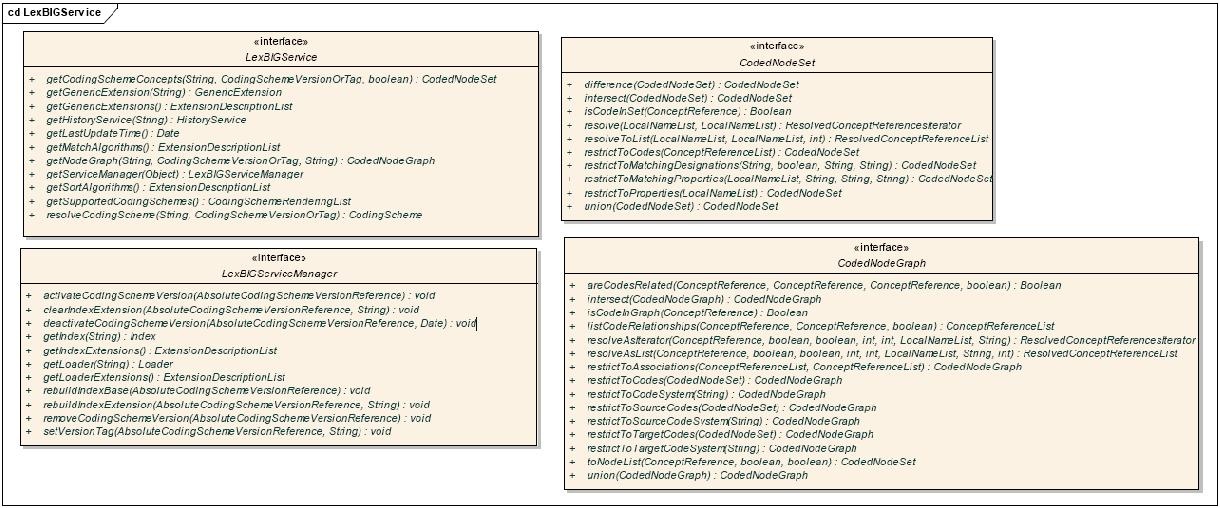
To describe LexBIG, the LexBIG service, CodeNodeGraph and CodeNodeSet interfaces are included. The model, as shown in the following diagram, contains the core query service from the org.LexBIG.LexBIGService domain package. The full and most recent version of the object model is described and illustrated as part of the JavaDocs. This diagram is a UML class diagram. For more information about UML, see the LexBIG Programmer Guide, available with the LexBIG installation {LEXBIG_DIRECTORY}/docs/LexBIG_Programmer_Guide.
For more information on the LexBIG architecture see Architecture Specification at http://cabigcvs.nci.nih.gov/viewcvs/viewcvs.cgi/lexgrid/LexBIG_architecture_specification.pdf HISTORICAL.
After successfully installing LexBIG and running the verification test suite, as described in this guide, you should be ready to start programming using the API to meet the needs of application needs. If you have the required software installed on your system (see the previous section), then installing and running the test should not take more than 60 minutes.
Downloading and Using the LexBIG Install Wizard
Attention
To best understand the installation and testing procedures for LexBIG, it is recommended that you follow the procedures described in this section with minimal deviation.
Complete the following steps to download LexBIG:
- Download the LexBIG install package.
- Select the most recent version of the LexBIG Software Package lexbig-install-X.X.X.jar (e.g., 1.0.1, lexbig-install-1.0.1.jar). Save this file to your computer. This location will be referred to as the SAVE_DIRECTORY. You may have to disable Pop-up blockers to allow save the install package to your local computer.
Using Microsoft Windows Environment Command Prompt change directory to the SAVE_DIRECTORY of the LexBIG software package you saved in step 2. At the command prompt enter the following command to begin the installation wizard.
java -jar lexbig-install-X.X.X.jar
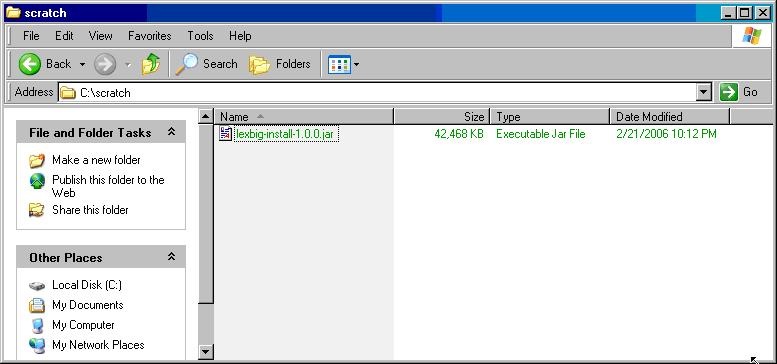
- As an alternative to the command line instruction you can navigate to the SAVE_DIRECTORY with the File Explorer. Double Click on the lexbig-install-1.0.1.jar file. This will launch the install wizard with a typical java installation
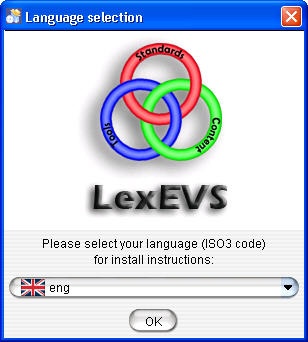
- Select the language and click OK button to begin the installation. Note that the only language currently supported is English.
- As an alternative to the command line instruction you can navigate to the SAVE_DIRECTORY with the File Explorer. Double Click on the lexbig-install-1.0.1.jar file. This will launch the install wizard with a typical java installation
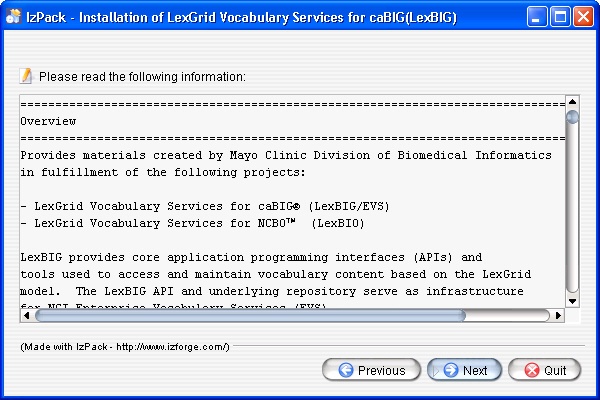
- After the initial welcome screen the release notes for the LexBIG distribution are displayed. Once you have read through the release notes click the Next button to continue.
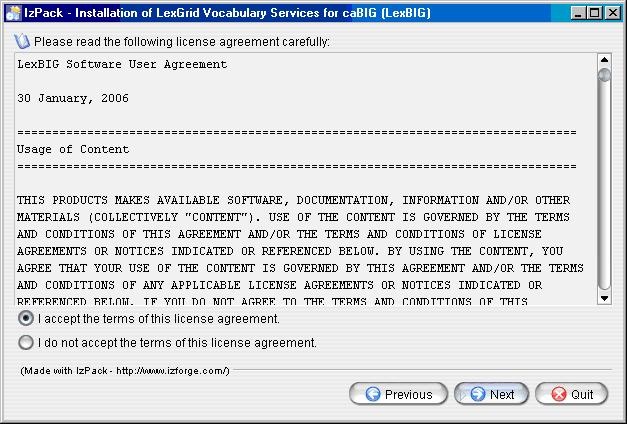
- The next step is to review the license agreement of the LexBIG software and accept the terms of the agreement. Click Next button to continue with installation.
Enter the path where you would like the LexBIG software installed. Click the Next button to continue installation. This will be referred to as the LEXBIG_DIRECTORY throughout the remaining instructions.
Note
If the directory does not exist, the program will prompt to proceed with creating the new directory. If the directory does exist, the program will prompt to overwrite the directory and files in the installation path.
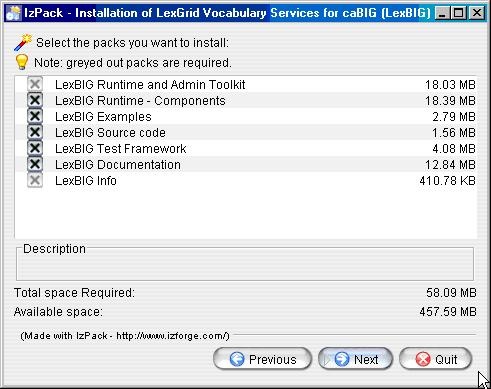
- Select the components to be installed for LexBIG. Two of the components LexBIG Runtime and Admin Toolkit and LexBIG Info are required and cannot be unchecked. The remaining components are optional. Once components have been decided click the Next button to continue with installation.
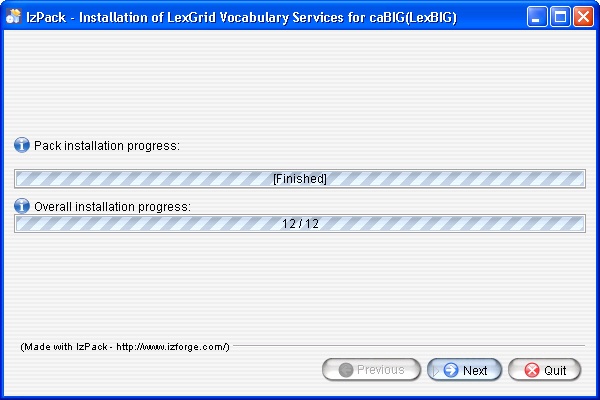
- Once all the components have been installed a Finished prompt will be displayed. Click the Next button to continue installation.
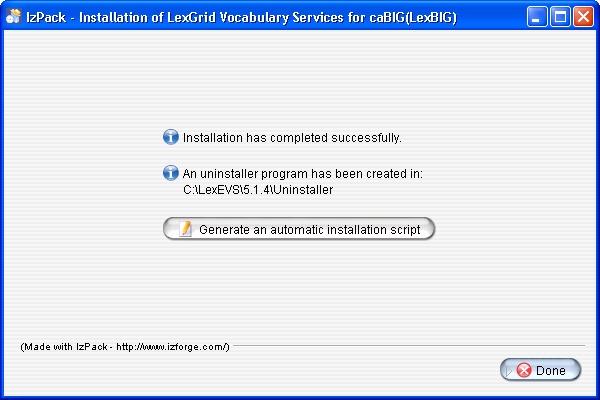
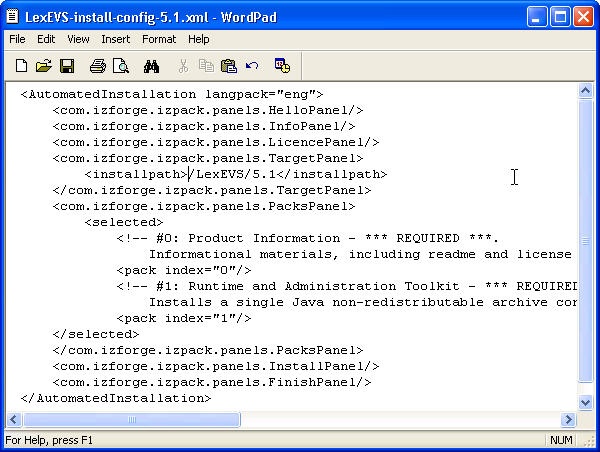
- The last step of the installation wizard provides the ability to generate an automatic installation script that can be used on other machines. This installation script can be used to install LexBIG without graphic wizard. Click Done to complete the installation process.
Downloading and Installing LexBIG Using Command Line
Attention
To best understand the installation and testing procedures for LexBIG, it is recommended that you follow the procedures described in this section with minimal deviation.
Complete the following steps to download and install LexBIG using command line option:
- To download the LexBIG install package go to the NCI GForge files archive.
- Select the most recent version of the LexBIG Software Package lexbig-install-X.X.X.jar (e.g., 1.0.1, lexbig-install-1.0.1.jar). Save this file to your computer. This location will be referred to as the SAVE_DIRECTORY. You may have to disable Pop-up blockers to allow save the install package to your local computer.
- Select the install-config.xml file. Save this file to your SAVE_DIRECTORY.
- Edit the install-config.xml file to configure the components to be installed. The install path can be modified to the location of choice. Components LexBIG Runtime and Admin Toolkit and LexBIG Info are required. Remove lines in install-config.xml file that you do not want to be installed. By default, the file is configured to install all packages.
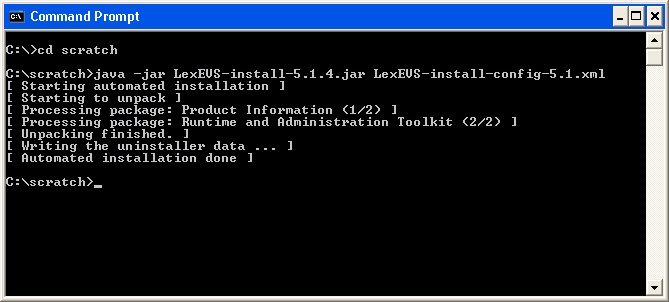
At command prompt in the SAVE_DIRECTORY enter the command:
java -jar lexbig-install-1.0.1.jar install-config.xml
Configuring the LexBIG Environment
The LexBIG install provides a config.props file to configure options for the LexBIG service and database settings. The LexBIG Service can be configured to work with many different databases, but the recommended databases are MySQL 4.1.16 (or higher) or PostgreSQL 8.x. Following installation, the Administrator should examine the config.props file and make any changes required to match the target database and runtime environment.
Modifying the config.props file for LexBIG
- The file {LEXBIG_DIRECTORY}/resources/config/config.props contains properties controlling the behavior of the LexBIG runtime.
- This guide has an overview of the options in this file; however, the file also has documentation embedded inside of it. The documentation inside the config.props file should be considered authoritative if there is a conflict between the documentation.
- The first table below contains the variables that you must modify so that LexBIG can properly use your database.
- The second table below contains the variables that you can change for performance reasons or alternative deployment scenarios, but you probably don't need to change in a standard LexBIG installation.
- When constructing file paths, you must use either '/' or '
'. '\' is not valid within the config.props file for file paths (it is ok for JDBC connection strings).
Variables to Modify for Using your Database
The following table describes the variables that must be set prior to use of LexBIG.
Property Name | Description |
|---|---|
| LexBIG can be configured to run within a single database (and it will use a numbering scheme on its tables) - or it can be configured to use multiple databases on a single server (and it will use a numbering scheme on its databases). It is completely up to the administrator which way will work better in their database environment. The default value is |
| The address of your database server. The value that you put here will be dependent on the SINGLE_DB_MODE variable. DB_URL=jdbc:mysql://hostname/LexBIGDB If SINGLE_DB_MODE is 'false' then this value should be a path that does NOT include the DB name. For example: DB_URL=jdbc:mysql://hostname/ |
| The prefix to use on all tables or databases that LexBIG creates. Notes If you wish to run multiple LexBIG installations on the same database server, give them each a unique prefix. Also, do not use dashes '-' in the db_prefix value. Recommended characters are alphanumeric (a-z, 0-98) and underscore '_'. |
| Optional variable for passing extra database parameters. These will be appended to the end of the database connection string. |
| The Java class name that represents the driver that you wish to use with your database. |
| The database username and password. |
Variables to Modify Prior to Using LexBIG
The following table describes the variables that must be set prior to use of LexBIG.
Property Name | Description |
|---|---|
| This is not actually a variable that you would set within this file. It is documented here for clarity of other variables that depend on this variable. Normally, this variable is automatically set (at runtime) to the location of the config.props file that is being used by the runtime. Alternatively, you can set the java system variable |
| This variable is the path that will be used to resolve any other relative (or unqualified) paths in the |
| The path of the folder that contains your SQL drivers and LexBIG extensions (if you have any). |
| The location of the file that will store information about all loaded terminologies. |
| The folder where all LexBIG generated indexes will be stored. This folder can potentially be large (several GB) - depending on the terminologies loaded. |
| LexBIG maintains a pool of connections to each database that it connects to. This sets the limit on the number of connections that will be opened. |
| LexBIG maintains an internal cache of some information that it needs to query from the database to resolve queries. This controls the size of that cache. This cache does not hold entire user queries. The default size is 500. |
| The length of time to allow an unused (and unclosed) iterator to stay valid before it is closed (and its resources freed) by the system. |
| This controls the maximum number of results that a user can resolve at one time for the CodedNodeSets and CodedNodeGraphs. |
| The path where LexBIG log files will be written. |
| Setting debug to |
| Indicates when a new log file should be started. This can be set to |
| If Note The unit is treated as days regardless of the If |
| Used to enable or disable e-mail notification of system errors and warnings. Default is |
| The SMTP server to use to send errors over e-mail. |
| A comma separated list of e-mail address to set failure and warning notifications to. |
Attention
It is considered beyond the scope of this manual to address database (e.g. MySQL or PostgreSQL) setup and administration. However, proper database configuration is critical to the performance and long-term health of the LexBIG environment. System administrators should consult the MySQL or PostgreSQL documentation to determine settings that are appropriate to the host machine and environment. Tuning should be performed prior to loading vocabularies.
Modifying the my.ini file for MySQL
The following table provides settings that have been modified in MySQL database environments used during LexBIG development and adoption, and are provided for consideration by database administrators.
The file {MYSQL_HOME_DIRECTORY}/my.ini contains properties controlling the behavior of the MySQL database server.
Property Name | Description |
|---|---|
| Flush the transaction logs at each commit. |
| Additional memory pool that is used by InnoDB to store metadata information. |
| Buffer pool used to cache both indexes and row data. |
| Maximum size for internal (in-memory) temporary tables. |
| Query cache is used to cache SELECT results and later return the without actual executing the same query once again. |
| This buffer is allocated when MySQL needs to rebuild the index in REPAIR, OPTIMIZE, ALTER table statements as well as in LOAD DATA INFILE into an empty table. |
Note
MySQL can be passed a jdbc option for the Windows local environment that may improve performance 30 to 50%.
Try the following values in the config.props file for the DB_URL:
SINGLE_DB_MODE=true
DB_URL=jdbc:mysql:///<dbname>?socketFactory=com.mysql.jdbc.NamedPipeSocketFactory
DB_DRIVER=org.gjt.mm.mysql.Driver
DB_USER=root
DB_PASSWORD=
DB_PREFIX=lb
DB_PARAM=
This uses Windows Named Pipe function and avoids use of the TCP/IP protocol. It only works when connecting with a local iteration of the MySQL database on Windows.
Modifying the posgresql.conf File for PostgreSQL
The file {PostgreSQL_HOME_DIRECTORY}/posgresql.conf contains properties controlling the behavior of the PostgreSQL database server. The following table provides settings that have been modified in PostgreSQL database environments used during LexBIG development and adoption, and are provided for consideration by database administrators.
Property Name | Description |
|---|---|
| Number of shared buffers. |
| The amount of memory in kilobytes allocated to working memory |
| The amount of memory in kilobytes allocated to maintenance working memory. |
| We set the 'enable_seqscan' to false to use always use an index versus a table scan. |
Testing the LexBIG Configuration
This LexBIG installation provides a test suite to verify and test the environment.
Warning
The LexBIG runtime and database environments must still be configured prior to invoking the test suite, as described above.
In a Command Promptwindow, enter the following command to go to the test directory:
cd {LEXBIG_DIRECTORY}/testRun the TestRunner utility to start the test process.
For Windows Environment enter:TestRunner.bat
For Linux Environment enter:
TestRunner.sh -h
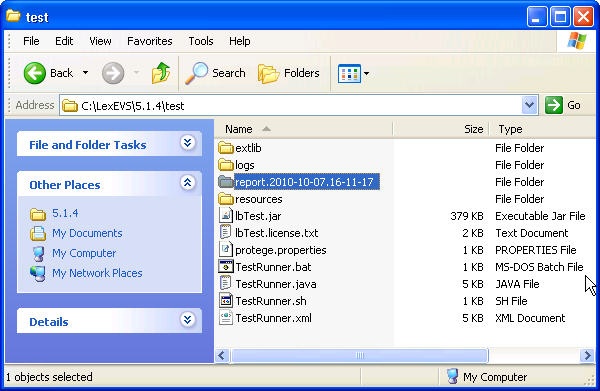
- Use file explorer to navigate to the directory that contains the test report. The report is placed in the {LexBIG_DIRECTORY}/test.
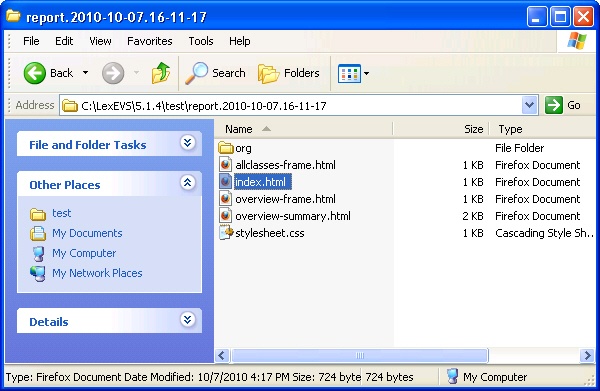
- Navigate to the report that represents the date and time you executed the test.
- Navigate to the report that represents the date and time you executed the test.
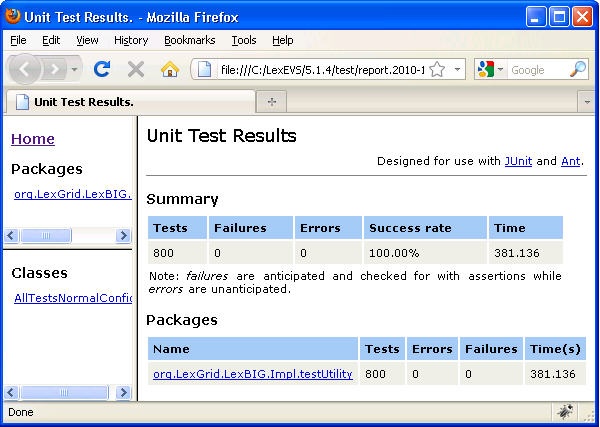
- Review the test results opening index.html file using a web browser.
Congratulations! If the test passes all tests, you have successfully installed the LexBIG software.
Tips and Pitfalls
Upgrading LexBIG
Upgrading LexBIG may require reloading content. Be sure to read the release notes for each LexBIG release before installing the latest version. Preserve configuration files and indexes unless instructed to reload or do otherwise in the release notes. These files include config.props, registry.xml and the entire lbIndex directory in the resources directory. |
Single and Multiple Database Configuration Changes
Do not attempt to change database configurations from single database mode to multi-database mode and vice versa after loading in one mode or the other. LexBIG does not support both configurations at once.
Failed and Interrupted Loads
LexBIG loads of content are generally handled in a robust manner and failed loads clean up after themselves relatively well when dbms' are properly configured to allow database drop functions by LexBIG. However, exiting the application in the middle of a load may cause unpredictable consequences with databases, indexes and lock files left in a state that will cause subsequent loads of the same terminology to fail.
- Often these can be remedied by deleting the lock.xml file followed by using the cleanup function.
- Other steps may need to be taken if this doesn't work, including dropping databases as a dba, deleting the index file for the offending terminology, and editing the registry.xml and metadata.xml files by hand.
- A quick, dirty solution is to drop all databases and delete all configuration files except config.props.
When to Scale a Dbms for a Large Number of Connections
LexBIG is configured for multi-database loads and has multiple users connecting to all terminologies, then the administrator will need to scale database configurations to adapt to this. If you have large number of terminologies loaded and a large user base connecting to the service using the lbGUI, then you will need the database configuration for number of connections scaled appropriately or users may not be able to connect.
Note
Loading in single database mode can eliminate this problem.
MySQL Driver Issues
LexBIG is distributed with an older version of the Java MySQL driver due to licensing concerns. If LexBIG reports an error concerning establishing a connection to the MySQL server yet the MySQL CLI is able to connect, a new version of Connector/J may be required.
The latest version of Connector/J is available from MySQL.org. The new jar should be placed in the LexGrid/LexBIG/2.0.0/runtime/sqlDrivers/ directory. Remove the existing mm.mysql-2.0.6.jar to ensure that the class loader does not incorrectly load the older driver file. |
Installing LexBIG into JBoss
Introduction
Since LexBIG is server oriented software, a common deployment scenario is to package LexBIG into a WAR file and deploy it into JBoss or another Application Server. The following are recommendations for packaging and configuring LexBIG for JBoss usage.
If not deploying into an Application Server such as JBoss, this chapter can be skipped.
While these instructions are tailored to JBoss, they should serve as a reasonable guide in packaging for other Application Servers.
Complete a standalone installation of LexBIG before starting this section. These files will be copied to create your JBoss package.
Creating your WAR file
To add LexBIG functionality to a WAR file, add the lexbig.jar file to the lib folder of the WAR file. Adding the lbRuntime.jar file to the lib folder may result in the duplication of many common libraries that LexBIG and JBoss share. In particular errors will occur due to a collision between the log4j libraries that LexBIG and JBoss both use.
The lexbig.jar can be found in the 'runtime-components' folder of the LexBIG installation.
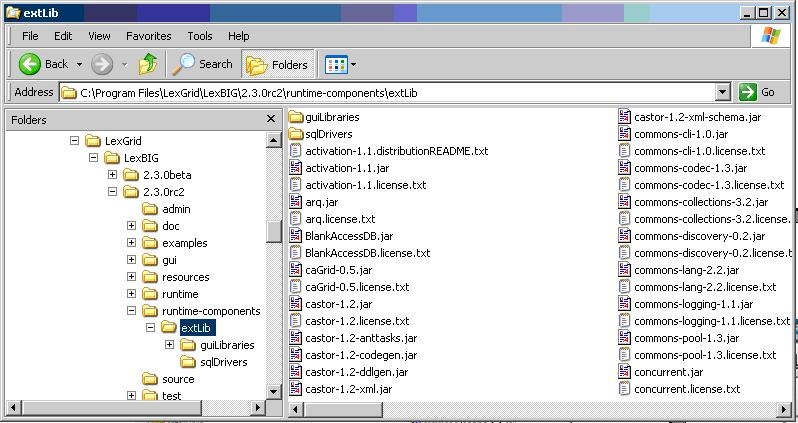
The lexbig.jar file adds LexBIG runtime functionality to JBoss; however, 3rd party dependencies must be added to the WAR file lib folder as well. These jar files are located in the 'runtime-components/extLib' subfolder as shown in the figure below.
Avoid duplicating jars already contained in the WAR package or jar files that JBoss already provides. For example, JBoss already provides a log4j x.x.x.jar' - this file should NOT BE COPIED into the WAR package. This jar is singled out because it is known to cause errors in JBoss if you deploy a WAR file that contains a log4j library.
Do not copy files from 'runtime-components/extLib/guiLibraries' or any of the sql drivers in the 'sqlDrivers' folder. The gui libraries are not needed and the sql drivers will be dealt with later.
Creating the File Storage Location for the LexBIG Runtime
LexBIG runtime needs to have the ability to read and write from a local file system in order to function properly. The files that it writes also need to persist through a stop and start of the JBoss server. These files cannot be placed inside of the WAR file, since JBoss extracts WAR files into a differently named temporary folder every time it starts up.
- Create a single folder to store this information, and configure the LexBIG JBoss instance to use this folder while it is running for all of its file system access needs.
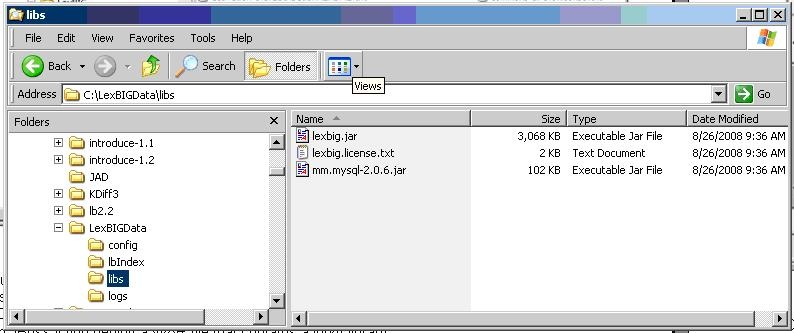
- Create a top level folder named 'LexBIGData'. Create sub-folders in this directory named 'config', 'lbIndex', 'libs', and 'logs'.
Below is a screenshot of this file structure:
- The folder 'config' is used for storing the LexBIG configuration, storing the terminology registry, and storing lock files. Copy 'LexBIG <version>\resources\config\config.props' into this folder now. This file will be customized later.
- The folder 'lbIndex' is where LexBIG will store the indexes that it creates. Leave this folder empty.
- In the folder 'libs' copy the SQL drivers. Keep in mind that the SQL driver that ships with LexBIG is not compatable with the latetest MySQL versions. Licensing restrictions prevent shipping the latest drivers and they must be downloaded by the user. Any LexBIG extensions can also be placed here. Copy the jar 'LexBIG 1.0.1\runtime-components\lexbig.jar' into this folder. A duplicate of this jar file needs to be here to assist with some custom classloader work that bypasses the normal classpaths.
- The folder 'logs' is where LexBIG will write its log messages. Leave this folder empty.
Your directory structure should now look like the screen shot above.
Configuring config.props for JBoss Deployment
There are a few variables in the config.props file in your LexBIGData folder that will need to be changed for the JBoss deployment. There are a number of ways that this file can be configured - but these instructions set up directories relative paths - allowing the WAR file to be easily moved from one server to another.
The config.props file should already be configured for standalone mode at this point, as described earlier in the manual. This section will only describe the changes that should be made for JBoss deployment.
There following five variables need to be set to the following values in the config.props file.
Variable and Setting | Description |
|---|---|
| This variable is being left blank. This will cause LexBIG to automatically set this variable to the location of the config.props file when it starts up. All other paths in the config.props file can then be set relative to the folder that contains the |
| This variable is being set to point to the |
| By only putting a file name here, a file of that name will be created in the same folder where it started (the |
| Sets the index storage location to the |
| Sets the log location to the |
Locating the File Storage Location for the LexBIG Runtime
Now that you have created your LexBIGData folder, and configured the config.props file, you need to decide where to place it on the system where JBoss and your WAR file will be deployed. Location is up to the user - so long as it is permanent. A couple of possibilities include keeping it with JBoss – in the JBoss data folder, \...\jboss-4.0.4.GA\server\default\data\LexBIGData, or it could go into a typical Linux application folder such as /apps/LexBIG/LexBIGData/.
Locating the config.props File when JBoss Starts
The only step remaining now is to help LexBIG find the proper config.props file when it initializes. There are a number of ways that this could be done - but the easiest way is to set the Java System Variable LG_CONFIG_FILE to the location of the config.props file.
This can be done by modifying the script that launches JBoss - adding the following (modify as appropriate for the place that you picked for your LexBIGData folder)
-DLG_CONFIG_FILE=C:\Program Files\jboss-4.0.4.GA\server\default\data\LexBIGData\config\config.props
Alternatively, you could programmatically set this system variable from your application when it starts up and before it makes its first LexBIG call.
Read the documentation in the config.props file for other LG_CONFIG_FILE configuration possibilities.
Note
JBoss tends to run out of memory while running with the default settings of JBoss. To fix the problem, modify the run.conf file under JBOSS_home/bin to change the memory setting and how frequently the rmi garbage collector runs, by editing the JAVA_OPTS line as follows:
if [ "x$JAVA_OPTS" = "x" ]; then
   JAVA_OPTS="-server -XX:MaxPermSize=128m -Xms256m -Xmx2000m -Dsun.rmi.dgc.client.gcInterval=120000 -Dsun.rmi.dgc.server.gcInterval=120000"
fi
Moving a Terminology to another SQL Server
In some deployment scenarios, it may be necessary to move a very large terminology onto a different SQL server than the standard LexBIG server configured above for scalability reasons.
This is supported, but there are some limitations and cautions as described in the bullets that follow:
- Manually edit the registry.xml file (It may have an alternate name as denoted in the REGISTRY_FILE variable of config.props) with a text editor.
- This terminology cannot be removed using the LexBIG API. To remove the terminology, edit the registry.xml file again, and manually drop the database from the server. This leaves an orphaned index – running the orphaned resources clean up tool wipes the index and associated entries.
- This "extra" SQL server must use the same driver and same username and password as the default LexBIG server since the configuration file only supports a single password and username set.
Steps to move a terminology to a new server:
- Manually move the proper database (or proper subset of tables in SINGLE_DB_MODE) to the new server. The LexBIG TransferScheme tool (in the admin scripts folder) can help you determine the proper SQL databases, tables, and commands that you will need to use to accomplish this. Alternatively, you can look at the registry.xml file to determine what database and/or tables you need to move.
- Manually edit the registry.xml file. You will need to change the value of the dbURL parameter on the proper line for this terminology that you are using.
- Restart LexBIG, and ensure that the terminology is still available.
LexBIG Administration
A set of administrative utilities are provided to manage the LexBIG Service. These utilities are provided for Windows (*.bat) and Linux (*.sh) operating systems. Each of the commands is located in the {LEXBIG_DIRECTORY}/admin and {LEXBIG_DIRECTORY}/test directory. A full description of the options with example is provided for each of the administration utilities.
LexBIG Administration Programs
The following table describes the available LexBIG Administration programs.
Administrative Program | Description |
|---|---|
ActivateScheme | Activates a coding scheme based on unique URN and version.
|
ClearOrphanedResources | Clean up orphaned resources - databases and indexes.
|
DeactivateScheme | Deactivates a coding scheme based on unique URN and version.
|
ExportLgXML | Exports content from the repository to a file in the LexGrid canonical XML format.
|
ExportOBO | Exports content from the repository to a file in the Open Biomedical Ontologies (OBO) format.
|
ExportOWL | Exports content from the repository to a file in OWL format.
|
ListExtensions | List registered extensions to the LexBIG runtime environment.
|
ListSchemes | List all currently registered vocabularies.
|
LoadLgXML | Loads a vocabulary file, provided in LexGrid canonical xml format.
|
LoadNCIHistory | Imports NCI History data to the LexBIG repository.
|
LoadNCIMeta | Loads the NCI MetaThesaurus, provided as a collection of RRF files.
|
LoadNCIThesOWL | Loads an OWL file containing a version of the NCI Thesaurus
|
LoadOBO | Loads a file specified in the Open Biomedical Ontologies (OBO) format.
|
LoadOWL | Loads an OWL file. Note Load of the NCI Thesaurus should be performed via the LoadNCIThesOWL counterpart, since it will allow more precise handling of NCI semantics. Options:
|
LoadUMLSDatabase | Loads UMLS content, provided as a collection of RRF files in a single directory. Files may comprise the entire UMLS distribution or pruned via the MetamorphoSys tool. A complete list of source vocabularies is available online at http://www.nlm.nih.gov/research/umls/metaa1.html.
|
LoadUMLSFiles | Loads UMLS content, provided as a collection of RRF files in a single directory. Files may comprise the entire UMLS distribution or pruned via the MetamorphoSys tool. A complete list of source vocabularies is available online at http://www.nlm.nih.gov/research/umls/metaa1.html.
|
LoadUMLSSemnet | Loads the UMLS Semantic Network, provided as a collection of files in a single directory. The following files are expected to be provided from the National Library of Medicine (NLM) distribution. These files can be downloaded from the NLM web site at http://semanticnetwork.nlm.nih.gov/Download/index.html.
|
LoadFMA | Imports from an FMA database to a LexBIG repository. Requires that the pprj file be configured with a database URN, username, password for an FMA MySQL based database. The FMA.pprj file and MySQL dump file are available at http://sig.biostr.washington.edu/projects/fm/upon registration.
|
LoadHL7RIM | Converts an HL7 RIM MS Access database to a LexGrid database
|
LoadMetaData | Loads optional XML-based metadata to be associated with an existing coding scheme.
|
RebuildIndex | Rebuilds indexes associated with the specified coding scheme.
|
RemoveIndex | Clears an optional named index associated with the specified coding scheme. Note: built-in indices required by the LexBIG runtime cannot be removed.
|
RemoveScheme | Removes a coding scheme based on unique URN and version.
|
TagScheme | Associates a tag ID (e.g. 'PRODUCTION' or 'TEST') with a coding scheme URN and version.
|
TestRunner | Located in {LEXBIG_DIRECTORY}/test. Executes a suite of tests for the LexBIG installation. Note The LexBIG runtime and database environments must still be configured prior to invoking the test suite. Options:
|
TransferScheme | Tool to help gather information necessary to transfer data from one SQL server to another.
|
Loading a Sample Vocabulary
This LexBIG installation provides the UMLS Semantic Net and a sampling of the NCI Thesaurus content (sample.owl) that can be loaded into the database.
In a Command Promptwindow, enter the following command to go to the example programs.
cd {LEXBIG_DIRECTORY}/examplesTo load the example vocabularies, run the appropriate LoadSampleData script (LoadSampleData.bat for Windows; LoadSampleData.sh for Linux).
Note
Vocabularies should not be loaded until configuration of the LexBIG runtime and database server are complete.
Running the Sample Query Programs
A set of sample programs are provided in the {LEXBIG_DIRECTORY}/examples directory. To run the sample query programs successfully a vocabulary must have been loaded.
Enter the following command:
cd {LEXBIG_DIRECTORY}/examplesExecute one of sample programs. (.bat for windows or .sh for Linux.)
FindConceptNameForCode.bat
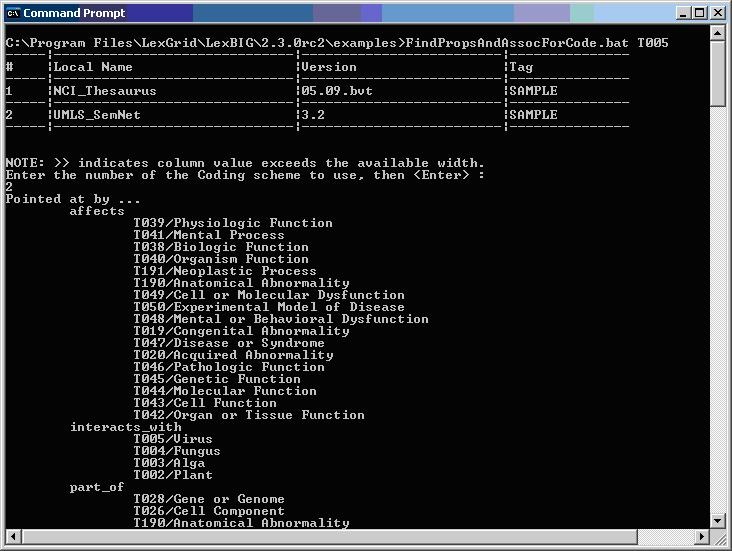
FindPropsandAssocForCode.bat
FindRelatedCodes
FindTreeforCodeAndAssoc
Installing NCI Thesaurus Vocabulary
This section describes the steps to download and install a full version of the NCI Thesaurus for the LexBIG Service.
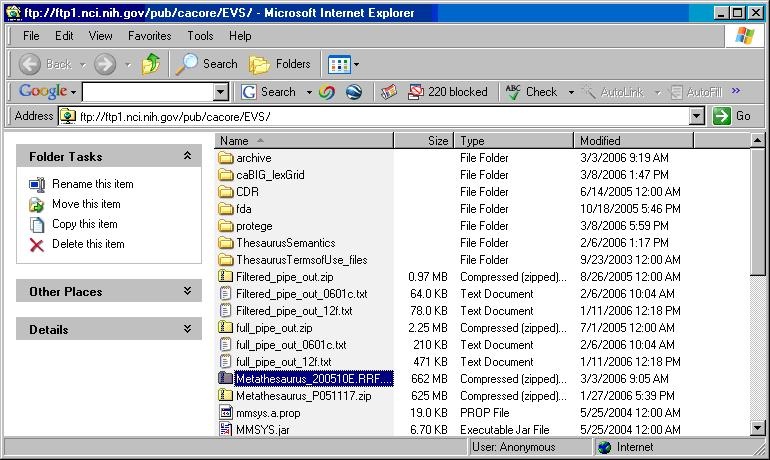
- Using a web or ftp client go to URL: ftp://ftp1.nci.nih.gov/pub/cacore/EVS/
- Select the version of NCI Thesaurus OWL you wish to download and save the file to a directory on your machine.
- Extract the OWL file from the zip download and save in a directory on your machine. This directory will be referred to as NCI_THESAURUS_DIRECTORY
Using the LexBIG utilities load the NCI Thesaurus:
cd {LexBIG_DIRECTORY}/adminFor Windows installation use the following command
LoadNCIThesOWL.bat -nf -in "file:///{NCI_THESAURUS_DIRECTORY}/Thesaurus_05.12f.owl"For Linux installation use the following command
LoadNCIThesOWL.sh -nf -in "file:///{NCI_THESAURUS_DIRECTORY}/Thesaurus_05.12f.owl"
Note
This step will require about three hours on a Pentium 3.0 Ghz machine. The total time to load NCI Thesaurus will vary depending on machine, memory, and disk speed.
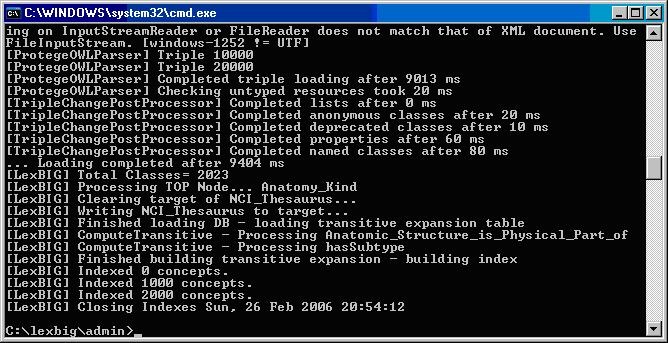
The following example shows output from load of NCI Thesaurus 05.12f.
 ...
 [LexBIG] Processing TOP Node... Retired_Kind
 [LexBIG] Clearing target of NCI_Thesaurus...
 [LexBIG] Writing NCI_Thesaurus to target...
 [LexBIG] Finished loading DB - loading transitive expansion table
 [LexBIG] ComputeTransitive - Processing Anatomic_Structure_Has_Location
 [LexBIG] ComputeTransitive - Processing Anatomic_Structure_is_Physical_Part_of
 [LexBIG] ComputeTransitive - Processing Biological_Process_Has_Initiator_Process
 [LexBIG] ComputeTransitive - Processing Biological_Process_Has_Result_Biological_Process
 [LexBIG] ComputeTransitive - Processing Biological_Process_Is_Part_of_Process
 [LexBIG] ComputeTransitive - Processing Conceptual_Part_Of
 [LexBIG] ComputeTransitive - Processing Disease_Excludes_Finding
 [LexBIG] ComputeTransitive - Processing Disease_Has_Associated_Disease
 [LexBIG] ComputeTransitive - Processing Disease_Has_Finding
 [LexBIG] ComputeTransitive - Processing Disease_May_Have_Associated_Disease
 [LexBIG] ComputeTransitive - Processing Disease_May_Have_Finding
 [LexBIG] ComputeTransitive - Processing Gene_Product_Has_Biochemical_Function
 [LexBIG] ComputeTransitive - Processing Gene_Product_Has_Chemical_Classification
 [LexBIG] ComputeTransitive - Processing Gene_Product_is_Physical_Part_of
 [LexBIG] ComputeTransitive - Processing hasSubtype
 [LexBIG] Finished building transitive expansion - building index
 [LexBIG] Getting a results from sql (a page if using mysql)
 [LexBIG] Indexed 0 concepts.
 [LexBIG] Indexed 5000 concepts.
 [LexBIG] Indexed 10000 concepts.
 [LexBIG] Indexed 15000 concepts.
 [LexBIG] Indexed 20000 concepts.
 [LexBIG] Indexed 25000 concepts.
 [LexBIG] Indexed 30000 concepts.
 [LexBIG] Indexed 35000 concepts.
 [LexBIG] Indexed 40000 concepts.
 [LexBIG] Indexed 45000 concepts.
 [LexBIG] Indexed 46000 concepts.
 [LexBIG] Getting a results from sql (a page if using mysql)
 [LexBIG] Closing Indexes Mon, 27 Feb 2006 01:44:22
 [LexBIG] Finished indexing
Installing NCI Metathesaurus Vocabulary
This section describes the steps to download and install a full version of the NCI Metathesaurus for the LexBIG Service.
- Using a web or ftp client go to URL: ftp://ftp1.nci.nih.gov/pub/cacore/EVS/
- Select the version of NCI Metathesaurus RRF you wish to download and save the file to a directory on your machine.
Extract the RRF files from the zip download and save in a directory on your machine. This directory will be referred to as NCI_METATHESAURUS_DIRECTORY.
Note
RELASE_INFO.RRF is required to be present for the load utility to work.
Using the LexBIG utilities load the NCI Thesaurus
cd {LexBIG_DIRECTORY}/adminFor Windows installation use the following command
LoadNCIMeta.bat -nf -in "file:///{NCI_METATHESAURUS_DIRECTORY}/"For Linux installation use the following command
LoadNCIMeta.sh -nf -in "file:///{NCI_THESAURUS_DIRECTORY}/"
Note
NCI Metathesaurus contains many individual vocabularies and requires several hours to load and index. This step requires about 15 hours on a Pentium 3.0 Ghz machine with 7200rpm disk. The total time to load NCI MetaThesaurus will vary depending on machine, memory, and disk speed.
Installing NCI History Information
This section describes the steps to download and install a history file for NCI Thesaurus.
- Using a web or ftp client go to URL: ftp://ftp1.nci.nih.gov/pub/cacore/EVS/
<TO BE DETERMINED> - Select the version of NCI History you wish to download. Save the file to a directory on your machine. Select the VersionFile download to the same directory as the history file.
- Extract the History files from the zip download and save in a directory on your machine. This directory will be referred to as NCI_HISTORY_DIRECTORY
Using the LexBIG utilities load the NCI Thesaurus
cd {LexBIG_DIRECTORY}/adminFor Windows installation use the following command
LoadNCIHistory.bat -nf -in "file:///{NCI_HISTORY_DIRECTORY}" -vf "file:///NCI_HISTORY_DIRECTORY}/VersionFile"For Linux installation use the following command
LoadNCIHistory.sh -nf -in "file:///{NCI_HISTORY_DIRECTORY}" -vf "file:///NCI_HISTORY_DIRECTORY}/VersionFile"
Note
If a 'releaseId' occurs twice in the file, the last occurrence will be stored. If LexBIG already knows about a releaseId (from a previous history load), the information is updated to match what is provided in the file. This file has to be provided to the load API on every load because you will need to maintain it in the future as each new release is made. We have created this file that should be valid as of today from the information that we found in the archive folder on your ftp server. You can find this file in the 'resources' directory of the LexBIG install.
Deactivating and Removing Vocabulary
This section describes the steps to deactivate a coding scheme and remove coding scheme from LexBIG Service.
Change directory to LexBIG administration directory. Enter:
cd {LEXBIG_DIRECTORY}/adminUse the DeactiveScheme utility to prevent access to coding scheme. Once a coding scheme is deactivated, client programs will not be able to access the content for the specific coding scheme and version. Example:
DeactivateScheme -u "urn:oid:2.16.840.1.113883.3.26.1.1" -v "05.12f"
Use RemoveScheme utility to remove coding scheme from LexBIG service and database. Example:
RemoveScheme -u "urn:oid:2.16.840.1.113883.3.26.1.1" -v "05.12f"
Tagging a vocabulary
This section describes the steps to tag a coding scheme to be used via LexBIG API.
Change directory to LexBIG administration directory. Enter:
cd {LEXBIG_DIRECTORY}/adminUse the TagScheme to tag a coding system and version with a local tag name (e.g. PRODUCTION). This tag name can be used via LexBIG API for query restriction. Example:
TagScheme -u "urn:oid:2.16.840.1.113883.3.26.1.1" -v "05.12f" -t "PRODUCTION"
System Monitoring and Debug
This section describes the configuration and use of LexBIG logs for system monitoring and debugging. The LexBIG service uses a set of log files. The log files are stored based on the LexBIG config.props file settings. Refer to Modifying the config.props file for LexBIG on page 23 for additional detail configuration parameters.
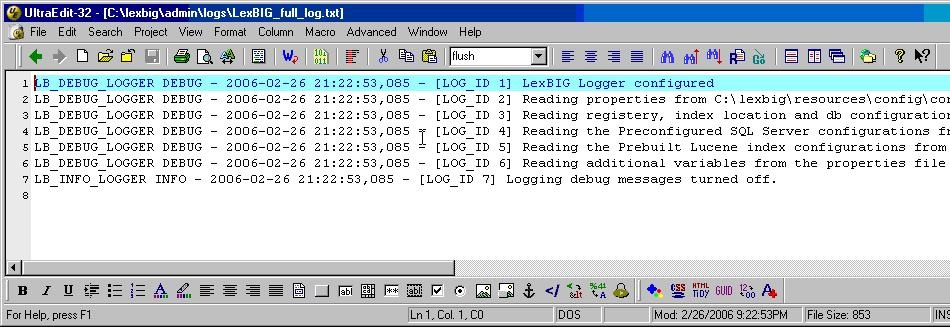
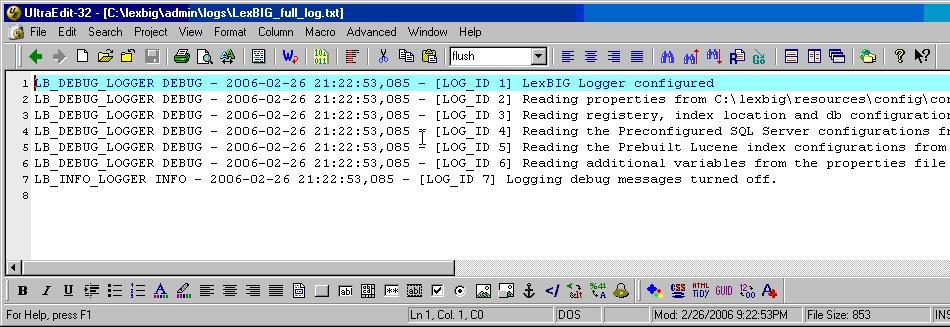
To view the LexBIG service and load log files perform the following steps.
- Change directory to LexBIG administration directory based on the settings of the
config.props log_file_locationsetting. - Open the file LexBIG_full_log.txt using text editor to review details about LexBIG service.
- Open LexBIG_load_log.txt using text editor to review details about vocabulary load utilities.
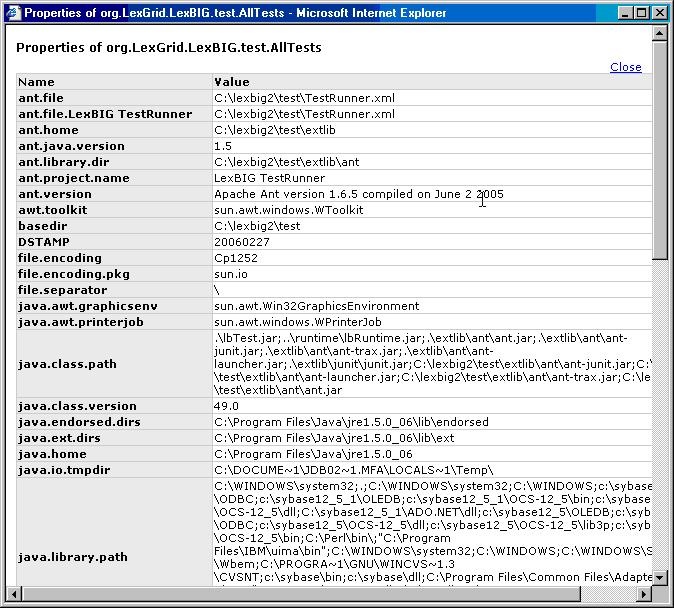
In addition to the log information, system properties are included as part of the system verification test as html or xml format. A sample of the system properties in html is included in the following figure.
Configuring Manifest Files
What Is Coding Scheme Manifest?
A "Coding Scheme Manifest" (or simply "manifest" as used interchangeably in this document) allows the user to set values for a coding scheme while loading or converting a LexGrid "XML", "NCI MetaThesaurus", "NCI OWL","OWL", "OBO", "UMLS RRF File", or"HL7 RIM Database" source to LexGrid format.
What Is Coding Scheme?
Coding Scheme is the term that is used to represent an ontology/terminology being loaded or converted. In the LexGrid data model a terminology is represented as a coding scheme and it can reference other coding schemes. An example of coding scheme is "Amino Acid" which is described in the "amino acid.owl" file.
A Coding Scheme has some meta information about it; values like 'formal name', 'local names', 'default language', 'version', 'copyright', 'sources' to name some.
Why Do We Need a Coding Scheme Manifest?
When a terminology is being converted to the LexGrid data model from its native format (in this case OWL), Coding Scheme information is read from the source file. Sometimes values may be missing (not provided or invalid) or the author/user of the terminology wants to override or set default values despite (or in addition to) what is provided in the source file. This can be accomplished using "manifest" files along with the source file.
How do we create a Coding Scheme Manifest file?
A coding scheme manifest file is a valid XML file, conforming to the schema defined by http://LexGrid.org/schema/LexBIG/2007/01/CodingSchemeManifestList.xsd. This XML file can define values for one or more coding schemes you are dealing with. Some coding scheme meta-information may not easily map to information in the source file. In this case a manifest file is of great help to bridge the gap and control the information flow while mapping to the LexGrid model. A detailed model of the LexGrid Coding Scheme and its fields can be found online. Structure of the schema for the manifest file is explained in the following table (manifest components refer to the original LexGrid model schema namespaces and types):
- Coding Scheme Manifest entry field: id
- Type: lgCommon:registeredName
- Required: Yes
- Override flag set: Not applicable
- Description:
The registered name is the key used to find a coding scheme (for example a unique URL or namespace by which other people access same coding scheme). This String value will be used to identify the manifest entry in the manifest file for the coding scheme too. For example the registered name for coding scheme "Amino-acid" is http://www.co-ode.org/ontologies/amino-acid/2006/05/18/amino-acid.owl#. This string is also set as the coding scheme's registered name field in the LexGrid model.
- Coding Scheme Manifest entry field: codingScheme
- Type: lgBuiltin:localId
- Required: No
- Override flag set: Yes
- Description:
This value will be set for 'coding scheme name' in the LexGrid format counterpart. If the override flag is set to 'true', the value provided in the source file will be replaced with this one. Otherwise, this value is treated as a default value and used only if the value is not provided in the source file.
- Coding Scheme Manifest entry field: entityDescription
- Type: lgCommon:entityDescription
- Required: No
- Override flag set: Yes
- Description:
This value will be set for 'coding scheme description' in the LexGrid format counterpart. If the override flag is set to 'true', the value provided in the source file will be replaced with this one. Otherwise, this value is treated as a default value and used only if the value is not provided in the source file.
- Coding Scheme Manifest entry field: formalName
- Type: lgBuiltin:tsCaseIgnoreIA5String
- Required: No
- Override flag set: Yes
- Description:
This value will be set for 'coding scheme formal name' in the LexGrid format counterpart. If the override flag is set to 'true', the value provided in the source file will be replaced with this one. Otherwise, this value is treated as a default value and used only if the value is not provided in the source file.
- Coding Scheme Manifest entry field: registeredName
- Type: lgCommon:registeredName
- Required: No
- Override flag set: Yes
- Description:
This value will be set for 'coding scheme registered name' in the LexGrid format counterpart. If the override flag is set to 'true', the value provided in the source file will be replaced with this one. Otherwise, this value is treated as a default value and used only if the value is not provided in the source file.
- Coding Scheme Manifest entry field: defaultLanguage
- Type: lgCommon:defaultLanguage
- Required: No
- Override flag set: Yes
- Description:
This value will be set for 'coding scheme default language' in the LexGrid format counterpart. If the override flag is set to 'true', the value provided in the source file will be replaced with this one. Otherwise, this value is treated as a default value and used only if the value is not provided in the source file.
- Coding Scheme Manifest entry field: representsVersion
- Type: lgCommon:version
- Required: No
- Override flag set: Yes
- Description:
This value will be set for 'coding scheme version' in the LexGrid format counterpart. If the override flag is
set to 'true', the value provided in the source file will be replaced with this one. Otherwise, this value is
treated as a default value and used only if the value is not provided in the source file.
- Coding Scheme Manifest entry field: localName
- Type: lgBuiltin:tsCaseIgnoreIA5String
- Required: No
- "To Add" flag set: Yes
- Description:
This value will be added for 'coding scheme local names'. If the add flag is set to 'true', this value will
be added to the list of local names (if not there already). Otherwise, this value is treated as the default
value and used only if the value is not provided in the source file.
- Coding Scheme Manifest entry field: source
- Type: lgCommon:source
- Required: No
- "To Add" flag set: Yes
- Description:
This value will be added for 'coding scheme sources'. If the add flag is set to 'true', this value will be
added to the list of sources (if not there already). Otherwise, this value is treated as the default value
and used only if the value is not provided in the source file.
- Coding Scheme Manifest entry field: copyright
- Type: lgCommon:text
- Required: No
- Override flag set: Yes
- Description:
This value will be set for 'coding scheme copyright' in the LexGrid format counterpart. If the override flag
is set to 'true', the value provided in the source file will be replaced with this one. Otherwise, this value
is treated as a default value and used only if the value is not provided in the source file.
- Coding Scheme Manifest entry field: mappings
- Type: lgCS:mappings
- Required: No
- "To Add" flag set: Yes
- Description:
This value will be added for 'coding scheme mappings'. If the add flag is set to 'true', this value will be
added to the list of mappings (if not there already). Otherwise, this value is treated as the default value
and used only if the value is not provided in the source file.
- Coding Scheme Manifest entry field: associationDefinitions
- Type: lgRel:association
- Required: No
- "To Add" flag set: Yes
- Description:
This value will be added for 'coding scheme associations'. If the add flag is set to 'true', this value will
be added to the list of associations (if not there already). Otherwise, this value is treated as the default
value and used only if the value is not provided in the source file.
Note
This option is used internally by the system to provide default recognition of some common associations. It is typically not necessary to provide this value, however, since association definitions are automatically derived from the source.
What Code Changes May Be Required To Use a Manifest File?
If you want to use the manifest file, you can supply the manifest file URI to the following methods when Loading NCI OWL or generic OWL Loads:
org.LexGrid.LexBIG.Extensions.Load.OWL_Loader.load()org.LexGrid.LexBIG.Extensions.Load.OWL_Loader.validate()
An example code snippet:
 LexBIGService lbs = new LexBIGServiceImpl();
    LexBIGServiceManager lbsm = lbs.getServiceManager(null);
    OWL_Loader loader = (OWL_Loader) lbsm.getLoader("OWLLoader");

 if (toValidateOnly)
   \{
        loader.validate(source, manifest, vl);
        System.out.println("VALIDATION SUCCESSFUL");
 \}
    else
   \{
        loader.load(new File("resources/testData/amino-
   cid.owl").toURI(),
   new File("resources/testData/aa-manifest.xml").toURI(),true,
   true);
 \}
For all other manifest loads the following methods are employed.
// Find the registered extension handling this type of load

LexBIGService lbs = new LexBIGServiceImpl();

LexBIGServiceManager lbsm = lbs.getServiceManager(null);

HL7_Loader loader = (HL7_Loader)lbsm.getLoader(org.LexGrid.LexBIG.Impl.loaders.HL7LoaderImpl.name);

// updated to include manifest

loader.setCodingSchemeManifestURI(manifest);

// updated to include loader preferences

loader.setLoaderPreferences(loaderPrefs);

loader.load(dbPath, stopOnErrors, true);
Loader Preferences
LexBIG loaders allow custom configuration using a loader preferences file. Loader preferences are limited in functionality and scope at present. The loaders for HL7 RIM, NCI Metathesaurus, UMLS SEMNET and NCI OWL currently support some loader preferences.
HL7 RIM and NCI MetaThesaurus both allow Metadata file location load preferences that provide customization of the location of the Metadata file generated by a loader by user option. The NCI OWL loader provides preferences for prioritizing comments, presentations and definitions within NCI OWL loads. Also provided is customization of a number of otherwise hardcoded values in the NCI OWL Loader. UMLS SEMNET preferences provides a range of inheritance values that determines whether inferred inheritance values are loaded or not. The range of customizable values are defined in the xsd schema files in the lbModel project available from the LexEVS project EVS on Gforge.
MetaThesaurus and HL7 metadata file locations are defined in the LoaderPreferences.xsd file as follows:
<xs:schema xmlns="http://LexGrid.org/LexBIG/LoadPreferences" targetNamespace="http://LexGrid.org/LexBIG/LoadPreferences" elementFormDefault="qualified" xmlns:xs="http://www.w3.org/2001/XMLSchema">

<xs:complexType name="LoaderPreferences">
		<xs:sequence>

<xs:element name="XMLMetadataFilePath" type="xs:string" minOccurs="0" nillable="true">
			</xs:element>

		</xs:sequence>
</xs:complexType>
</xs:schema>
NCI OWL preferences have the following values and ranges:
<xs:element name="OWLLoaderPreferences">
<xs:complexType>
	<xs:complexContent>
		<xs:extension base="lbPreferences:LoaderPreferences">
			<xs:sequence>

<xs:element name="PropnamePres" type="xs:string" minOccurs="0" />
<xs:element name="PropnamePrimitive" type="xs:string" minOccurs="0" />
<xs:element name="PropnameType" type="xs:string" minOccurs="0" />
<xs:element name="DatatypeBoolean" type="xs:string" minOccurs="0" />
<xs:element name="AssocHastype" type="xs:string" minOccurs="0" />
<xs:element name="AssocHastypeURN" type="xs:string" minOccurs="0" />
<xs:element name="ConceptAltName" type="xs:string" minOccurs="0" />
<xs:element name="MatchConceptCode" type="xs:string" minOccurs="0" />
<xs:element name="MatchConceptStatus" type="xs:string" minOccurs="0" />
<xs:element name="MatchNoopNamespaces" type="xs:string" minOccurs="0" />
<xs:element name="MatchRootName" type="xs:string" minOccurs="0" />
<xs:element name="MatchXMLRepformNames" type="xs:string" minOccurs="0" />
<xs:element name="MatchXMLSourceNames" type="xs:string" minOccurs="0" />
<xs:element name="MatchXMLTextNames" type="xs:string" minOccurs="0" />
<xs:element name="IsDBXrefSource" type="xs:boolean" minOccurs="0" />
<xs:element name="IsDBXrefRepform" type="xs:boolean" minOccurs="0" />

<xs:element name="PrioritizedCommentNames" minOccurs="0" nillable="true">
      					<xs:complexType>
  						<xs:sequence>
<xs:element name="name" nillable="true" maxOccurs="unbounded" minOccurs="0" type="xs:string"/>
  						</xs:sequence>
					</xs:complexType>
				</xs:element>

<xs:element name="PrioritizedDefinitionNames" minOccurs="0" nillable="true">
      					<xs:complexType>
  						<xs:sequence>
<xs:element name="name" nillable="true" maxOccurs="unbounded" minOccurs="0" type="xs:string"/>
  						</xs:sequence>
					</xs:complexType>
				</xs:element>

<xs:element name="PrioritizedPresentationNames" minOccurs="0" nillable="true">
      					<xs:complexType>
  						<xs:sequence>
<xs:element name="name" nillable="true" maxOccurs="unbounded" minOccurs="0" type="xs:string"/>
  					</xs:sequence>
					</xs:complexType>
				</xs:element>

			</xs:sequence>
		</xs:extension>
		</xs:complexContent>
	</xs:complexType>
 </xs:element>
Loader preferences for a given loader can be loaded from a file in the following format example for the NCI OWL loader.
<OWLLoaderPreferences xmlns:basePreferences="http://LexGrid.org/LexBIG/LoadPreferences">

<MatchConceptCode>currency</MatchConceptCode>

<PrioritizedCommentNames>
<name>units</name>
</PrioritizedCommentNames>

<PrioritizedDefinitionNames>
<name>max</name>
</PrioritizedDefinitionNames>

<PrioritizedPresentationNames>
<name>currency</name>
</PrioritizedPresentationNames>

</OWLLoaderPreferences>
Preferences are pulled into code used to wrap a loading process in the following manner:
	// Find the registered extension handling this type of load ...
			LexBIGService lbs = LexBIGServiceImpl.defaultInstance();
			LexBIGServiceManager lbsm = lbs.getServiceManager(null);

OWL_Loader loader = (OWL_Loader) lbsm.getLoader(org.LexGrid.
LexBIG.Impl.loaders.OWLLoaderImpl.name);

			// Perform the requested load or validate action ...
			if (vl >= 0) {
				loader.validateNCI(source, manifest, vl);
				Util.displayTaggedMessage("VALIDATION SUCCESSFUL");
			} else {
			    if (loaderPrefs != null)
			      loader.setLoaderPreferences(loaderPrefs);
loader.loadNCI(source, manifest, memorySafe, stopOnErrors, true);
				Util.displayLoaderStatus(loader);
			}
Variable loaderPrefs is a path to a preferences file.
System Administration
Preliminary Considerations
Before You Begin
This section provides an overview of the components as related to system adminstration, backup, and recovery. Individual organizations may have there own backup and diaster recovery procedure.
Database Installation
Database systems as described in the section Required Software—Not Included in LexBIG provide the storage for vocabularies loaded into LexBIG. For each vocabulary version loaded into LexBIG a new database is created. As defined in the config.props files the db_prefix variable is used to create the database name.
For example with db_prefix=lexbig, each new vocabulary version that is loaded a new database is created using an incremental counter.
- lexbig1
- lexbig2
- lexbig3
- lexbigN
Depending on backup strategy, system administrators will need to be aware that multiple databases are being created and may need backup procedures to meet servicability and recovery requirements for your organization.
LexBIG Installation
The LexBIG software, documentation, indexes, and system logs are located in the {LEXBIG_DIRECTORY} (e.g., /usr/local/packages/LexBIG or c:\lexbig). These files may be part of the local file system and may require backup procedures to meet servicability and recovery requirements for your organization.
LexBIG uses basic database indexes, but also includes a separate indexing facility using Apache Lucene. Lucene Index files are stored in a directory as specified in the config.props file index_location variable.
Appendix I: What Is Installed
LexBIG Components
The LexBIG installation includes the following components:
- Administrative Programs for managing LexBIG server
- ActivateScheme
- ClearOrphanedResources
- CodingSchemeSelectionMenu
- DeactivateScheme
- ExportLgXML
- ExportOBO
- ExportOWL
- ListExtensions
- ListSchemes
- LoadFMA
- LoadHL7RIM
- LoadLgXML
- LoadMetadata
- LoadNCIHistory
- LoadNCIMeta
- LoadNCIThesOWL
- LoadOBO
- LoadOWL
- LoadRadLex
- LoadUMLSDatabase
- LoadUMLSFiles
- LoadUMLSHistory
- LoadUMLSSemnet
- RebuildIndex
- RemoveIndex
- RemoveMetadata
- RemoveScheme
- TagScheme
- TransferScheme
- Documentation
- JavaDocs
- LexBIG Programmer Guide
- LexBIG Installation and Administration Guide
- Program Examples for common vocabulary functions using sample vocabulary
- FindConceptNameForCode
- FindPropsAndAssocForCode
- FindRelatedCodes
- FindTreeForCodeAndAssoc
- LexBIG Automated Verification Test Suite
- LexBIG Runtime jar (combined archive)
- LexBIG Runtime components (combined archive with 3rd party jars outside of archive)
- LexBIG Uninstaller
- LexBIG License Terms and Conditions
- Configuration files to enable you to customize your installation to meet your specific database, server, and other network needs
- config.props
What's Inside
This section describes the location and organization of installed materials. Following installation, many of the following hierarchy of files and directories will be available (some features are optionally installable):
The following table describes the contents of the LexBIG installation root directory.
Directory | Description of Content |
|---|---|
| Installed by default. This directory provides a centralized point for command line scripts that can be executed to perform administrative functions such as the loading, activation/deactivation, and removal of vocabulary resources. Object code used to carry out these functions is included directly in the LexBIG runtime components. Source code is included in the |
| Optionally installed. This directory provides documentation related to LexBIG services, configuration, and execution. This guide is distributed in the |
| This directory provides documentation for model classes and public interfaces available to LexBIG programmers. Also included with each object representation is a UML-based model diagram that shows the object, its attributes and operations, and immediately linked objects. The diagrams work to provide clickable navigation through the javadoc materials. |
| Optionally installed. This directory provides a small number of example programs. |
| Contains sample vocabulary content for reference by the example programs; use the |
| Optionally installed. This folder contains programs and supporting files to launch the LexBIG Graphical User Interface (GUI). The GUI provides convenient centralized access to administrative functions as well as support to test and exercise most of the LexBIG API. The GUI is launched using a platform-specific script file in the |
| Default location for log files, which can be modified by the LOGFILELOCATION entry in the |
| Installed by default. This directory contains resources referenced and written directly by the LexBIG runtime. It should, in general, be considered off-limits to modify or remove the content of this directory without specific guidance and reason to do so. Files typically stored to this location include the vocabulary registry (tracking certain metadata for installed content) and indexes used to facilitate query over the installed content. |
| Installed by default. This directory contains a Java archive (.jar) file containing the combined object code of the LexBIG runtime, LexBIG administrative interfaces, and any additional code they are dependent on. All required code for execution of LexBIG administrative and runtime services is installed to this directory.
|
| The JDBC drivers used to connect to database repositories are not included in the Note While the LexBIG software package ships with JDBC drivers to certain open source databases such as mySQL and PostgreSQL, this folder provides a mechanism to introduce updated drivers or to add drivers for additional supported database systems. For example, the Oracle database is supported by the runtime environment. However, the drivers are not redistributed with the LexBIG software. To run against Oracle, an administrator would add a jar with the appropriate JDBC driver to this directory and then reference it in the |
| Optionally installed. Due to license considerations for additional materials (as described by the Note These files are included as an alternative to the |
| This subdirectory includes all 3rd party code redistributed with the LexBIG runtime, along with respective license agreements. |
| Optionally installed. This directory provides central accessibility to Java source for all code developed for the LexBIG project. |
| Optionally installed. This directory provides an automated test bucket that can be used by System Administrators to verify node installation. Note that the |
| Contains an executable jar that can be invoked by an administrator to uninstall files originally introduced by the LexBIG installation. |
Appendix II: LexBIG GUI Admin Tool
If you choose to install the LexBIG GUI when you installed LexBIG - you will have a 'gui' folder inside of your LexBIG base installation. If you installed the GUI for all operating systems, you should have the following programs
- Linux_64-lbGUI.sh
- Linux-lbGUI.sh
- OSX-lbGUI.command
- Windows-lbGUI.bat
- Windows-lbGUI -browser.bat
We provide two Windows shell script versions which allow a choice between the full fledged loading, managing and "end use" or "end use" only type interfaces.
This shell script provides an example by which any shell script can pass an argument option "-d" into the java command launching the LexBIG GUI application, restricting the end user to browsing only and allowing no loading or management of terminologies.
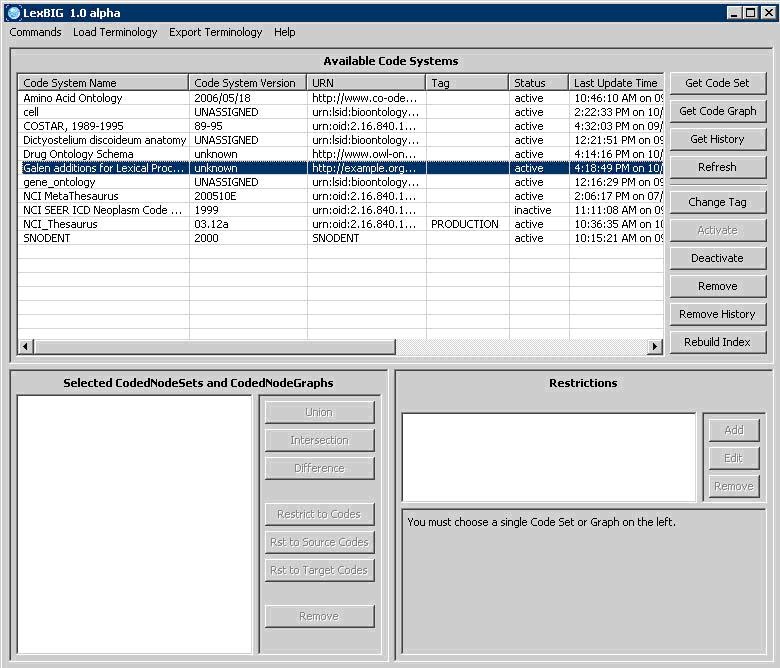
Launch the GUI by executing the appropriate script for your platform. You will be presented with an application that looks like the following figure:
This application will let you perform most administrative functions that are available in the LexBIG API. To enable the administrative functions, first, go to the 'Commands' menu, and then click on the 'Enable Admin Options' submenu. This will enable all of the commands that can make changes to the LexBIG environment.
This guide will only cover the administrative commands - please refer to the programmers guide for instructions on the rest of the LexBIG GUI.
Each administrative command is described in turn in the following tables, starting with the menus.
Commands Menu
SubmenuProperty Name | Menu Action |
|---|---|
Configure | This menu option will bring up a dialog which will show you all of the options from the current config.props file. You can make changes to individual variable here - but these changes will only affect the GUI - they will not be written back out to the config.props file. You can also choose which config.props file that you want to use. |
Enable Admin Options | This option enables or disables all of the GUI features which are considered administrative options. |
Clean Up | This command will run the clean up orphaned resources tool. It will give you a listing of any resources that are orphaned in the LexBIG environment, and give you the option to remove them. |
View Log File | This will show you the all of the logs messages that have occurred during the LexBIG GUI session. The log file viewer also has choices to let you customize the types of messages that are logged. |
Exit | Close the application. |
Export Terminology Menu
SubmenuProperty Name | Menu Action |
|---|---|
Export as OBO | This menu option will launch an exporter that exports the selected terminology into an OBO 1.2 format. |
Export as LexGrid XML | This menu option will launch an exporter that exports the selected terminology into the LexGrid XML format. |
Now that all of the menus have been covered, we will go over the administrative buttons in the LexBIG GUI. These can be found in the lower right area of the top half of the application.
Button | Button Action |
|---|---|
Change Tag | Brings up a dialog that allows you to set (or remove) the tag on the selected terminology. |
Activate | Activates the selected terminology. Only available if the terminology is currently deactivated. |
Deactivate | Deactivates the selected terminology. Only available if the terminology is currently activated. |
Remove | Deletes the selected terminology. |
Remove History | Removes the NCI History data for the selected terminology. Only applicable to NCI Thesaurus terminologies. |
Rebuild Index | Rebuilds the internal indexes for the selected terminology. If no terminology is selected, rebuilds the indexes for all terminologies. |
Contacting Technical Support
LexBIG Application Support can be contacted at:
Division of Biomedical Statistics and Informatics
Mayo Clinic
200 1st ST SW
Rochester, MN 55905
informatics@mayo.edu

