NBIA role required to use this feature: NCIA.SUPER_CURATOR
For more information about roles, see Creating a New NBIA User.
A workflow is a business process that, in the case of NBIA, an image series must pass through before it is published. Since it is a business process, these steps must be defined first within an organization. NBIA allows you to change the visibility status of an image series. This visibility change is part of the definition of a workflow item. Workflow items can also trigger a web service call to a URL. When you define a workflow item, you specify a name for it, the type of action that will take place during it (such as a visibility change), which image collection and site are involved, and the URL of a web service if the information resulting from this workflow item should be sent to one.
You can create, edit, and delete workflow items
Creating a Workflow Item
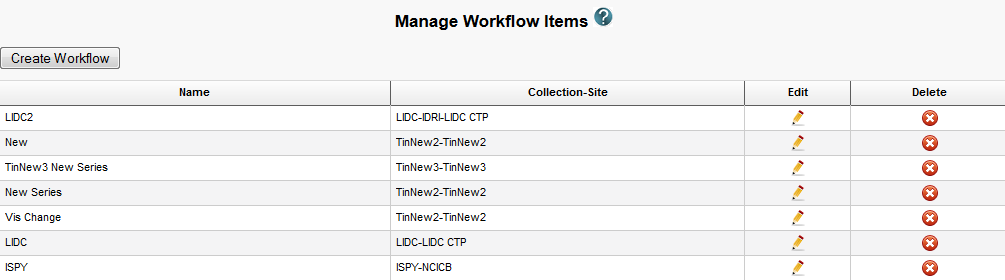
- Select Admin > Manage Workflow Items.
The Manage Workflow Items page appears.
- Click Create Workflow.
The Workflow Item page appears.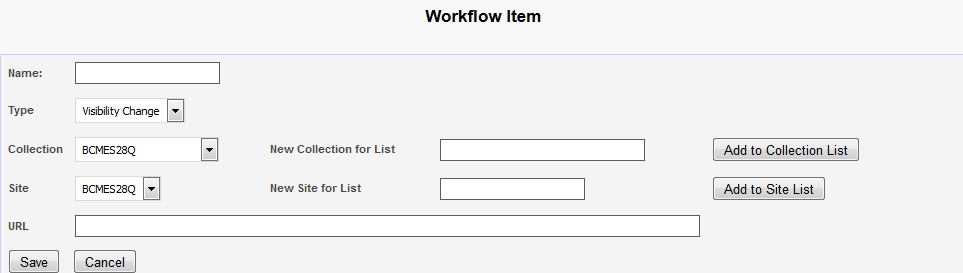
In the Name box, specify a name for the new workflow item. The name cannot be longer than 50 characters.
From the Type list, select Visibility Change or New Series.
Select the Visibility Change option when editing an existing workflow item. A visibility change occurs when the workflow item triggers a web service call to the URL you have entered in the URL field on this page.
Select the New Series option if you want the result of this workflow item to create a new image series. You can add this new series to a collection in the next step.
- From the Collection list, select an existing image collection to which this workflow item should apply. Existing image collections are in the Collection list. If you need to create a new collection to apply to this workflow item, enter it in the New Collection for List box and then click Add to Collection List.
- From the Site list, select an existing site. Existing sites are in the Site list. If you need to create a new site to apply to this workflow item, enter it in the New Site for List box and then click Add to Site List.
- To send information in this workflow item to a web service, enter the web service's URL in the URL box.
- Click Save.
The new workflow item appears on the Manage Workflow Items page.
Editing a Workflow Item
You can edit a workflow item's name and collection/site.
To edit a workflow item
- Select Admin > Manage Workflow Items.
The Manage Workflow Items page appears.
- Click the
 in the row of the workflow item you want to edit.
The Workflow Item page appears, showing the values already set for the workflow item you selected.
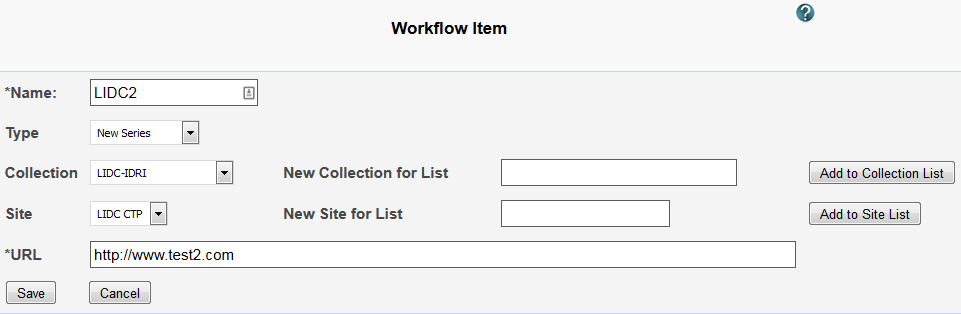
- Edit the name, type, collection, site, or URL as needed, consulting Creating a Workflow Item for details on these steps.
- Click Save.
Deleting a Workflow Item
To delete a workflow item
- Select Admin > Manage Workflow Items.
The Manage Workflow Items page appears.
- Click
 in the row of the workflow item you want to delete.
You are prompted to confirm the deletion.