This chapter describes how to search the local and any selected remote image databases for images.
Topics in this chapter include:
Performing Searches
NBIA enables you to search for images in the local NBIA in vivo image repository. If available, you can also search remote imaging archives.
NBIA is designed to perform the following tasks:
- Search for images in simple or advanced search mode
- Combine search criteria defined in those searches with keyword searches of curated annotation data
- Save the search queries to be used repeatedly
- Review query histories
As subjects, studies, series or images are located, save them to your data basket for download.
Downloading series with annotation files
When you download a series that has annotation files (indicated by Yes in the Contains Annotations column), they are automatically downloaded as well.
NBIA submissions are organized in the following hierarchy, which is important to remember in creating your search query and reviewing search results:
Collection > Patient (Subject) > Study > Series > Images |
|---|
NBIA provides three search modes:
Performing a Simple Search
To perform a simple search
On the NBIA home page, click Simple Search or Search Images > Simple Search.
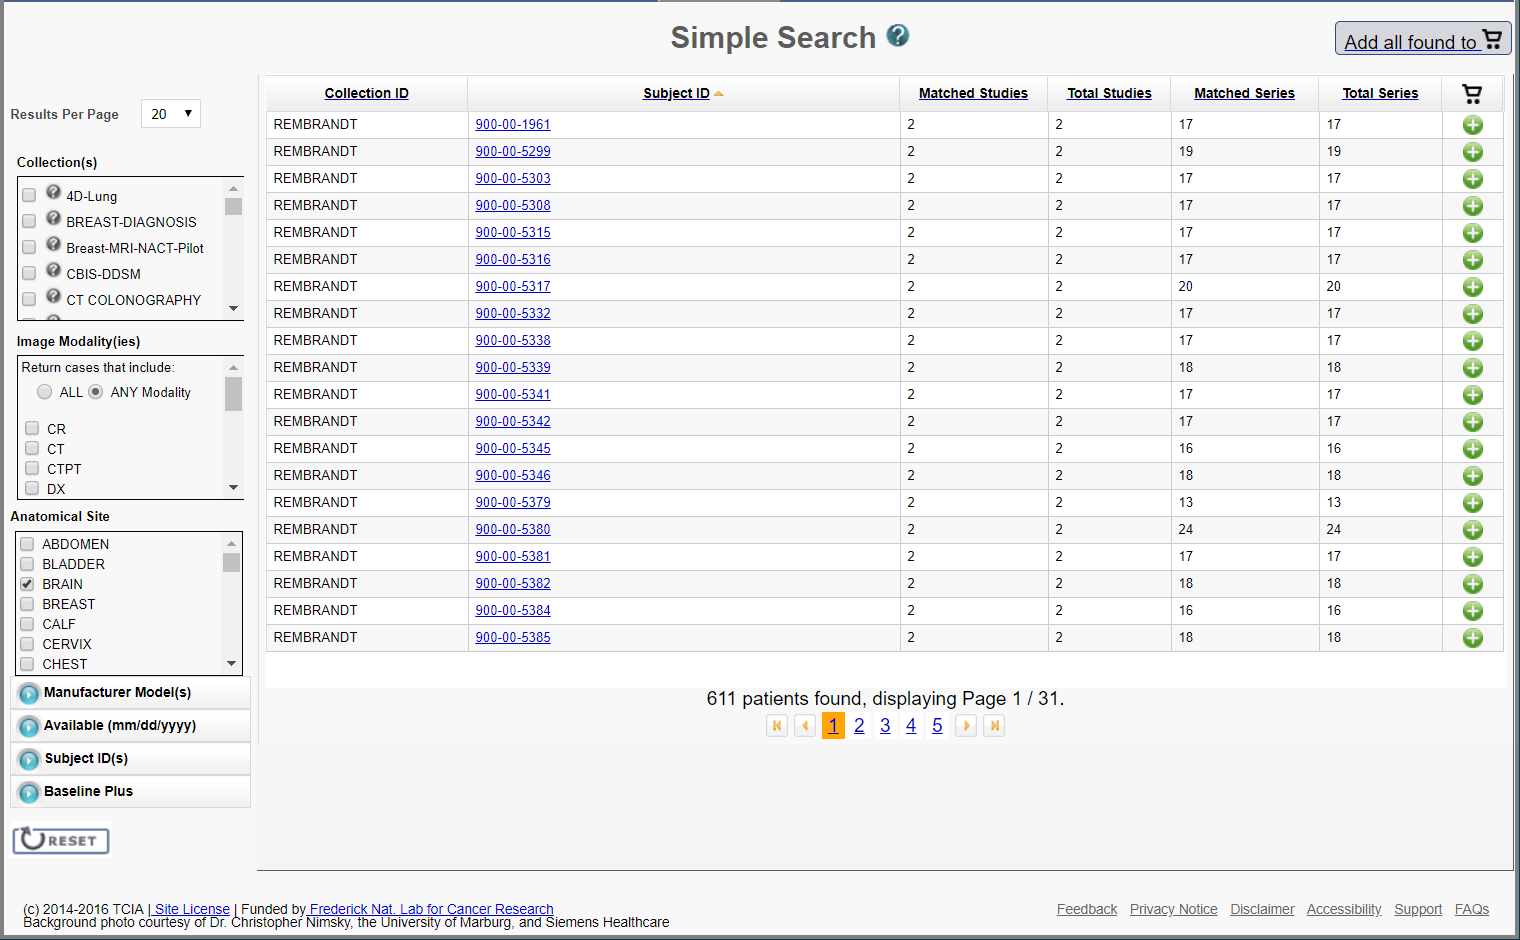
The Simple Search page appears.
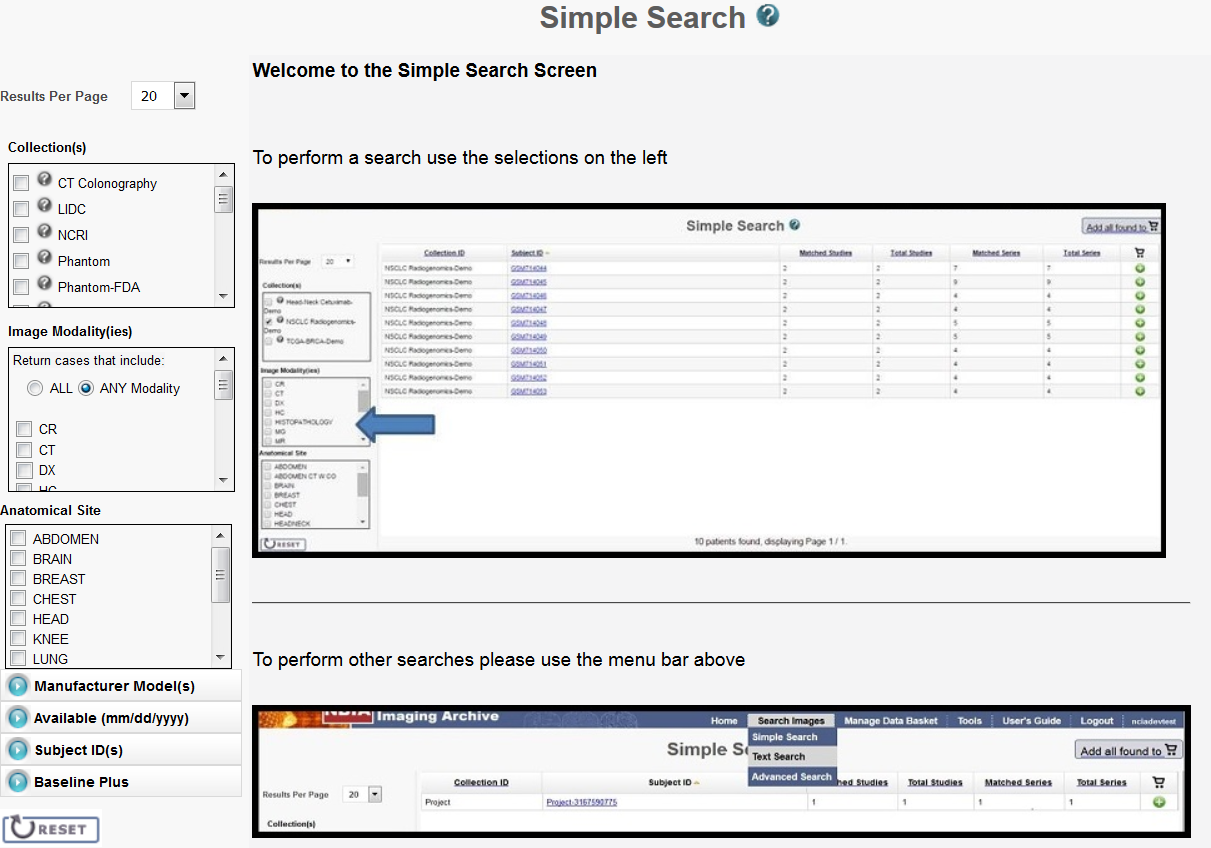
Choose the search criteria as described in the following table.Description Simple Search Criteria Results per Page Select the number of search results per page the search will return.
Collection(s) Collections are NCI-defined groupings of image data sets. Select from the collections to which you can access. If none are selected, then the search returns data for all collections.Click the (?) icon next to the collection name to display a popup with the collection description if it exists.
Click Collection Descriptions for more information about the collections.
Image Modality(ies) Select from the available image classifications. If none are selected, then the search returns data for all modalities.
Specify whether to Return cases that include All or ANY Modality.
Modality description
Descriptive text for the modality displays when you hover the cursor over the option.
The NBIA data portal can perform ultrasound-specific searches. To launch an ultrasound image search, select US in the list of Image Modalities. When you do so, three additional search options display on the page, shown below. Configure the options appropriately for the ultrasound data you want to search.
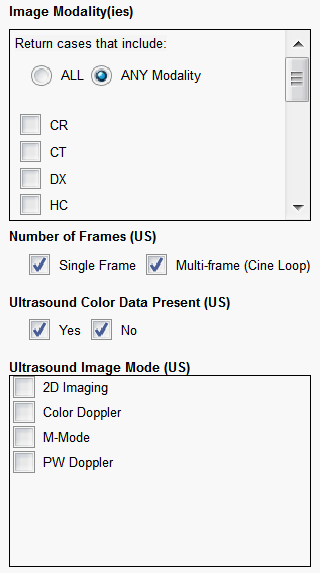
- Number of frames: One ultrasound DICOM file can consist of multiple frames which you can specify in this option.
- Specify if Ultrasound Color Data is present.
- Specify one or more Ultrasound Image Modes.
If you choose to view an ultrasound DICOM file in animation, NBIA loops through all of the images in the file.
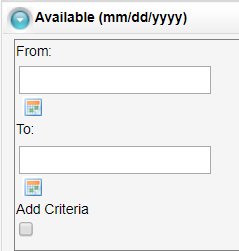
Anatomical Site To further restrict the search, optionally choose the anatomical site of interest. Manufacturer Model To restrict manufacturer model results, uncheck All Manufacturers. Expand and display the list as needed, and select the items to restrict the search. Available (mm/dd/yyyy) To restrict results to the date the image became available in the system, expand the panel, enter from and to dates and select Add Criteria to perform the search.
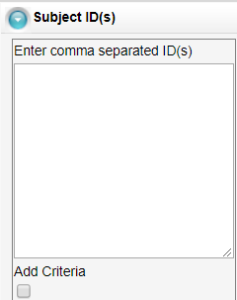
Subject ID To restrict results to a comma-separated list of patient IDs, expand the panel, enter the list of patient IDs, and select Add Criteria to perform the search.
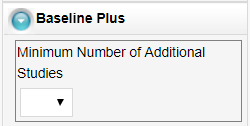
Baseline Plus Expand the panel and specify the Minimum Number of Additional Studies.
To clear the search criteria and start over, click
 .
.The search results appear.
Save the Query
You can save your search criteria to make it easier to repeat this query in the future. After you have selected one or more search criteria, the Save Query link appears at the bottom left of the page.
To save a search query- Select search criteria.
In the box above the Save Query link, enter a name for your query.
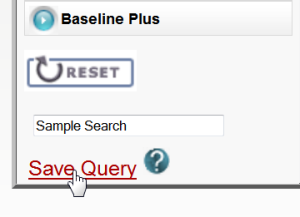
Click Save Query.
The query is saved. You can see it by selecting Tools > View Saved Queries.
For more information, see Managing Saved Queries.
Navigation Tips
- Click the down arrow next to a column title to sort the column by that item.
- Click the arrows at the bottom of the table to display the first, previous, next, or last page of results.
- Click the page number links to move to a specific page of results.
The Search Results (Studies for Subject) page shows studies associated with the subject that you selected on the Search Results by Subject page. Each study, identified by Study Instance ID, Description, and Date, is followed by a table with rows for each image series in the study. At the top and bottom of the page, breadcrumbs in the format Search >> Study show the level of the data on the page. Clicking Search in those breadcrumbs returns you to your original search results.The following table describes the data available for each study and image series in that study.
Field
Description
DICOM Web Viewer link Click this link to see all study images in the DICOM Web Viewer.
Series
Series identification number
Description
Description of the series
Modality
Image modality
Manufacturer
Name of the manufacturer of the image series
Images
Displays the number of images in the series. This number includes visible images that meet the search criteria.
Thumbnails Click this link to display thumbnails of the series' images. For more information, see Search Results (Images for Series).
Cine Mode Click
 in a series record to launch an animation of the series. This feature is only available when two or more thumbnails are available for the series. For more information, see Viewing Image Animation.
DICOM Click
 to open a new window that displays DICOM metadata about the first image in the series.
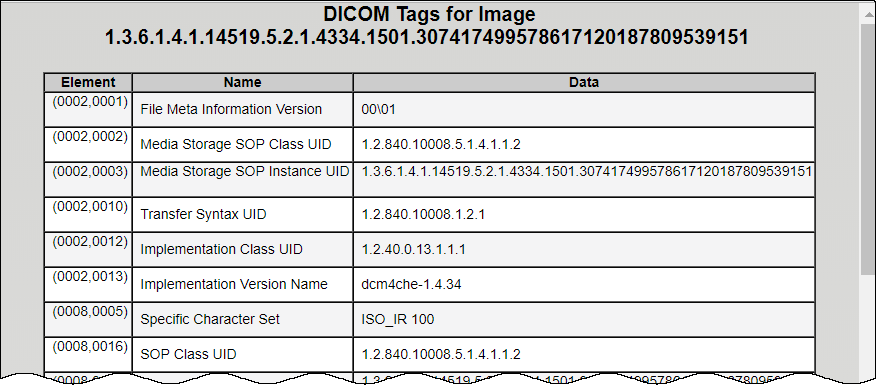
Each image series can have multiple images whose thumbnails display in this search results page. While each image has its own DICOM file whose attributes may vary slightly from the others in the series, the DICOM file that opens displays values for only the first image in the series. These values represent the values for all images in the series.Add to Basket
- Click
 to select a series and add it to your data basket, or
  to remove it from your data basket.
 - To mark all series in the search results as records you want to add to your data basket, click
 .
.
For more information, see Managing the Data Basket.
Add a Study series to Basket To add only the series in a single study in the search results to your basket, click
 in the Add This Study to Basket section.
Performing a Text Search
Text search does have some restrictions. These are:
- The text string you use must have more than one character. The search won't return any values if the text string has only one character.
- Do not use a forward slash (/) in your text string.
- Do not use complex searches with AND or OR statements (text search supports Lucene syntax but only a single field can be searched at a time).
To perform a text search
On the NBIA home page, click Text Search or Search Images > Text Search.
The Text Search page appears.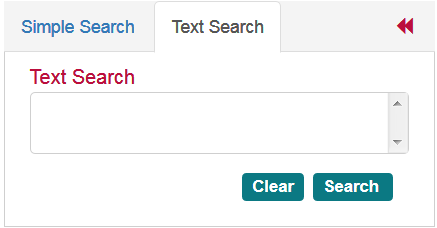
- Select the number of search results per page you want the search to return.
- In the box at the top of the page, enter a text string of two characters or more.
Click
 .
.
The search results appear.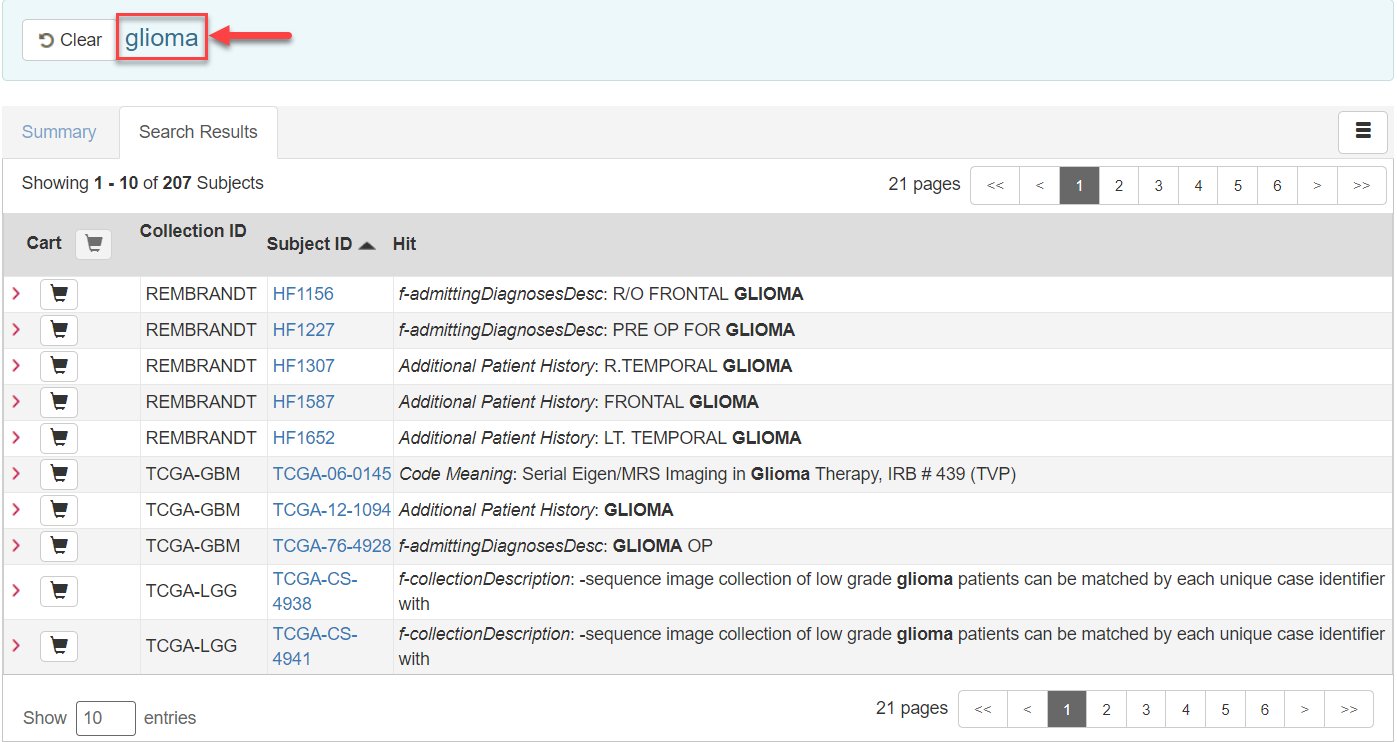
Navigation Tips
- Click the down arrow next to the Subject ID column header to sort the results alphabetically (A to Z or Z to A) by Subject ID.
- Click the arrows at the bottom of the table to display the first, previous, next, or last page of results.
- Click the page number links to move to a specific page of results.
- In the Show (10) entries box in the bottom left, edit the default 10 to the number of entries you want to see on a search results page.
- For performance Text Search will only return the first 3000 subjects that match the criteria
The following table describes each item in the search results table.
| Search Result | Description |
|---|---|
| Click the caret to view the subject details. Click the cart symbol to add image series to your cart. |
| Collection ID | Collection identifier |
| Subject ID | Click the Subject ID to view the details for all study images for this subject, a single series' thumbnails, or the DICOM header for the first image in the series. |
| Hit | The field in the study where the text string that you entered in the search criteria appears. |

Performing an Advanced Search
To perform an advanced search
- On the NBIA home page, click Advanced Search or Search Images > Advanced Search.
The Advanced Search page appears.
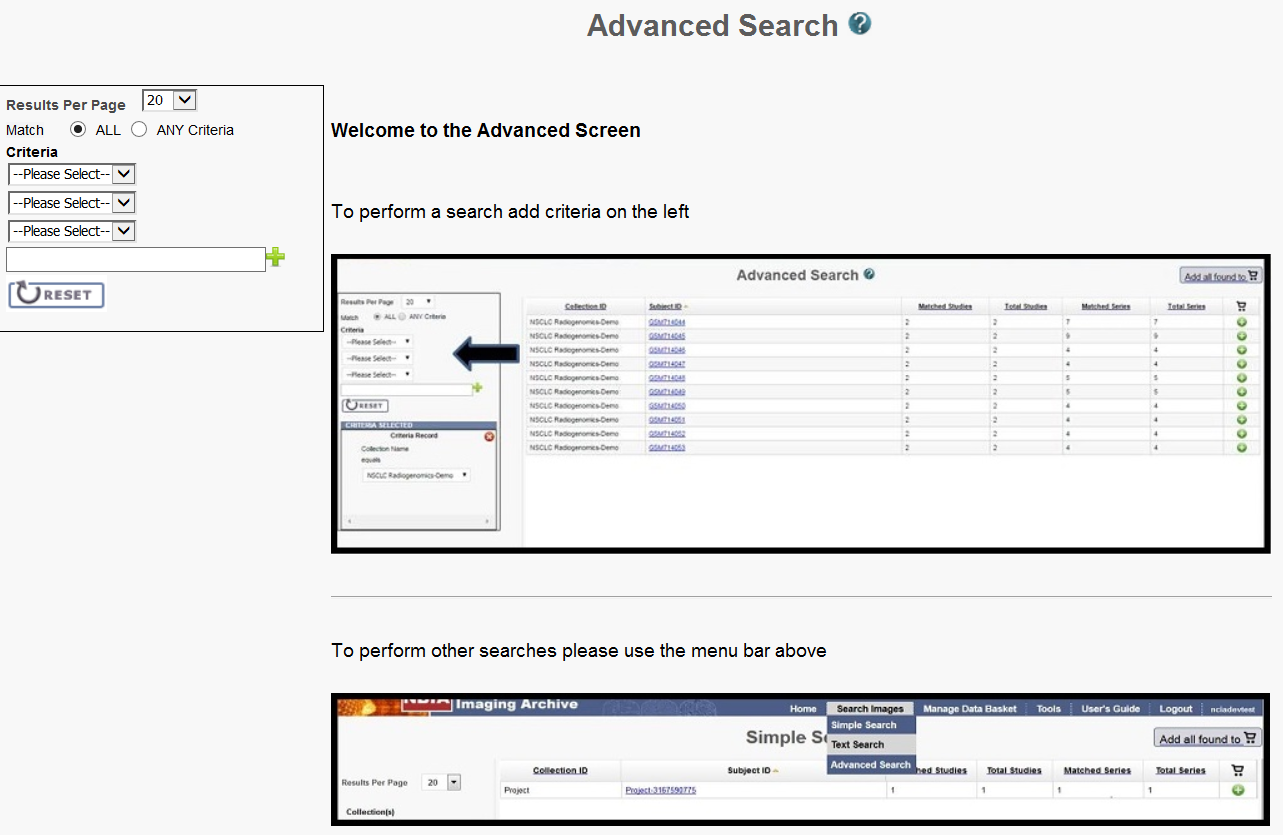
- Select the number of search results per page the search will return.
- From the Match options, select ALL to find image series that meet all of your search criteria or select ANY Criteria to find image series that meet any of your search criteria.
- From the first Criteria list, select an NBIA entity. Your selection here determines the options available for the rest of the search criteria.
Select options from the lists or enter text into the box as needed to perform your search. If you enter text into the box, click the Add icon (
 ) for each set of criteria you define.
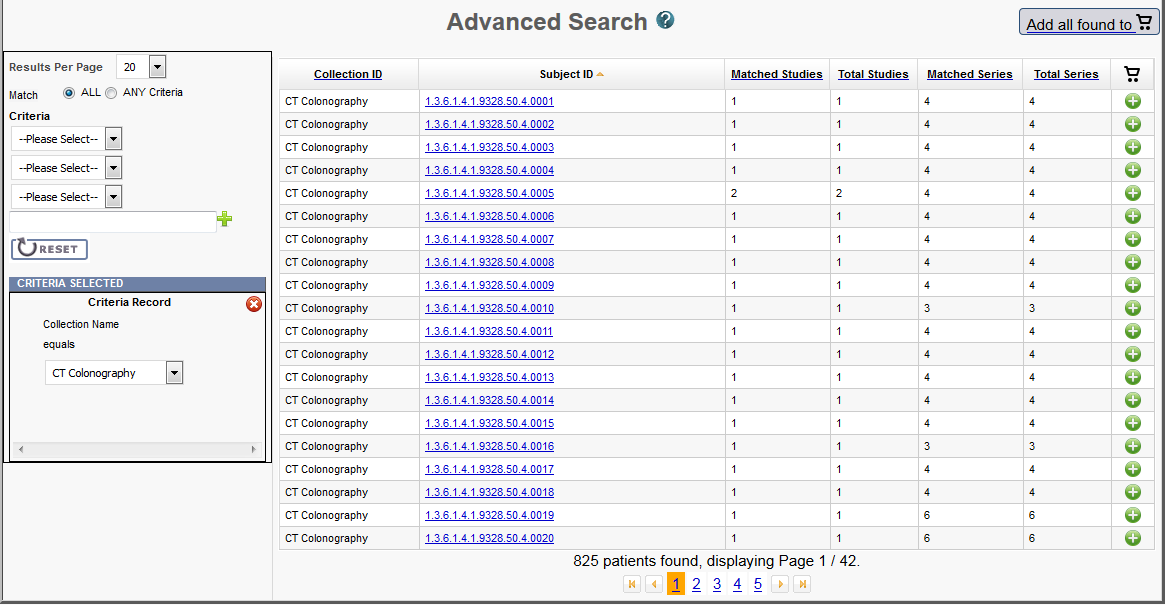
As soon as you specify the final criterion, the criteria you selected appear in the box below the criteria and the search results appear to the right.Modality searches
Modality searches only support the CT and MR modalities.
Navigation Tips
- Click the down arrow next to a column title to sort the column by that item.
- Click the arrows at the bottom of the table to display the first, previous, next, or last page of results.
- Click the page number links to move to a specific page of results.
The following table describes each item in the search results table.
Search Result Description Collection ID Collection identifier Subject ID Click the Subject ID to view all study images for this subject in a DICOM web viewer, a single series' thumbnails, or the DICOM header for the first image in the series. See Search Results (Studies for Subject).
Matched Studies Total number of studies for this subject that match the search criteria
Total Studies Total number of studies for the subject Matched Series Total number of image series for the subject that match the search criteria Total Series Total number of image series for the subject 
Add the images for a single series or the entire study to your data basket. When you have marked a record for addition to the data basket, it is highlighted in yellow.
- Click
 to select the record and
  to clear it.
 - To mark all records in the search results as records you want to add to your data basket, click the basket icon in the column header or click
 .
.
For more information, see Managing the Data Basket.
To further refine your results, select new search criteria. These new criteria filter your existing results and as with the previous search, the criteria you selected appear in a box below the criteria. Click the
 to delete the record from the page or click
  to delete all criteria and start over.
Working with Saved Queries
While performing a Simple Search, you can save your choice of Collection(s), Image Modality(ies), and Anatomical Site as a named query. You can then run that query in the future or edit it if you want to change any of the search criteria. That edited query can either update your original query or become a new query with a new name.
The following procedures are associated with saved search queries.
Creating Saved Queries
- Select search criteria.
In the box above the Save Query link, enter a name for your query.
Click Save Query.
The query is saved. You can see it by selecting Tools > View Saved Queries.
Viewing and Editing Saved Queries
Disallowed Collections and Saved Queries
If you save a query when you have access to a collection then subsequently lose that access, you do not lose the saved query. However, records from a disallowed collection are not included in the search results.
To view, edit, and resubmit saved queries
- Select Tools > View Saved Queries.
The Saved Queries page appears.
The query table is sorted in descending order by Last Executed date by default. You can also sort by Query Name by clicking on the down arrow next to the column title.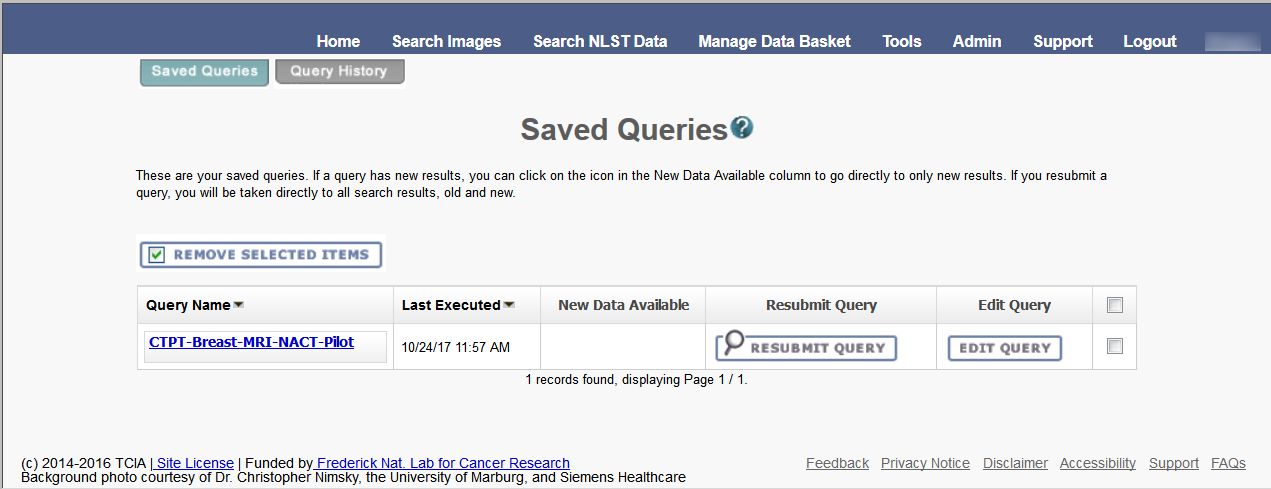
The following table describes the information about your saved queries on this page.
Saved Query | Description |
|---|---|
Query Name | The name of the query displays as a link. The default is that the criteria themselves do not display. The link toggles whether the criteria for the saved query displays. Click the link to display/not display the criteria selected for the query. |
Last Executed | The most recent date and time you executed the query displays. The time is displayed for the Eastern Time (US and Canada) time zone. |
New Data Available | An icon ( |
Resubmit Query | Click this button to open the Simple Search page showing all available results of the currently saved search criteria. A message appears in the lower left corner identifying the source of the search results.
|
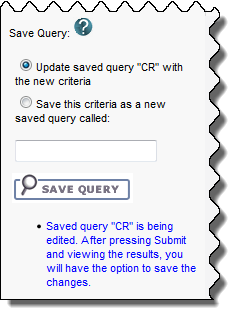
Edit Query | Click this button to open the Simple Search page with the currently saved search criteria selected. In the lower left corner of the page, the Save Query section provides the options to update the saved query with new criteria or to save these criteria as a new saved query, with a box for the new query name. Select an option and click Save Query.
|
Check Box | Click the check box to mark the query for deletion. You can click the checkbox in the header to select all queries or you can select queries individually. Click Remove Selected Items. The Manage Saved Queries page displays a message indicating success or failure and any additional actions that are required. |
You can also perform the following action on the Saved Queries page.
| Action | Description |
|---|---|
| View Query History | Click the Query History tab. The View Query History page appears. For more information, see Viewing Query History. |
Viewing Query History
- Select Tools > View Query History link
or
Click the Query History tab from the Saved Queries page.
The Query History page appears. The Query History page displays a table of the last twenty queries that you executed. These include saved queries that you resubmitted as well as queries you have not saved.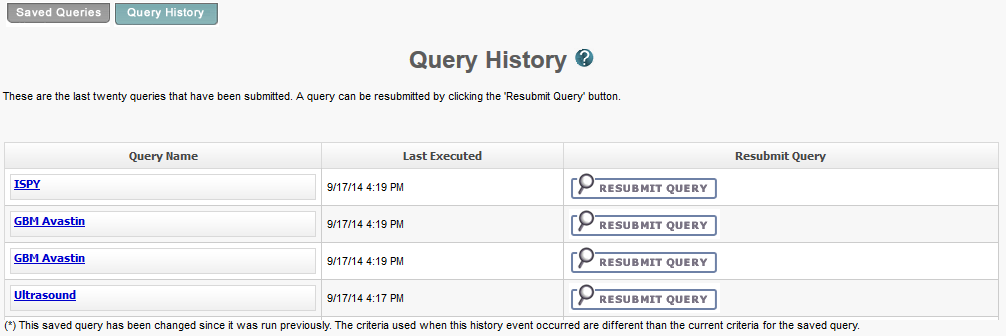
The Query History page contains the following information:
Field Name | Description |
|---|---|
Query Name | The name of the query displays as a link. The link toggles whether the criteria for the executed query is displayed. The text of the link can appear in three different ways depending on the situation.
|
Last Executed | The date and time that you executed the query. The time is displayed for the Eastern Time (US & Canada) time zone. |
Resubmit Query | Click the Resubmit Query button to submit the query using the saved criteria. The results display on the Search Results page. |
Click the Saved Queries tab to view, edit, or resubmit saved queries (see Managing Saved Queries).