NIH | National Cancer Institute | NCI Wiki  

Error rendering macro 'rw-search'

null

Versions Compared

Key

  • This line was added.
  • This line was removed.
  • Formatting was changed.

...

Step

Action

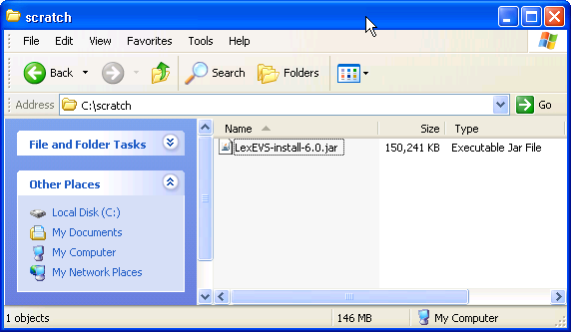
1. Download the latest version of the Local Runtime GUI install package from the right. The location you have chosen to save this on your computer will be referred to as the SAVE_DIRECTORY. Examples will use scratch as the directory.

Note
titleNote

If you plan to install LexEVS Distributed or the LexEVS Grid Services then you must install matching versions in conjunction with the Local Runtime.

Note
titleNote

Access to the downloads does not require an account. If you are having trouble downloading files then you may need to disable pop-up blockers or check any firewall settings at your site.

Include Page
LexEVS 6.2 Local Runtime Downloads to Include

2. Using a file explorer, navigate to the SAVE_DIRECTORY. Double Click on the downloaded JAR file. This will launch the install wizard.
As an alternative to a file explorer, use a command prompt. Change to the SAVE_DIRECTORY:
cd {SAVE_DIRECTORY}
Then enter the command to begin the installation wizard:
java -jar LexEVS-install-{version}.jar
where {version} is the version you downloaded For example:

Code Block
java -jar LexEVS-install-6.24.0.jar

screenshot illustrating step

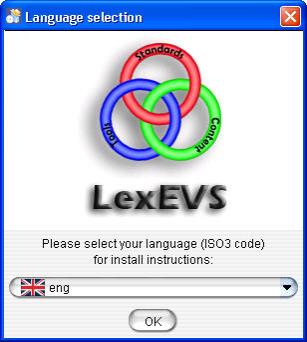
3. Click the OK button to begin the installation.

Note
titleNote

The only language currently supported is English.

screenshot illustrating step

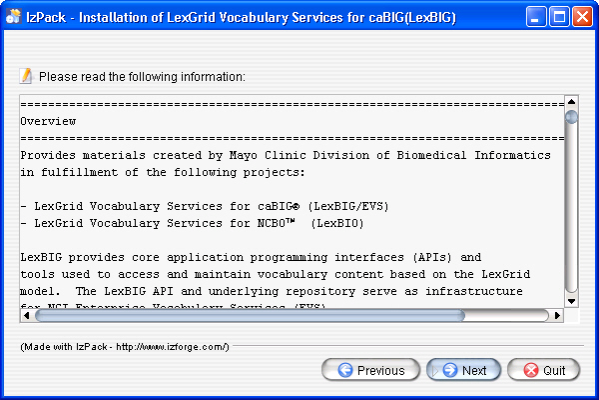
4. After the initial welcome screen, the release notes for the LexEVS distribution are displayed. Once you have read through the release notes click the Next button.

screenshot illustrating step

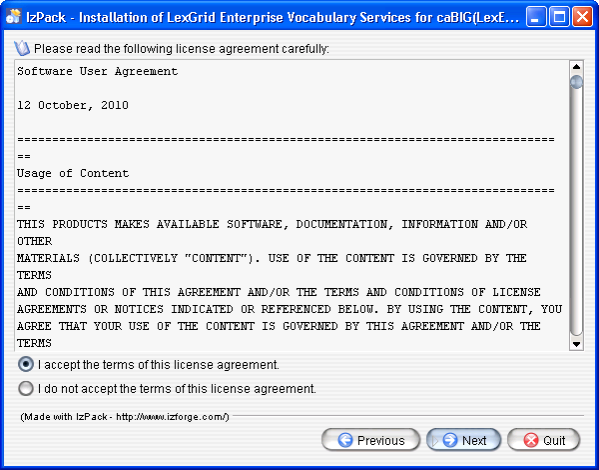
5. Review the license agreement of the LexEVS software. Select "I accept the terms of this license agreement." and click Next.

screenshot illustrating step

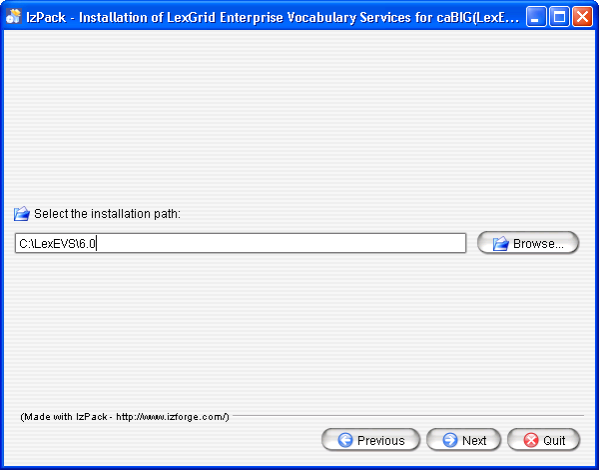
6. Enter the path where you would like the LexEVS software installed. This will be referred to as LEXEVS_HOME throughout the remaining instructions.

Note
titleNote

In any operating system it is NOT recommended to use spaces in the install path. You will be better off if you do not use the default "Program Files" path in Windows.


Click the Next button.

Note
titleNote

If the directory does not exist, the program will prompt to proceed with creating the new directory. If the directory does exist, the program will prompt to overwrite the directory and files that may be contained within it.

screenshot illustrating step

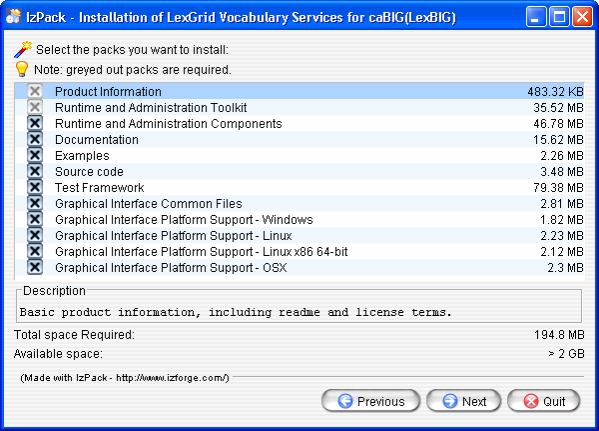
7. Select the components to be installed. The components "Product Information" and "Runtime and Administration Toolkit" are required and cannot be unchecked. The remaining components are optional. Clicking on individual components will display a description of that component.

Once components have been selected click Next.

screenshot illustrating step

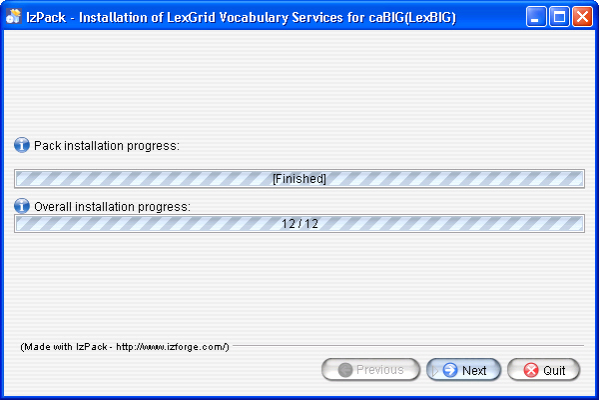
8. Once all the components have been installed, a [Finished] dialog will be displayed. Click Next.

screenshot illustrating step

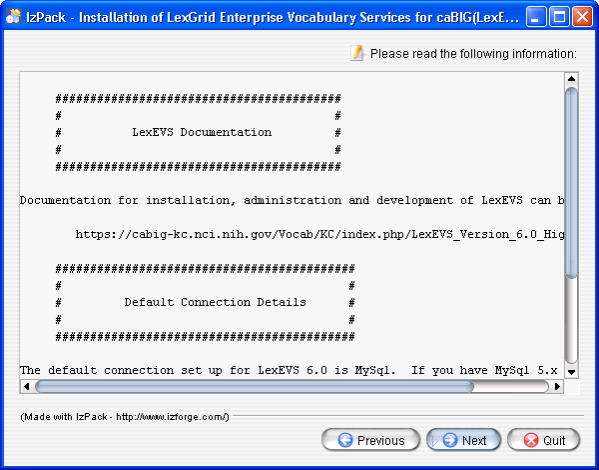
9. A dialog with some help and urgent reminders will appear. Click Next.

screenshot illustrating step

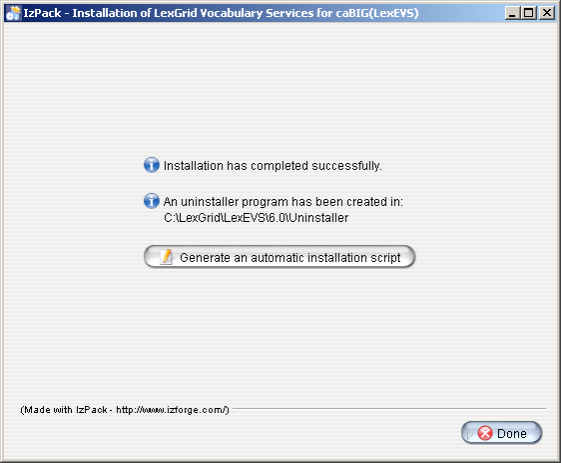
10. The last step of the installation wizard provides the ability to generate a command line installation configuration XML file that can be used on other servers. This installation script can be used to install LexEVS without the wizard that you just went through. If you want to generate this file then click the Generate an automatic installation script button. This will have no effect on the current installation. For more information look at the instructions for Installing LexEVS 6.0 Local Runtime (Optional Command Line Method).

Click Done to complete the installation process.

screenshot illustrating step

11. Install the latest fixes.

If you started with the 6.2 4 installer there are no additional fixes at this time.

Include Page
LexEVS 6.2 4 Local Runtime Downloads to Include


...

The LexEVS Local Runtime can be configured to work with many different databases, however, the recommended databases are database is MySQL or PostgreSQL. Specific versions are noted in the listing. Following installation of a database of your choice , you should follow these steps in order.

Step

Action

1. Configure Database Management System properties

We provide examples an example of a MySQL and PostgreSQL configurations configuration to optimize a database for LexEVS.

Note
titleNote

It is considered beyond the scope of these install instructions to address database setup and administration. However, proper database configuration is critical to the performance and long-term health of the LexEVS environment. System administrators should consult the MySQL or PostgreSQL documentation to determine settings that are appropriate to the host machine and environment. Tuning should be performed prior to loading vocabularies. At a minimum, users must create a target database (see the next step) on the database server and provide user credentials for creating, deleting, and writing to tables.

  • MySQL properties
    We highly recommend optimizing the behavior of the MySQL database server by changing the set of properties in the following link.
    LexEVS 6.x Local Runtime MySQL Properties GuidePostgreSQL properties
    Optimizations for the Postgres DBMS are at the following link.
    LexEVS 6.x Local Runtime PostgresSQL Properties Guide

2. Create a database

LexEVS does not create a database for you. You must do this as the administrator of your database management system.

Consult database management system documentation. We provide an example and a recommendation for MySQL. LexEVS must have access to a user with rights to create, update and delete tables.

3. Make sure the JDBC driver is in place

The java software interface for a given supported database must be available in the <install-root>/runtime/sqlDrivers directory

  • Check {LEXEVS_HOME}\runtime\sqlDrivers to see if the appropriate driver for your database is there. Licensing restrictions prevent some drivers, like those from MySQL, from being shipped with LexEVS.
  • MySQL driver can be downloaded from MySQL downloads.

4. Modify the LexEVS configuration file

Update the LexEVS service properties file {LEXEVS_HOME}/resources/config/lbconfig.propswith connection and database settings

Note
titleNote

This file contains properties controlling the behavior of the LexEVS Local Runtime. You must at least adjust the database configuration values for LexEVS within this file.

The lbconfig.props file has the latest documentation embedded inside of it. lbconfig.props should be considered authoritative if there is a difference between the documentation written here and that contained in lbconfig.props.
You may open that file now and use the documentation within it to configure LexEVS.
The following link describes all of the property settings available for configuring LexEVS. It may have additional descriptive information beyond that found within lbconfig.props. It is useful but not necessary to a successful install.
LexEVS 6.x Local Runtime Configuration File Settings

5. Set DB_PRIMARY_KEY_STRATEGY

Take extra care to consider this parameter in the configuration file. The value for the parameter may not be optimal for loading terminologies. You must change its value before any LexEVS operations. Once there have been any operations you can not reset this parameter without deleting the database and recreating it.

See the parameter settings documentation for more information.

...