Page History
...
When you submit an image to NBIA using FileSender, the process follows the path illustrated in the following flowchart:


In summary, the process involves the following steps. These steps are described in detail in the succeeding sections of this user's guide.
...
- To start your local CTP client, execute the
ctp.bat (ctp.shin Linux) in the CTP-Client/CTP folder. In Windows, the file path is:C:\apps\nbia\CTP-client\CTP\ctp.bat. Open a browser and type in the CTP client URL for your local installation. You can find the port number by looking in the
config.xmlfile in the CTP folder. The third line of the standard file is"<Server port="24080" />". If changes are made to this number, the localhost port needed to access the CTP admin page changes in tandem.Example URL for CTP client:
http://localhost:24080/Tip title Tip You may want to refer to the helpful information about this part of the CTP setup on the NCI wiki. You should also note that CTP only supports 32-bit Java.
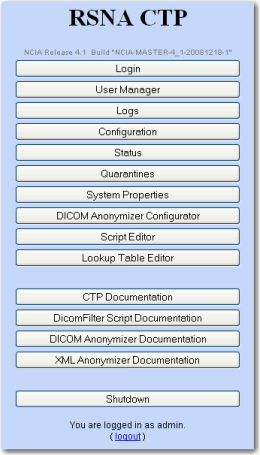
The CTP Client Console opens in your browser. The following image on the left shows the main menu when you are not logged in. The following image on the right shows the main menu when you are logged in.
Not logged in
Logged in

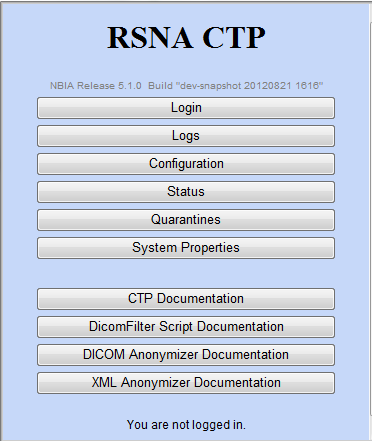

Info title Not logged in? You do not need to be logged in to the CTP client to review some of the pages. See the first figure. You do need to be logged in to configure the anonymizer.
- Click the Configuration button. The Configuration page appears.
- Verify the URL in the bottom section of the page, HTTP Export. This should point to the import service of the CTP server to which the images will be exported from the CTP client. You cannot change the text on this page; it must be changed in the
config.xmlfile referred to in step 2. - Once the file(s) are received in the CTP client, they are anonymized there. To configure the anonymization parameters, you must be logged in. Request the login credentials from your administrator.
- Click the DICOM Anonymizer Configurator button on the CTP client main page. (This option appears only after you are logged in.)
- Click the hypertext link in the first screen that opens. The DICOM Anonymizer Configurator page appears. On this page, you can enter, verify, or edit anonymization parameters. This customization overrides the default configuration in the
da.scriptfile. - Anonymize your DICOM images.
...
The default configuration for submitting images to NBIA is detailed in the da.script file. You can override that script by customizing anonymization parameters on the DICOM Anonymizer Configurator page, which follows. This page indicates how the image's DICOM tags are modified to anonymize the data, thus meeting HIPAA regulations to preserve patients' privacy. For example, the patient's birth date and patient ID are anonymized.

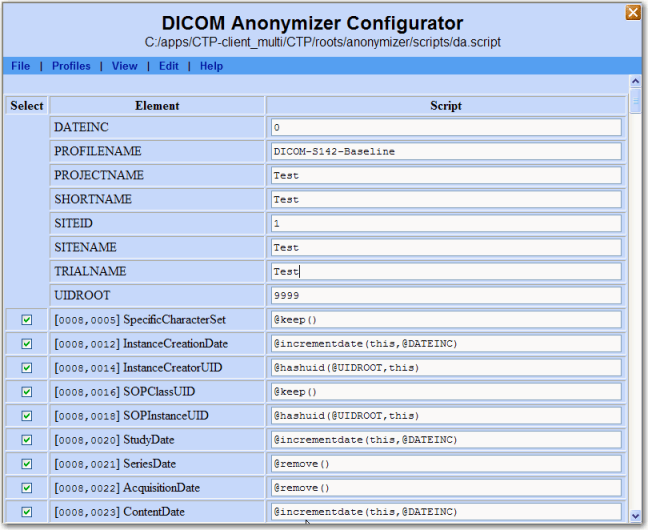
The following fields on this page are required:
...
To start your local CTP server, execute the
ctp.bat (ctp.shin Linux) in the CTP-Client/CTP folder. In Windows, the file path is:C:\apps\nbia\CTP-server\CTP\ctp.bat.Open a browser and enter the CTP Server URL for your local installation. You can find the port number by looking in the
config.xmlfile in the CTP folder. The third line of the standard file is"<Server port="23080" />". If changes are made to this number, the localhost port needed to access the CTP admin page changes in tandem. An example URL for the CTP server:http://localhost:23080/.
The CTP Server Console opens in your browser. To determine the status of an image you have submitted, as described in Submitting Images to NBIA 6.5.3.1, continue with the steps in Submitting Images to NBIA 6.5.3.1.
...
- To open the FileSender, execute
filesender.bat (filesender.shin Linux) in the CTP-Client/FileSender folder. The FileSender opens to a screen that displays a Source panel on the left and a Destination panel on the right (shown in the following figure.)
In Windows, for example, the file path is:C:\apps\nbia\CTP-client\FileSender\FileSender.bat.
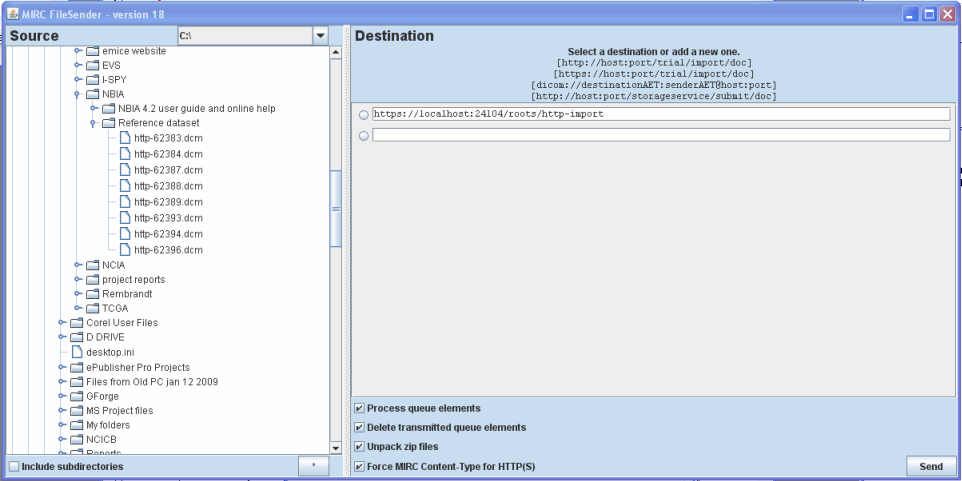
- In the left panel of FileSender, select one image or a folder of images to be submitted (see the previous figure). You cannot select and submit multiple individual images at one time.
- Select Include Subdirectories if you want subdirectories to your selection to also be submitted.
Select the default URL for the destination in the Destination panel. This is the host and port number (the port number for the
HttpImportServicedefined in theconfig.xml) where the CTP client is located.Tip title Tip The CTP client must be started to successfully submit images.
- Leave the checkboxes at the bottom of the Destination panel checked in the default selections.
Click Send to execute the submission process to the CTP client. The Destination panel displays the progress of the task.
...
To submit images using the user-defined username/password, follow these steps on the CTP Server:
- Click User Manager.
- Create a username/password. The new username and password should be same in the ExportService section of the configuration file, which is the
config.xmlof the CTP Client. - Make sure to check on importclick Import. By default, the Import checkbox is hidden. Click on Show All Roles to view import status.

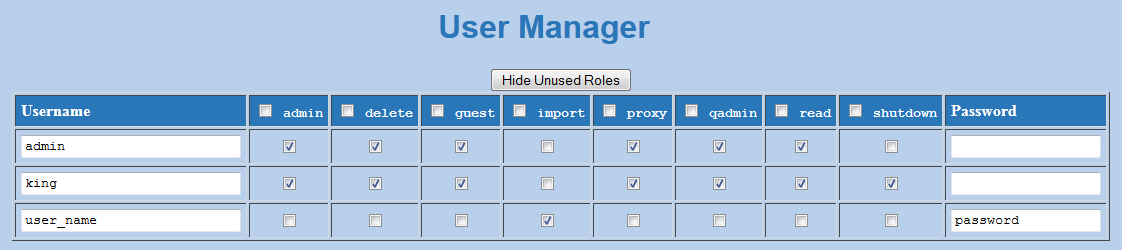
- Assign roles to the user using the Checkboxcheckbox. Click Save to save changes.
...