Page History
...
The experiment data used in this tutorial was not generated de novo; it came from an existing experiment whose data is publicly available on the official NCI instance of caArray at https://array.nci.nih.gov/caarray/home.action (you must have an official NCI user account to access this site). The experiment, entitled "TCGA Ovarian: Comparative Genome Hybridization Analysis Using the Agilent Human Genome CGH 244A Platform", was conducted at Harvard Medical School in Boston, MA. It can be accessed via the URL https://array.nci.nih.gov/caarray/project/EXP-498 or by searching for the experiment ID 'EXP-498' on the NCI caArray instance. The array design used was TCGA-Agilent_HG-CGH-244A; the ADF array design files can be downloaded from the experiment, as can all the experiment data, including the IDF and SDRF metadata files, the Agilent TXT raw array data files, and the TSV derived array data files.
Getting Started -- Dividing the Array Data Into Batches
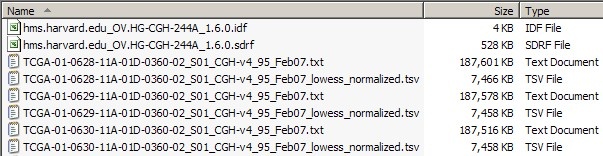
The screenshot below shows a portion of the dataset from our sample experiment, including the IDF and SDRF files, as well as some TXT and TSV files.
The total combined size of all the TXT and TSV files in this dataset is a whopping 26.8 GB, which is way too large to be uploaded to caArray at once, even when archived into a single file. Our first step, then, is to break down the dataset into smaller batches, each of which will be no larger than the individual 2 GB upload limit. We can do this simply by selecting a subset of TXT and TSV files in our file manager (Windows Explorer in this case), taking care to keep the size of the selection following ZIP compression. Since the average Zip compression ratio of array data is about 2.5:1, we may safely assume that any batch smaller than 5 GB before compression will come out to less than 2 GB after compression.
Before creating the batches, first create a subfolder named 'Batches' in your experiment folder, then create individual subfolders ('batch1', 'batch2', etc.) within that folder for each batch. Now, select multiple TXT and TSV files in your file manager (Windows Explorer in this tutorial), taking care to keep the size of the selection below 5 GB, as shown below: 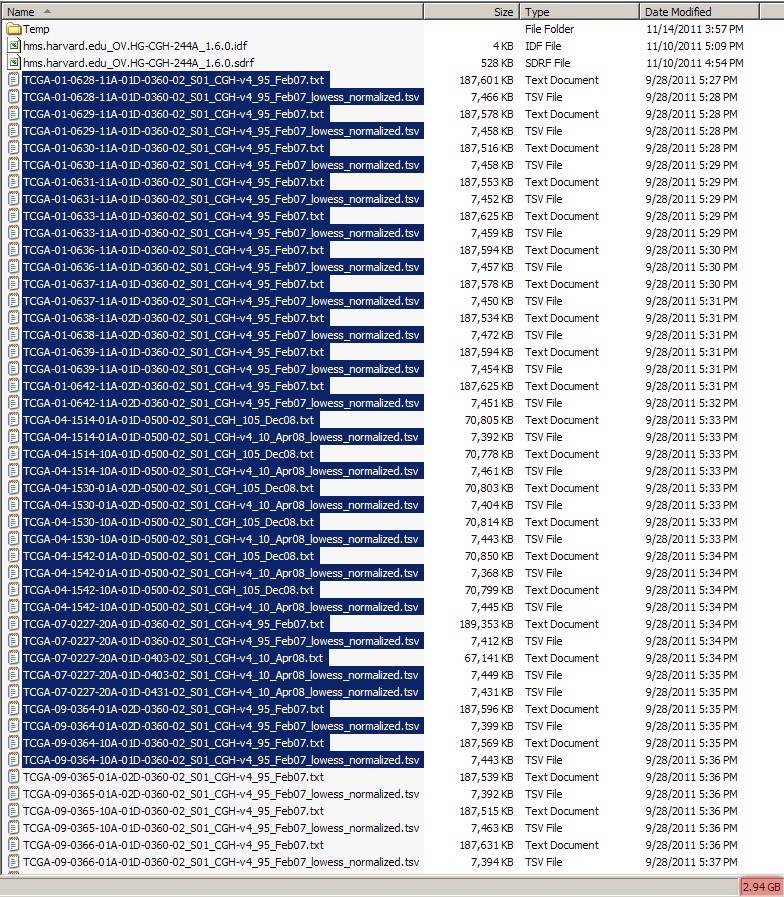 below 2 GB, as shown below:
(Note: Even though caArray allows files archives as large as 2 GB to be uploaded, in this tutorial we will keep the size of data batches archives to approximately 1 Gb GB each to facilitate rapid file uploads on slow network connections.)
You can now move the highlighted file selection to the 'batch1' subfolder we created earlier, as shown below: 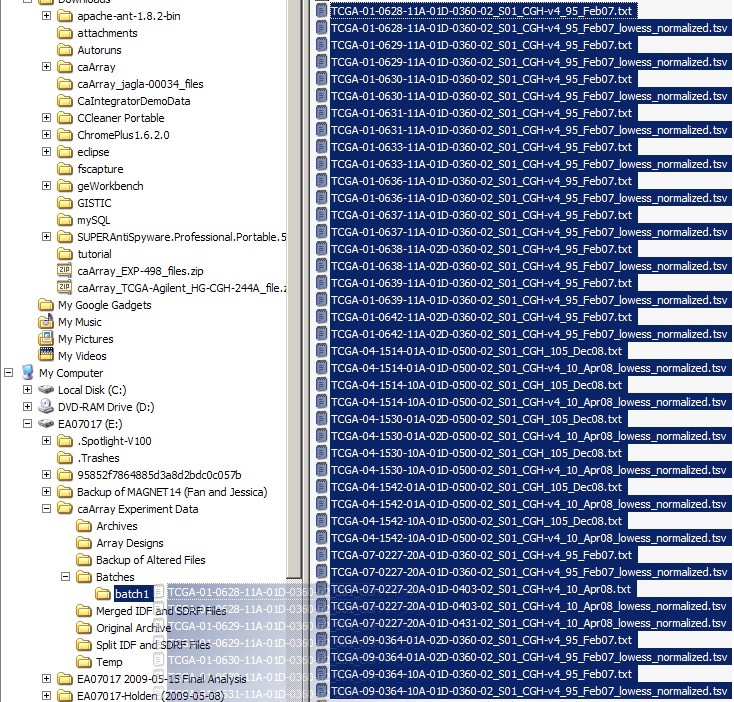
Preparing Data for Upload
In preparing your data for upload, the first step is to find all the files associated with a given IDF file. To so, open any of the IDF files from your experiment in Microsoft Excel or another application suited for viewing tab-limited data. The partial screenshot below shows the first of twelve IDF files from our example experiment as viewed in Excel.

The field 'SDRF files' towards the bottom of your IDF file displays the name of the SDRF file that is associated with the IDF.
...