Page History
...
The screenshot below shows a portion of the dataset from our sample experiment, including the IDF and SDRF files, as well as some TXT and TSV files.
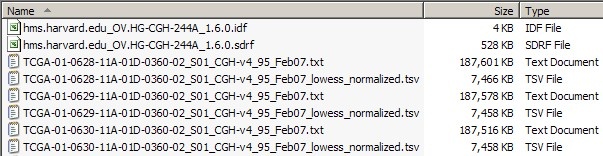
This dataset comprises IDF and SDRF metadata files, as well as the TXT raw array and TSV derived array data files they reference.
The total combined size of all the files in this dataset is a whopping 26.8 GB, which is way too large to be uploaded to caArray at once, even when archived into a single file. Our first step, then, is to break down the dataset into smaller batches, each of which will be no larger than 2 GB following ZIP compression. Since the average ZIP compression ratio of array data is about 2.5:1, we may safely assume that any batch smaller than 5 GB before compression will come out to less than 2 GB after compression.
Before creating the batches, first create a subfolder named 'Batches' in your experiment folder, then create individual subfolders ('batch1', 'batch2', etc.) within that folder for each batch. Now, select multiple TXT and TSV files in your file manager (Windows Explorer in this tutorial), taking care to keep the size of the selection below 5 GB, as shown below:
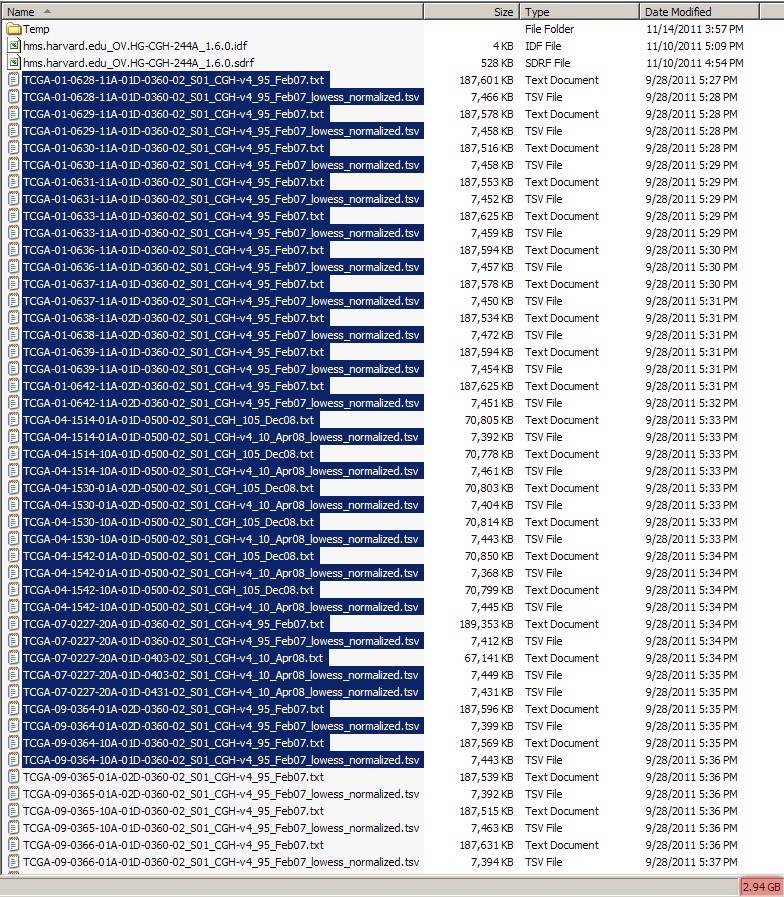
When selecting a subset of your TXT and TSV files in your file manager, make sure the combined size of the selected files is below 5 GB, as anything larger may compress to greater than the 2 GB upload limit caArray imposes for a single ZIP archive.
(Note: Even though caArray allows archives as large as 2 GB to be uploaded, in this tutorial we will keep the size of archives to approximately 1 GB each to facilitate rapid uploads on slow network connections.)
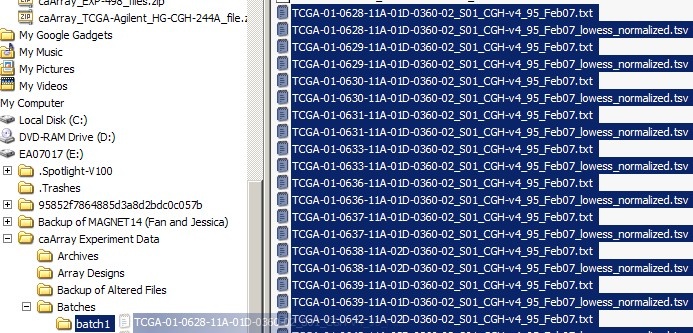
You can now move the file selection to the 'batch1' subfolder we created earlier, as shown below:
below:
Move the selected files to the subfolder you created for this batch.
You can repeat this procedure to create the remaining batches, as summarized below, until every single file in the dataset has been accounted for:
- Create a separate subfolder for each new batch
- Select multiple dataset data files in your file manager, taking care to keep selection size below 5 GB uncompressed (2 GB compressed)
- Move selected files to respective batch folder
...
Now that we've created batches of our array data files, our next step is to split the original SDRF file into multiple SDRFs, each corresponding to a single batch and referencing only the array data files from that batch. To do so, first open the original SDRF file in Microsoft Excel or another tab-limited data viewer, as shown below:
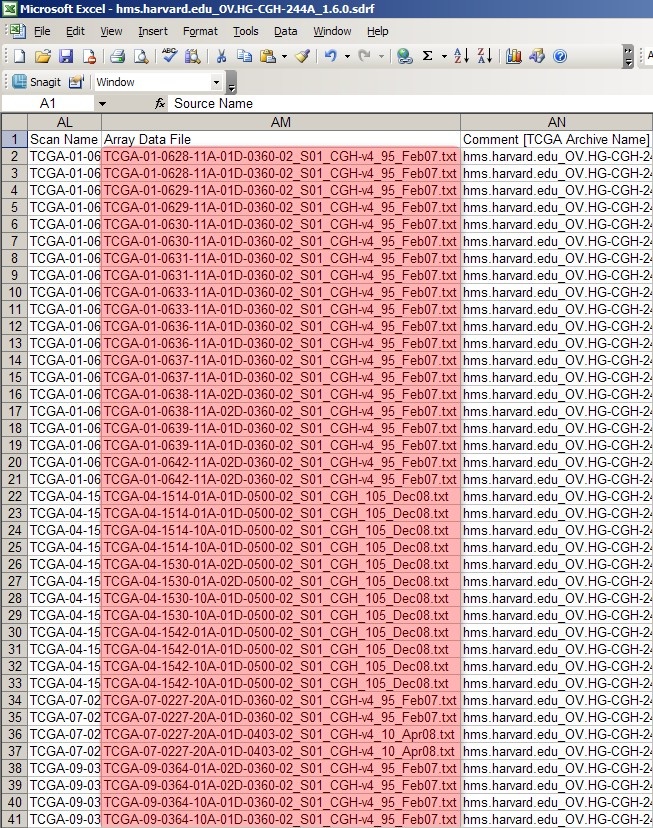
The SDRF file from your experiment lists all the associated raw array data files under the column headed 'Array Data File'.
As you can see, the column headed 'Array Data File' lists the filenames of all the raw array data files from the experiment. The first 40 rows correspond to all the data files from the first batch we created in the previous section, Getting Started. We can generate a unique SDRF file for this batch by deleting all the other rows from the file -- except, of course, for the top header row -- and saving the modified file as a new SDRF with a different filename from the original. (The convention used in this tutorial is to prefix the original SDRF filename with a number representing the batch, followed by a period. For example, if the original SDRF filename is 'hms.harvard.edu_OV.HG-CGH-244A_1.6.0.sdrf', then the filename of the first, or 'zeroeth' batch, would be '0.hms.harvard.edu_OV.HG-CGH-244A_1.6.0.sdrf'.)
...
Once you've generated a unique SDRF file for each batch, you must also generate a unique IDF file which references that SDRF file. You can do so simply by opening the original IDF file and editing the field 'SDRF Files' with the filename of the SDRF you wish to reference, as shown below:
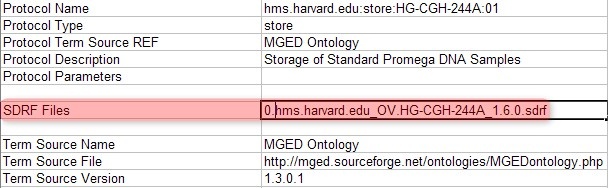
Edit the field 'SDRF Files' field in your IDF file to reflect the file name of the new SDRF file you generated previously.
In this example, the originally referenced SDRF filename 'hms.harvard.edu_OV.HG-CGH-244A_1.6.0.sdrf' has been changed to '0.hms.harvard.edu_OV.HG-CGH-244A_1.6.0.sdrf', which is the SDRF for the first batch we created.
...