Page History
...
| Anchor |
|---|
...
|
...
|
| Tip | ||||||
|---|---|---|---|---|---|---|
| ||||||
|
This guide explains how to use Annotation and Image Markup (AIM) on ClearCanvas Workstation. ClearCanvas
| Multiexcerpt include | ||||||||
|---|---|---|---|---|---|---|---|---|
|
...
- In AIM on ClearCanvas Workstation, specify the folder where you want to place images you download.
- Select Tools > Preferences > Tools.
Click XNAT.
The XNAT options appear.
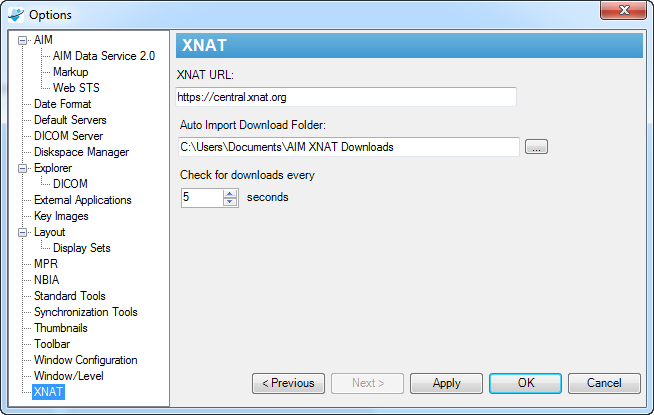
In the Auto Import Download Folder box, enter the path where you want to store downloaded images. Make a note of this folder path for later, when you will specify this same folder path within XNAT .
- Click OK.
- In the AIM on ClearCanvas toolbar, click
 .
.
XNAT CENTRAL appears.
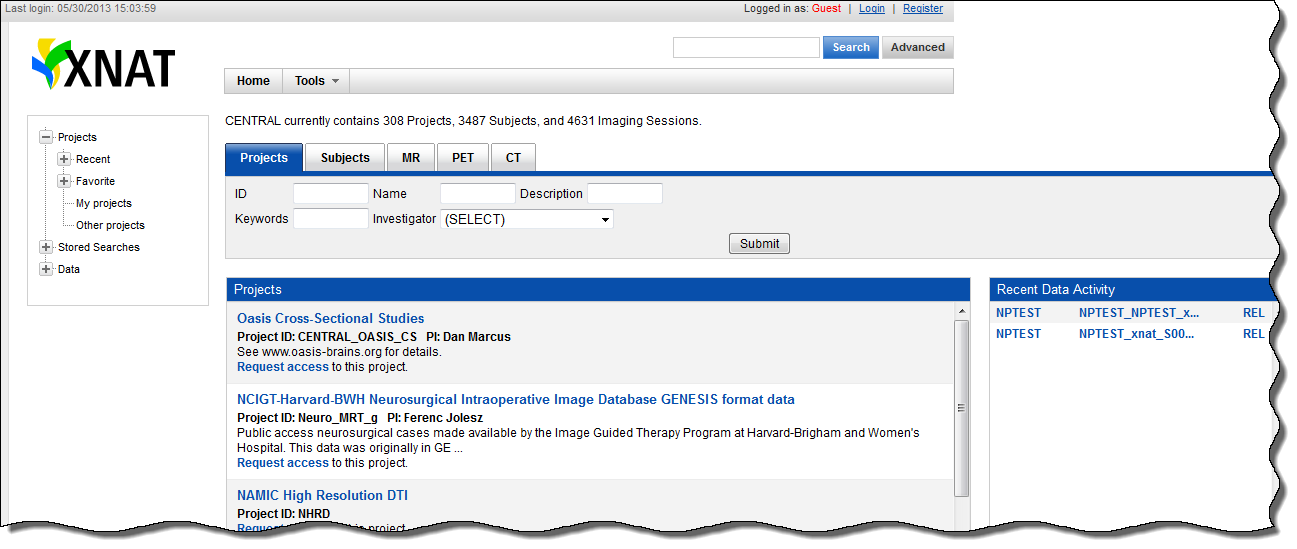
- Register for XNAT Central, if needed, and then log in using your XNAT Central name and password.
- Click a project name where the images are that you want to download.
The study's details and subject summary appears. Since you have logged in, you can see the Actions menu options.
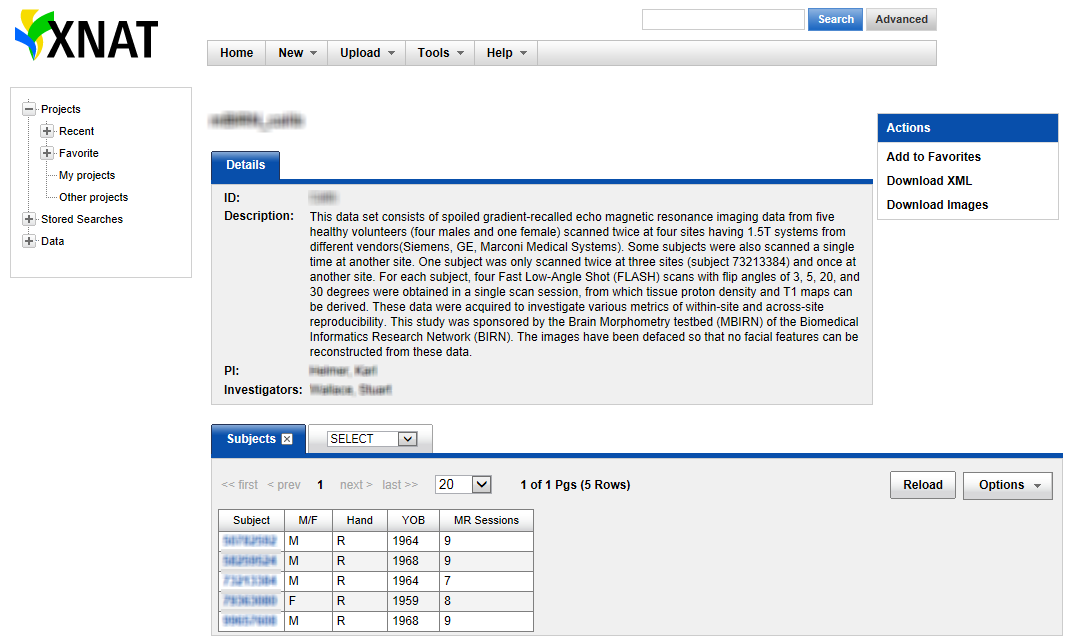
- Decide if you want to download a single experiment's images or all of the study's images. Downloading a single experiment's images generally takes less storage space and time than downloading all of a study's images.
- Download the images.
- To download a single experiment's images, do the following.
- Click a subject's link.
The experiments appear.
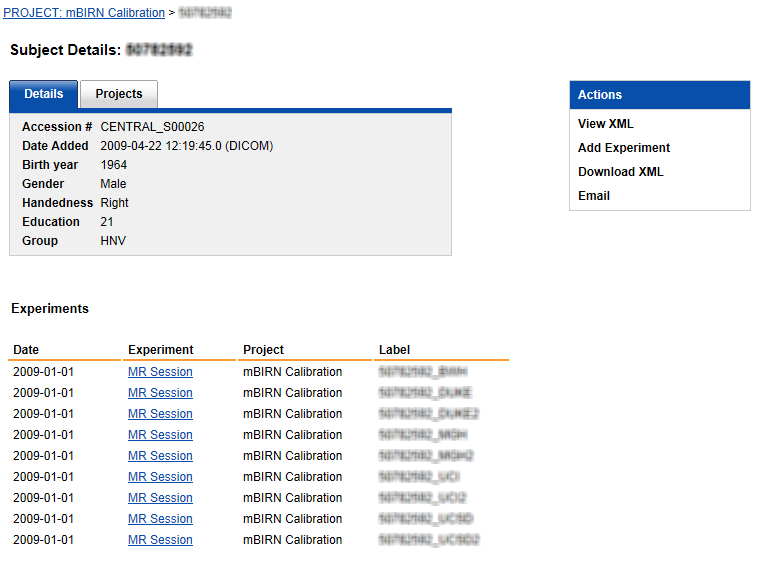
- Click an experiment's link.
The scans appear.
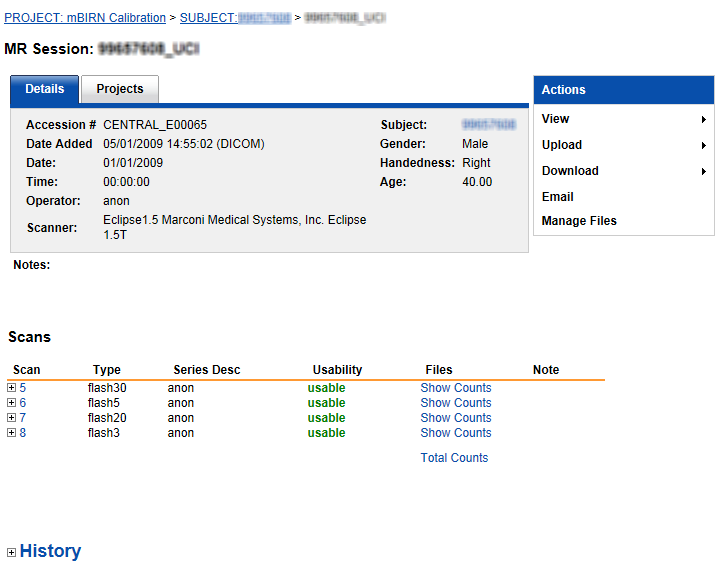
- Select Download > Download Images.
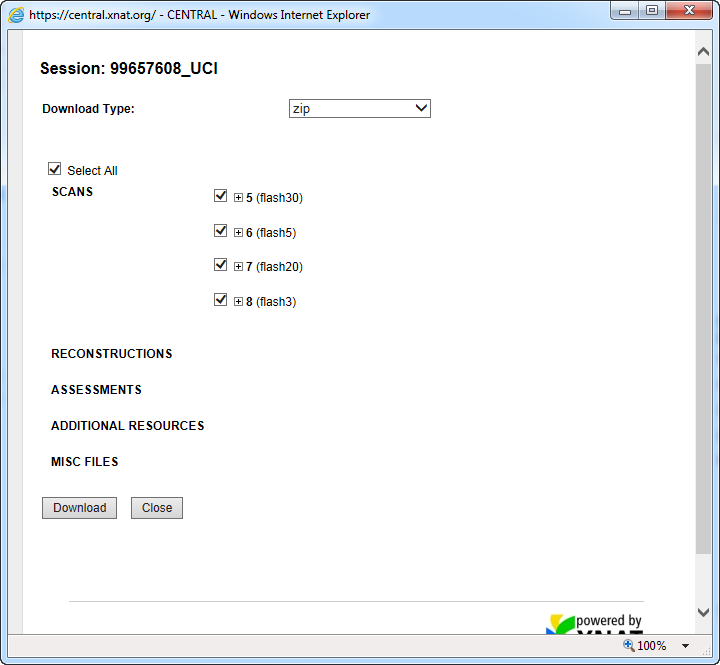
- Select the download file type and which scans you want to download. The more scans you select, the longer the download will take and the more time it will take to download them.
- Click Download.
- Click a subject's link.
- To download all of a study's images, do the following.
- Select Actions > Download Images.
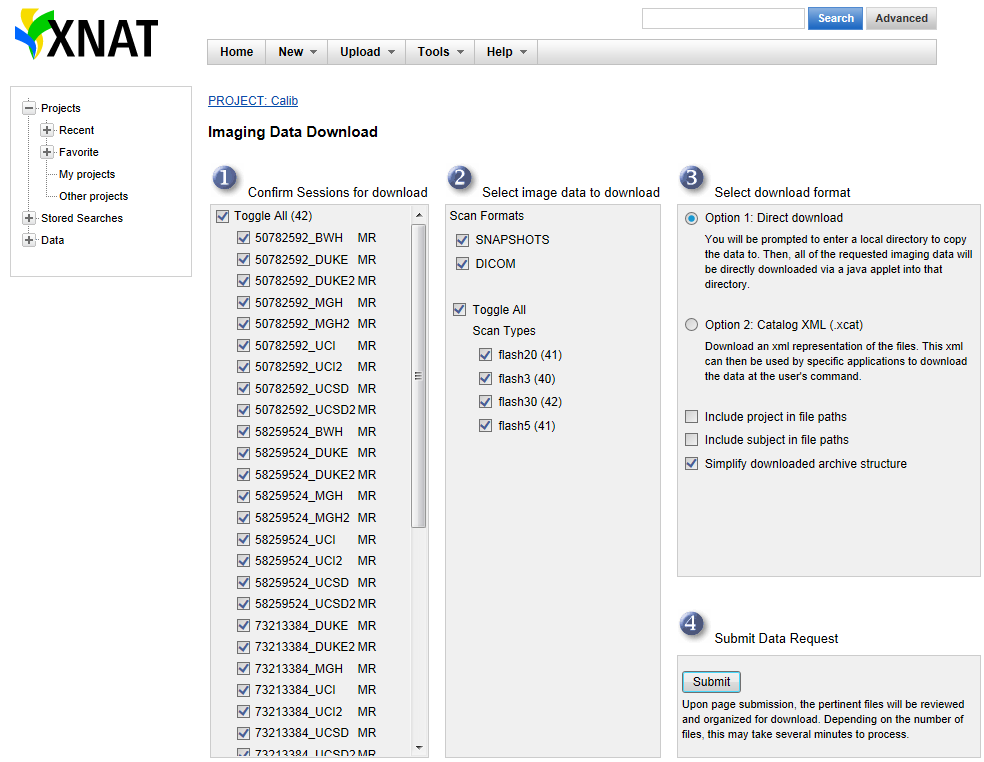
Confirm the sessions and image data you want to download, select the download format.
Click Submit.
- Select Actions > Download Images.
- When your browser prompts you to save the file from XNAT, select Save > Save As to specify the folder where the download should go. Make it the same path as that which you specified in step 1c in AIM on ClearCanvas Workstation.
- To download a single experiment's images, do the following.
- Check your destination folder for the images you downloaded. The downloaded file will be automatically uncompressed or unzipped and DICOM images in the zip file will be imported. The file will be deleted after importing DICOM files is done.
...
- Select Tools > Preferences > AIM.
The Options dialog box appears.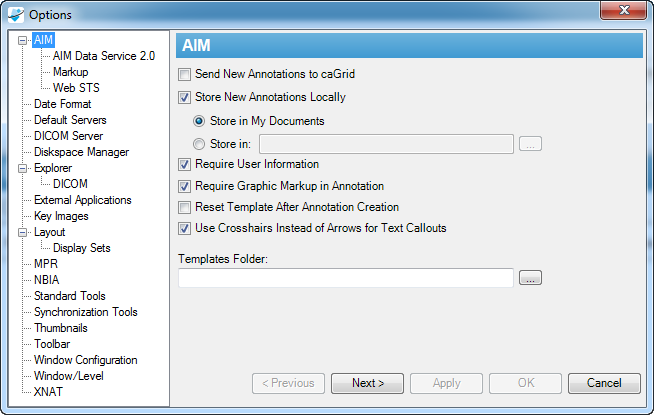
Specify any of the following AIM preferences.
Option Description Send New Annotations to caGrid If selected, the workstation will send new annotations to the assigned caGrid location. Also see Specifying AIM Data Service Preferences.
By default, the Send New Annotations to caGrid option is disabled. You must enable this option in order to have new AIM XML documents sent to the AIM Data Service. If you have neither set the AIM Data Service destination nor enabled the Send New Annotations to caGrid option, you cannot send your existing AIM XML documents to the AIM Data Service.
Store New Annotations Locally If selected, the workstation will store a copy of new annotations in the AIM XML format on the local computer. A user can assign where the AIM annotation documents can be stored on the local computer. Required User Information If selected, user credentials need to be entered before creating an AIM annotation document. Require Graphic Markup in Annotation If selected, a user must create at least one graphical drawing on an image before creating an AIM annotation document. Reset Template After Annotation Creation Use Crosshairs Instead of Arrows for Text Callouts Change the image used when you create text callouts. Templates Folder If entered, the directory will be used to search for AIM template XML documents. Click Apply.
Specifying Toolbar Preferences
...
The following table describes four AIM tools that are available on the AIM on ClearCanvas Workstation.
Tool | Name | Description |
|---|---|---|
| AIM Template | Displays a template based form with a set of questions and choice(s) of answers for each question. A user can import a new AIM template to that location. Create new annotation objects by completely filling out this form and clicking the Create Annotation button. |
| AIM Object Locator | Depicts available AIM objects in the currently displayed study without searching through every image in the study or series. |
| AIM Annotation Details | Provides the ability to view specific areas of a selected graphic markup for an existing annotation. |
| Closed Polygon Markup | Allows creation of a free hand graphical markup. This tool can be used in addition to existing ClearCanvas tools in creating graphical markup. |


AIM Template Tool
To activate the AIM template tool in Figure 1, click the AIM template tool button (#1). If you put the pin down (#2), you can detach the AIM Template tab by putting the mouse pointer at the header (#3) and dragging it out, as illustrated in Figure 2.
...
Before you can add an annotation to an image, AIM on ClearCanvas Workstation verifies that the annotation you have drawn complies with the rules in the AIM template. AIM on ClearCanvas Workstation verifies new annotations according to the following rules:
| Template Condition | Verification Condition |
|---|---|
| Template has multipoint geometric shape | Line or angular markup has to be drawn on image |
| Template has polyline geometric shape | Rectangular or polygonal markup has to be drawn on image. |
| Template has circle or ellipse geometric shape | Elliptical markup has to be drawn on image. |
| Template has point geometric shape | Cross hair markup has to be drawn on image. |
In addition to verifying specific new annotations, AIM on ClearCanvas Workstation also checks that no additional marks are on the image that the template does not allow.
...
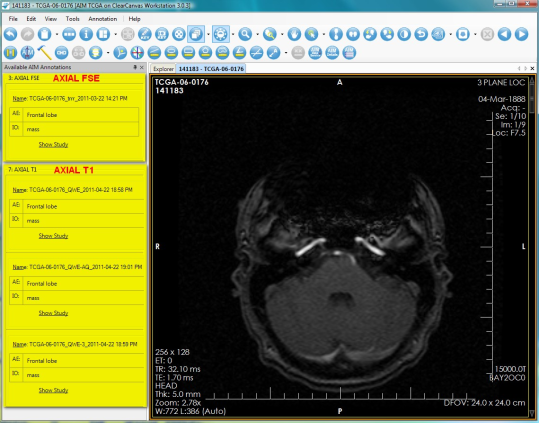
You can see AIM annotations for an imaging study grouped by image series in the Available AIM Annotations section. The following screen shows two different image series. The first, Axial FSE, includes one AIM instance. The second, Axial T1, includes three AIM instances.
Using the National Biomedical Imaging Archive (NBIA) Data Service
...

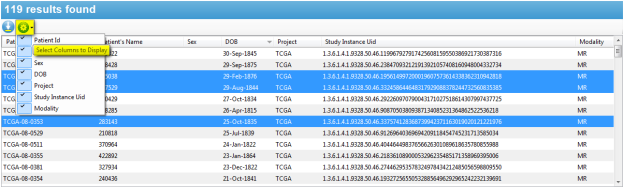
Columns in the NBIA Data Service page can be selected or deselected to display or hide an available result. The following image depicts that all available columns for the service have been selected.