Page History
...
- In AIM on ClearCanvas Workstation, specify the folder where you want to place images you download.
- Select Tools > Preferences > Tools.
Click XNAT.
The XNAT options appear.
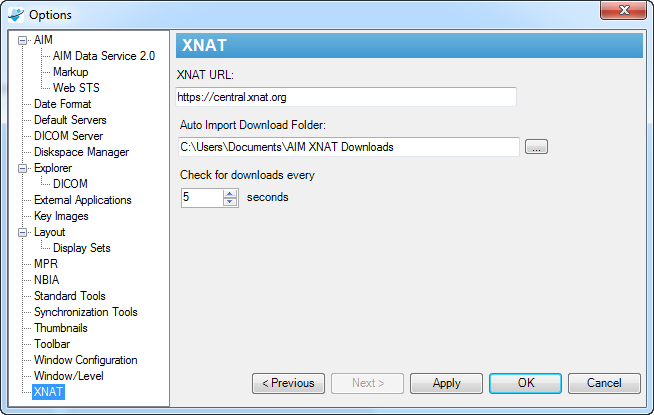
In the Auto Import Download Folder box, enter the path where you want to store downloaded images. Make a note of this folder path for later, when you will specify this same folder path within XNAT .
- Click OK.
- In the AIM on ClearCanvas toolbar, click
 .
.
XNAT CENTRAL appears.
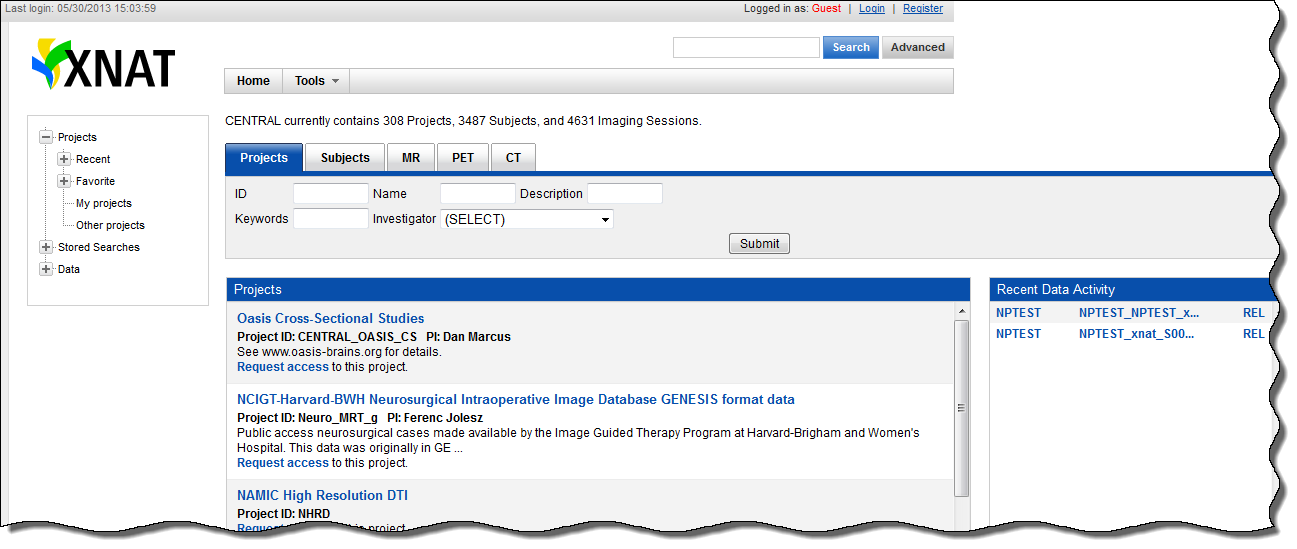
- Register for XNAT Central, if needed, and then log in using your XNAT Central name and password.
- Click a project name where the images are that you want to download.
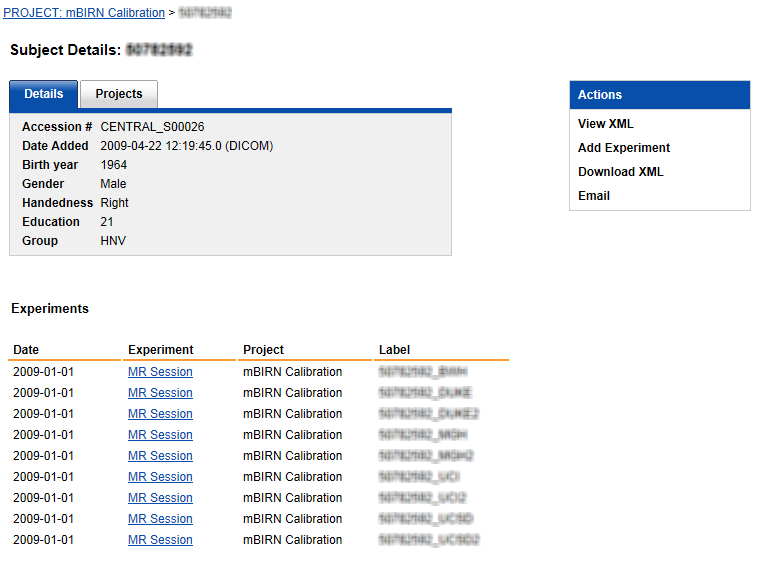
The study's details and subject summary appears. Since you have logged in, you can see the Actions menu options.
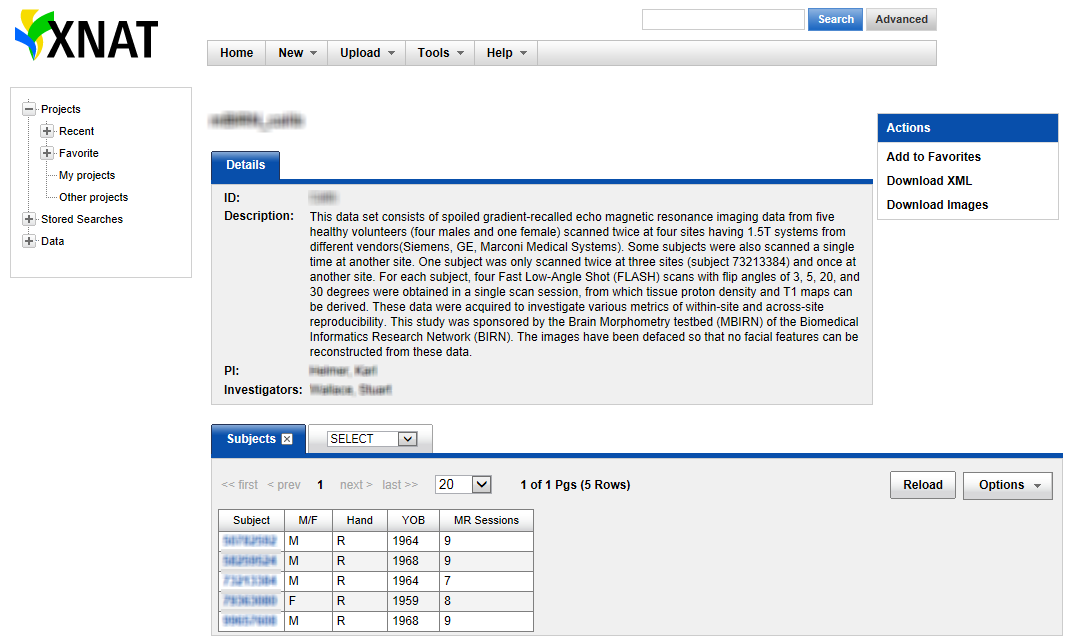
- Decide if you want to download a single experiment's images or all of the study's images. Downloading a single experiment's images generally takes less storage space and time than downloading all of a study's images.
- Download the images.
- To download a single experiment's images, do the following.
- Click a subject's link.
The experiments appear.
- Click an experiment's link.
The scans appear.
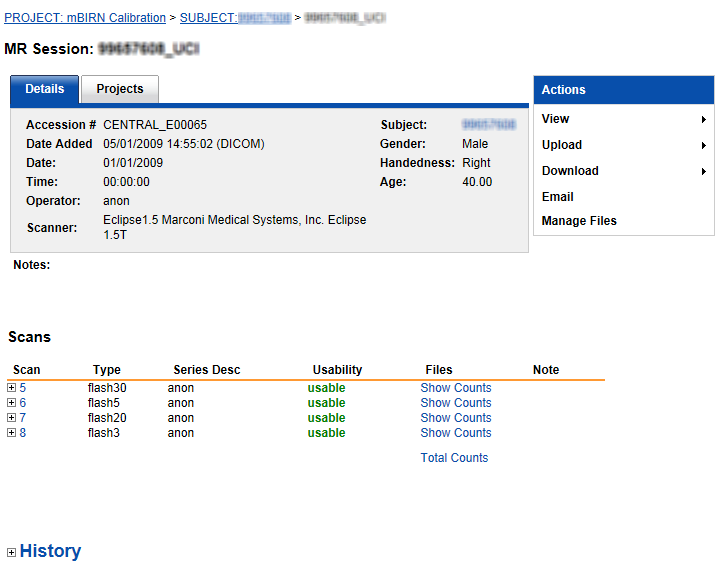
- Select Download > Download Images.
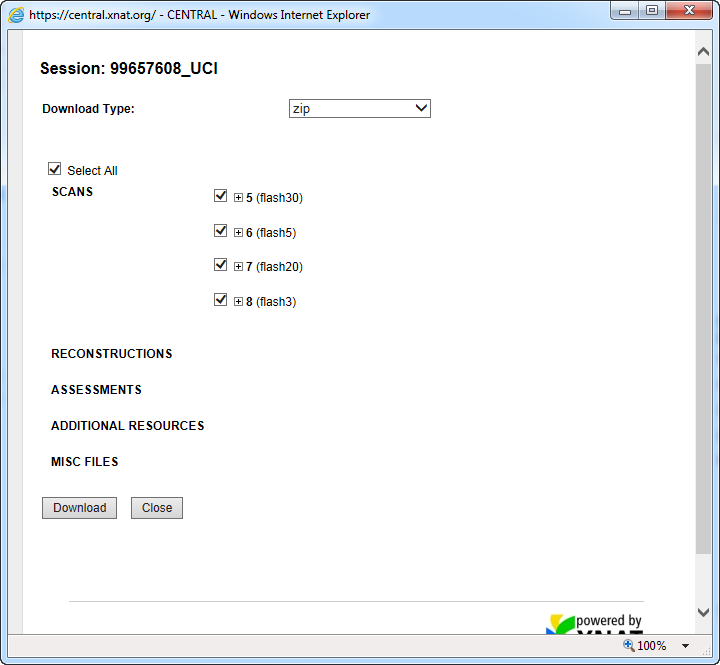
- Select the download file type and which scans you want to download. The more scans you select, the longer the download will take and the more time it will take to download them.
- Click Download.
- Click a subject's link.
- To download all of a study's images, do the following.
- Select Actions > Download Images.
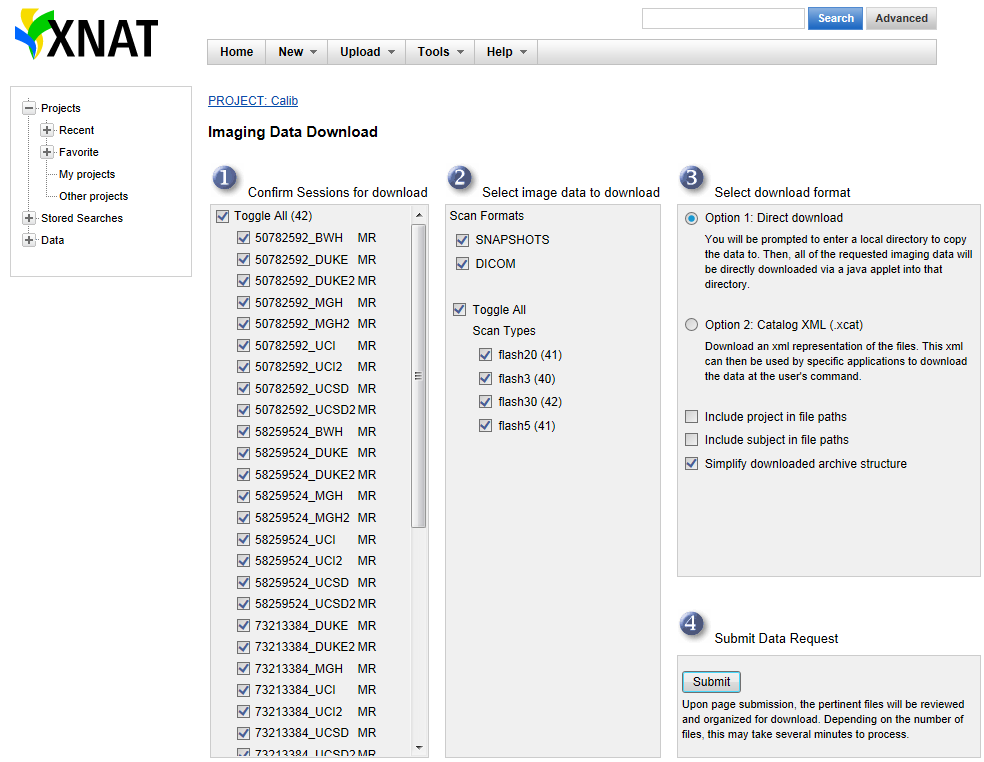
Confirm the sessions and image data you want to download, select the download format.
Click Submit.
- Select Actions > Download Images.
- When your browser prompts you to save the file from XNAT, select Save > Save As to specify the folder where the download should go. Make it the same path as that which you specified in step 1c in AIM on ClearCanvas Workstation.
- To download a single experiment's images, do the following.
- Check your destination folder for the images you downloaded. The downloaded file will be automatically uncompressed or unzipped and DICOM images in the zip file will be imported. The file will be deleted after importing DICOM files is done.
...
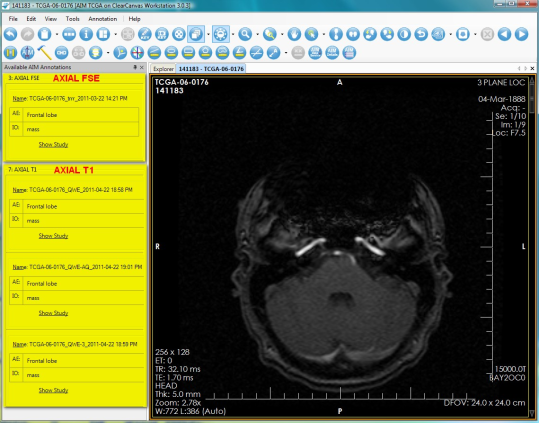
You can see AIM annotations for an imaging study grouped by image series in the Available AIM Annotations section. The following screen shows two different image series. The first, Axial FSE, includes one AIM instance. The second, Axial T1, includes three AIM instances.
Using the National Biomedical Imaging Archive (NBIA) Data Service
...

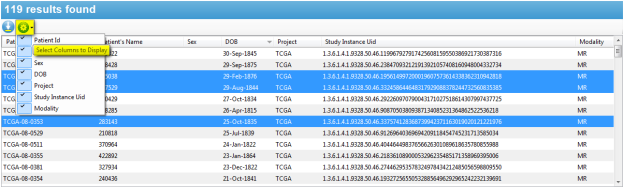
Columns in the NBIA Data Service page can be selected or deselected to display or hide an available result. The following image depicts that all available columns for the service have been selected.