Page History
| Scrollbar | ||
|---|---|---|
|
Problem: When uploading experiment data from large microarrays into caArray, you may find that size of your data archive is larger than the application's individual file size limit of 2 GB.
Topic: caArray Usage
Release: caArray 2.0 and above
Date entered: 10/17/2011
Solution
This article presents a simple workaround which allows you to break down your data into smaller, more manageable chunks that can be individually uploaded without violating the 2 GB limit.
Overview
Your experiment data consists of multiple IDF metadata files, each of which is associated with one or more SDRF metadata files. Each of these SDRF files, in turn, is associated with one or more raw array data and derived array data matrix files. In this tutorial, the array files we use are in the Agilent TXT and TSV formats; the file formats for your data may differ.
...
This tutorial assumes that you have past experience and basic familiarity with uploading data into caArray. Specifically, it assumes that you have already created an experiment for your data, uploaded the corresponding array designsdesign, and associated the experiment with those designsthat design. In case you lack a basic background on uploading caArray data, please refer to the official caArray User's Guide on the NCI wiki at https://wiki.nci.nih.gov/x/LBo9Ag.
...
Make a note of all the TXT and TSV filenames, as we will need to include each of them in the data archive that we upload to caArray. The easiest way to note these filenames is to copy them from the SDRF file and paste them into a plain text file, which you can print for reference.
Creating the Archive
Now that we've identified all the files associated with our IDF, our next step is to creative an archive of them. Launch WinZip, click the 'New' toolbar button, and enter a name for your archive in the 'New Archive' dialog. We'll call ours 'upload.zip', as shown below.
...
(WARNING: After you've created the archive, ensure that the resulting file size is less than 2 GB. If it isn't, you will have to re-create the archive with a higher compression ratio. In our example, the size of the 'upload.zip' archive came out to approximately 900 MB, as shown below, so the file is ready to upload as is.)

Uploading the Archive
To upload the archive, first log in to caArray and navigate to the experiment you will be upload your data into, then select the 'Data' tab, followed by the 'Manage Data' tab beneath it. Now click on the 'Upload New Files' button as shown below.
...
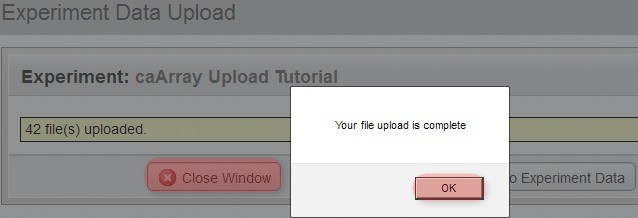
You'll know when the upload is complete when you see a new window overlaid over the upload window with the message 'Your file upload is complete', as shown below. Click the 'OK' button below this message, then click on the 'Close Window' button behind it to return to the main experiment window.
Verifying the Archive
Back in the main experiment window, the contents of the archive we just uploaded are now listed under the 'Manage Data' tab. The TSV matrix files are considered supplemental, so we will move them to the 'Supplemental Files' tab by checking off all the TSV files in the list, then clicking on the 'Add Supplemental Files' button below.
...
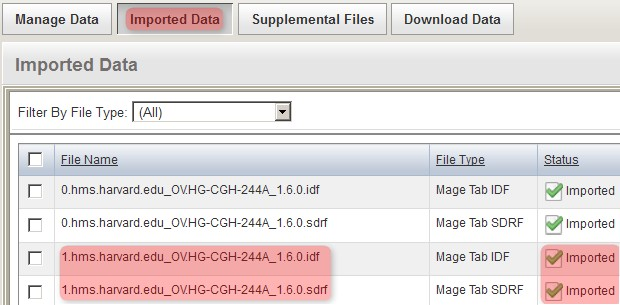
The files now appear under the 'Imported Data' tab, as shown below, with a status of 'Imported'. Note that other, previously uploaded files from the same experiment appear under this tab as well alongside the files we just imported.
Reproducing the Procedure
So far, only one-sixth of the data has been uploaded. You can reproduce the procedure we followed so far to upload the data from your experiment. The procedure, summarized below, is as follows:
...
- Import the validated files into the experiment
Have a comment?
Please leave your comment in the caArray End User Forum.
...