Page History
...
Now that we've identified all the files associated with our IDF, our next step is to creative an archive of them. Launch WinZip, click the 'New' toolbar button, and enter a name for your archive in the 'New Archive' dialog. We'll call ours 'upload.zip', as shown below.
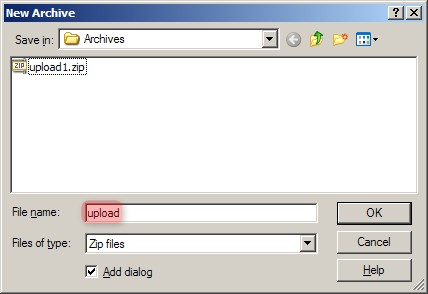
In WinZip's 'New Archive' dialog, specify a filename for the data archive to be created ('upload.zip in our example').
Once we've created the archive, we can now add files to it. We can refer to our previous notes of all the filenames associated with our IDF file. In our example, the archive will consist of a total of 42 files: one IDF, one SDRF, 20 TXT, and 20 TSV files. We can select these files in the 'Add' dialog as shown below, then click the 'Add' button at the bottom to begin creating the archive. (Hint: Hold down the CTRL key to select multiple files).
!worddav77a135ac788f03083615a13ec6a95ecf.png|alt="In WinZip's 'Add' dialog, select all the related IDF, SDRF, raw data, and derived data files (a total of 42 files in our example), then click the 'Add' button below to begin creating the archive.
"|height=743,width=430! 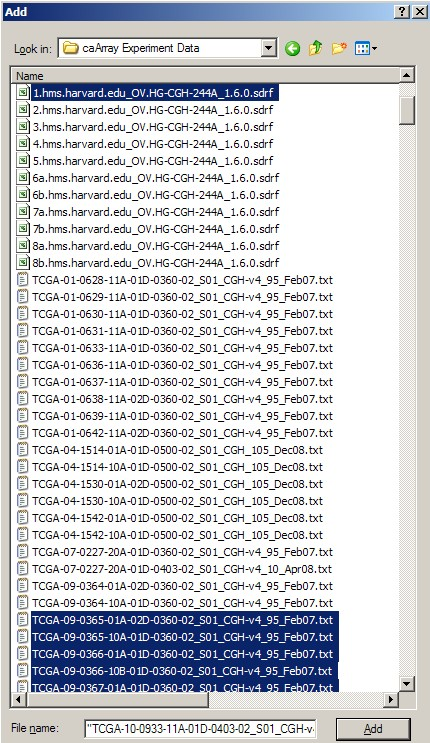
In WinZip's 'Add' dialog, select all the related IDF, SDRF, raw data, and derived data files (a total of 42 files in our example), then click the 'Add' button below to begin creating the archive.
(WARNING: After you've created the archive, ensure that the resulting file size is less than 2 GB. If it isn't, you will have to re-create the archive with a higher compression ratio. In our example, the size of the 'upload.zip' archive came out to approximately 900 MB, as shown below, so the file is ready to upload as is.)

In our example, the 'upload.zip' data archive we created is approximately 900 MB in size, which is below the 2 GB upload limit. If your data archive turns out to be larger than 2 GB, you will not be able to upload it until you re-create it with a higher compression ratio.
...
To upload the archive, first log in to caArray and navigate to the experiment you will be upload your data into, then select the 'Data' tab, followed by the 'Manage Data' tab beneath it. Now click on the 'Upload New Files' button as shown below.
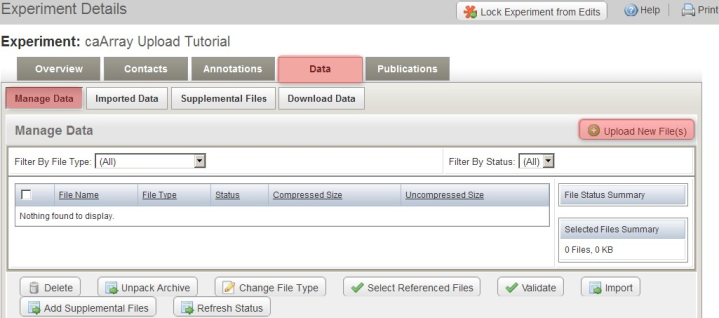
Click the 'Upload New Files' button under the 'Manage Data' tab to specify the location of your data archive.
A new pop-up window entitled 'Experiment Data Upload' will appear in your Web browser, prompting you to upload files. Click on the 'Browse' button, then select the 'upload.zip' archive we created previously from the Open dialog as shown below.
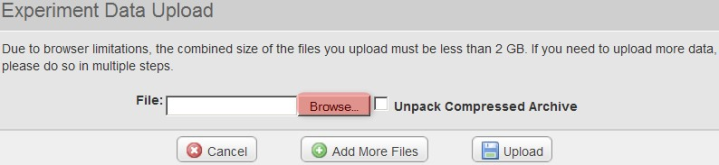
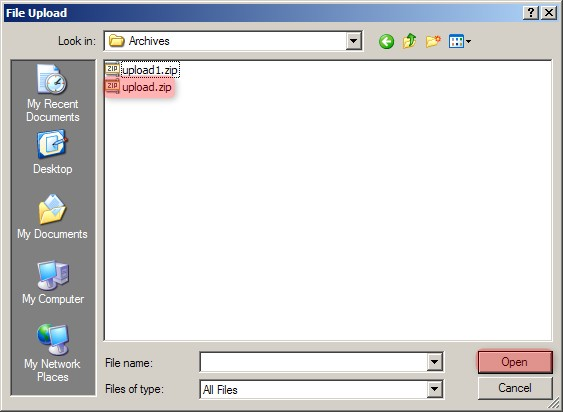
In the 'Experiment Data Upload' pop-up window, click the 'Browse' button, then in the 'File Upload' dialog, navigate to the 'upload.zip' archive we created previously and click on the 'Open' button.
Back in the 'Experiment Data Upload' window, make sure that the box labeled 'Unpack Compressed Archive' is checked, then click on the 'Upload' button to begin uploading the file. 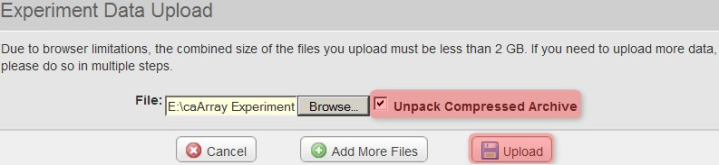
!worddav9536fd48df98aa0ab602d9503327c7b3.png|alt="Back in the 'Experiment Data Upload' window, make sure that the box labeled 'Unpack Compressed Archive' is checked, then click on the 'Upload' button to begin uploading the file.
"|height=165,width=719!
Back in the 'Experiment Data Upload' window, make sure that the box labeled 'Unpack Compressed Archive' is checked, then click on the 'Upload' button to begin uploading the file.
...
You'll know when the upload is complete when you see a new window overlaid over the upload window with the message 'Your file upload is complete', as shown below. Click the 'OK' button below this message, then click on the 'Close Window' button behind it to return to the main experiment window.
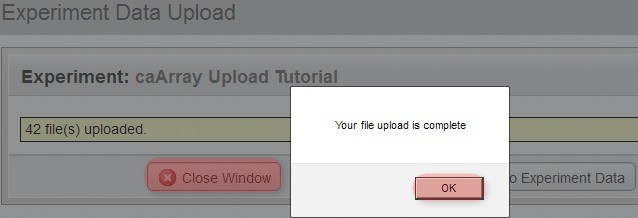
You'll know when the upload is complete when you see a new window overlaid over the upload window with the message, 'Your file upload is complete',.
Verifying the Archive
Back in the main experiment window, the contents of the archive we just uploaded are now listed under the 'Manage Data' tab. The TSV matrix files are considered supplemental, so we will move them to the 'Supplemental Files' tab by checking off all the TSV files in the list, then clicking on the 'Add Supplemental Files' button below.
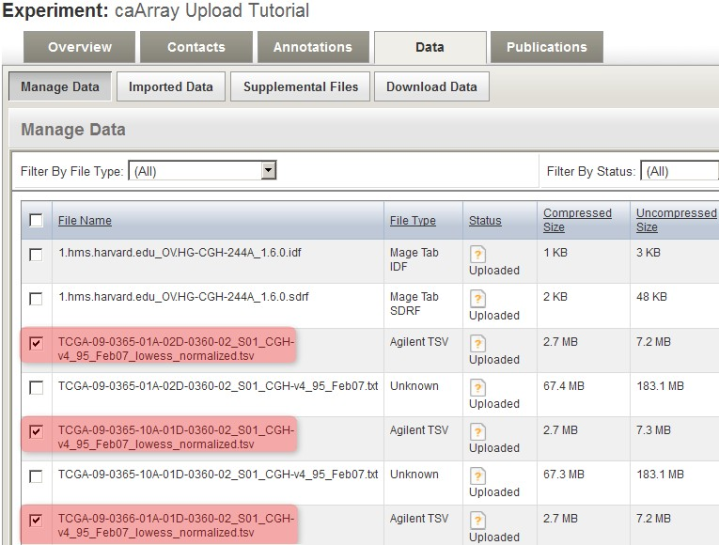
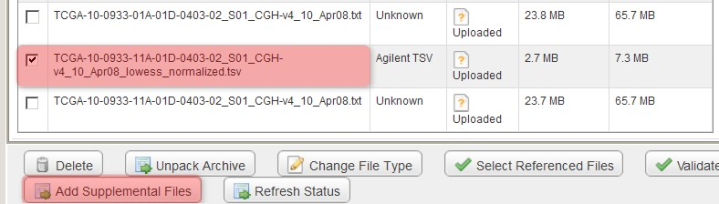
You can mark the derived array data files as supplemental by checking them off under the 'Manage Data' tab, then clicking the 'Add Supplemental Files' button.
These TSV files now appear under the 'Supplemental Files' tab, alongside other TSV files from a previous upload to the same experiment.
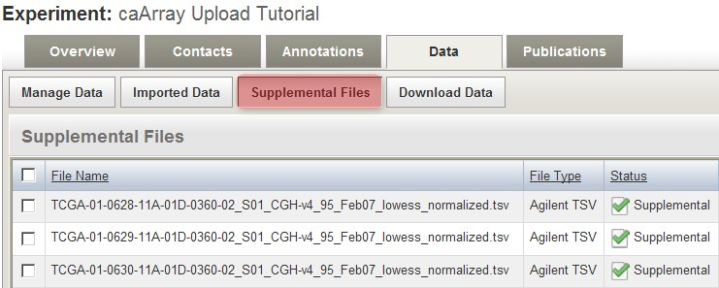
The derived array data files we checked off under the 'Manage Data' tab now appear under the 'Supplemental Files' tab, alongside other such files from a previous upload to the same experiment.
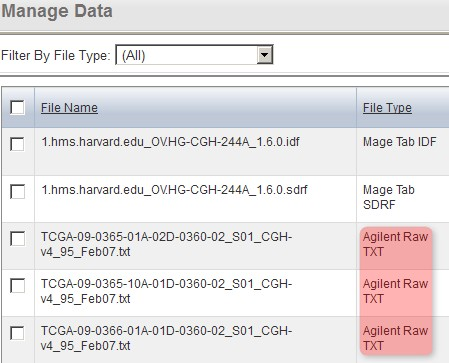
Back on the 'Manage Data' tab, the remaining files from our upload are one IDF, one SDRF, and 20 TXTs (only the first three of these files is shown below due to space constraints). Note that the status of the TXT file from the screenshot (and of all other TXT files in the list) shows as 'Unknown', which means that caArray did not automatically recognize the file type in this particular case. As a result, we will have to manually specify the file type ourselves by selecting all the TXT files in the list, then clicking the 'Change File Type' button below.
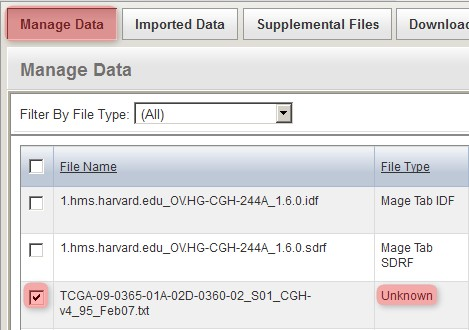

Since caArray didn't automatically recognize the format of the array data files we uploaded, we must manually specify the format ourselves by selecting the files under the 'Manage Data' tab, then clicking the 'Change File Type' button.
For the particular data in this example, the array data files are in the Agilent Raw TXT format. To specify this, in the 'Manage Files' window shown below, select 'Agilent Raw TXT' from the 'Select New File Type' drop-down list, then click on the 'Save' button above it. (NOTE: Depending on the assay type and array design used in your own experiment, your data may be in a different format, in which you will have to select the appropriate type from the drop-down list, or the file type may be automatically recognized by caArray, in which case you won't have to manually specify the file type yourself.)
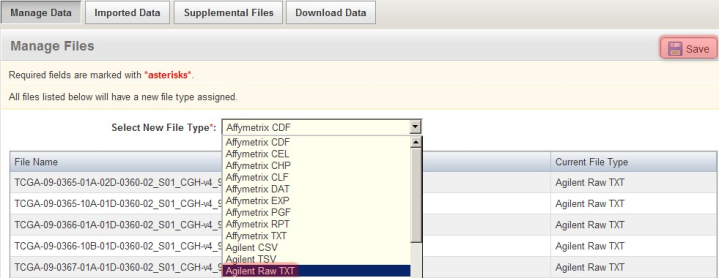
Manually specify the format of the uploaded array data files by selecting the appropriate format (Agilent Raw TXT in this example) from the 'Select New File Type' drop-down list.
Back on the 'Manage Data' window, the status of all the TXT files now shows as 'Agilent Raw TXT', indicating that caArray now correctly recognizes the file type.
Back on the 'Manage Data' window, the format of all the originally unrecognized array data files now shows under the 'File Type' column (as Agilent Raw TXT in our example), indicating that caArray now correctly recognizes the file type.
Our next step is to validate all the files, which we will do in two passes: the first pass, validating only the TXT files (but not the IDF and SDRF), and the second pass, validating all the files (IDF, SDRF, and TXT). For the first pass, check off all the TXT files in the list, then click the 'Validate' button below.
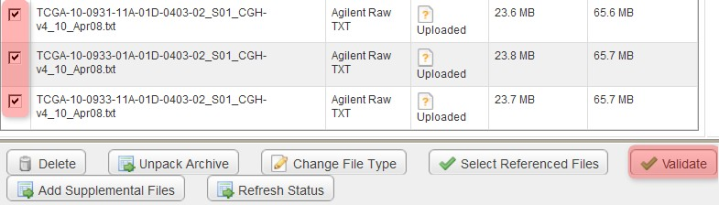
To begin verifying the uploaded data, check off all the array data files under the 'Manage Data' tab, then click the 'Validate' button.
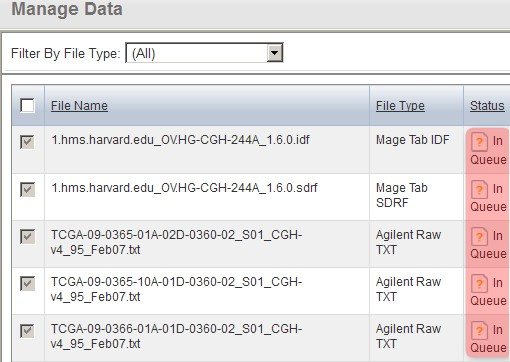
The page will now refresh with the updated status of the files showing as 'In Queue'. Depending on the size of your array and the performance of your server, the TXT files may take several minutes to validate, so be patient. To further complicate matters, the page will not automatically refresh once the files have finished validating, so you will have to manually refresh the page periodically yourself using your browser's 'Refresh button' until the file status updates again.
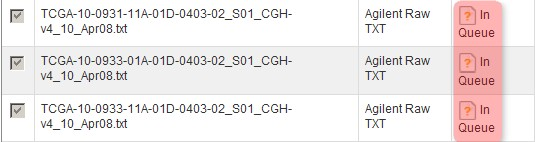
The 'Manage Data' tab now refreshes with the status of the array data files showing as 'In Queue'.
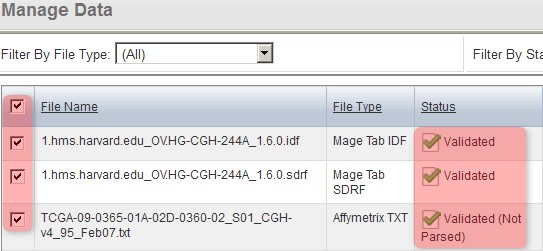
You'll know when the first pass validation is successful when the status for TXT files shows as 'Validated, Not Parsed'. (NOTE: The 'Not Parsed' status doesn't indicate any problem with your array data; caArray still has not implemented a parser for the Agilent TXT format and is thus unable to parse these files. The files can still be imported into your experiment without being parsed.)
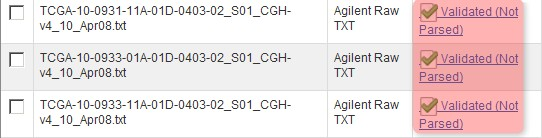
Once the data finishes validating, the 'Manage Data' tab will appear with the status of the array data files showing as 'Validated (Not Parsed)'.
For the second pass, check off every single file on the 'Manage Data' page (IDF, SDRF, and TXT), then again click the 'Validate' button below.


To finish verifying the uploaded data, check off all the files under the 'Manage Data' tab (IDF, SDRF, and array data files), then click the 'Validate' button again.
The page will again refresh with the files' status showing as 'In Queue'. After a few minutes, click the browser's 'Refresh button' until the file status updates again.
The 'Manage Data' tab now refreshes with the status of all the files showing as 'In Queue'.
You'll know when the second pass validation is successful when the status of the IDF and SDRF files shows as 'Validated' and the status of the TXT files shows as 'Validated, Not Parsed'. Once you've reached this stage, you can import the validated files into the study by checking all the files in the list, then clicking on the 'Import' button below.

Once the data finishes validating, the 'Manage Data' tab will appear with the status of all the files showing as 'Validated' or 'Validated (Not Parsed)'. To import the files, select them all, then click the 'Import' button.
The page will again refresh with the files' status showing as 'Importing'. After a few minutes, click the browser's 'Refresh button' until the file status updates again.
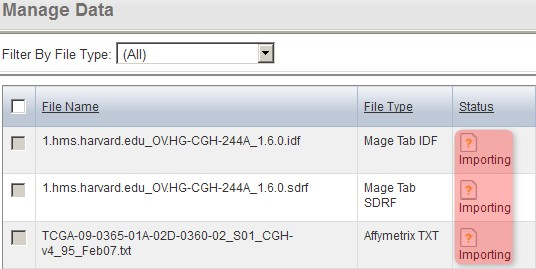
The 'Manage Data' tab now refreshes with the status of all the files we selected for importing showing as 'Importing'.
...
The files now appear under the 'Imported Data' tab, as shown below, with a status of 'Imported'. Note that other, previously uploaded files from the same experiment appear under this tab as well alongside the files we just imported.
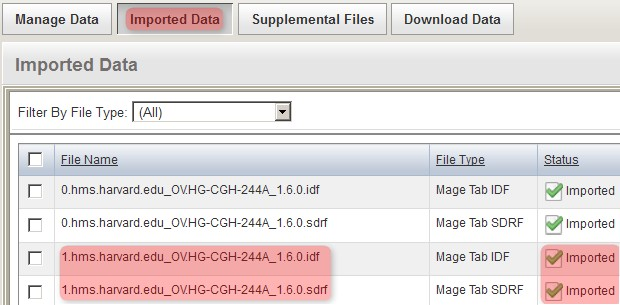
The imported files now appear under the 'Imported Data' tab with a status of 'Imported' alongside other files from a previous upload to the same experiment.
...