Page History
...
Once we've created the archive, we can now add files to it. We can refer to our previous notes of all the filenames associated with our IDF file. In our example, the archive will consist of a total of 42 files: one IDF, one SDRF, 20 TXT, and 20 TSV files. We can select these files in the 'Add' dialog as shown below, then click the 'Add' button at the bottom to begin creating the archive. (Hint: Hold down the CTRL key to select multiple files). !worddav77a135ac788f03083615a13ec6a95ecf.png|alt="In WinZip's 'Add' dialog, select all the related IDF, SDRF, raw data, and derived data files (a total of 42 files in our example), then click the 'Add' button below to begin creating the archive.
"|height=743,width=430!
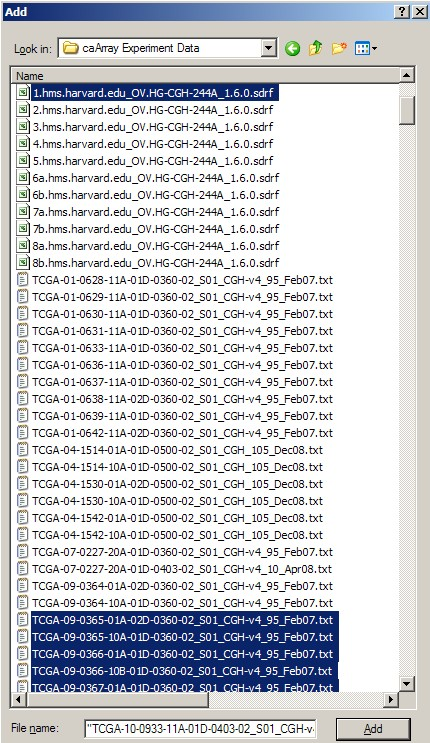
In WinZip's 'Add' dialog, select all the related IDF, SDRF, raw data, and derived data files (a total of 42 files in our example), then click the 'Add' button below to begin creating the archive.
...
Back in the 'Experiment Data Upload' window, make sure that the box labeled 'Unpack Compressed Archive' is checked, then click on the 'Upload' button to begin uploading the file. !worddav9536fd48df98aa0ab602d9503327c7b3.png|alt="Back in the 'Experiment Data Upload' window, make sure that the box labeled 'Unpack Compressed Archive' is checked, then click on the 'Upload' button to begin uploading the file.
"|height=165,width=719!
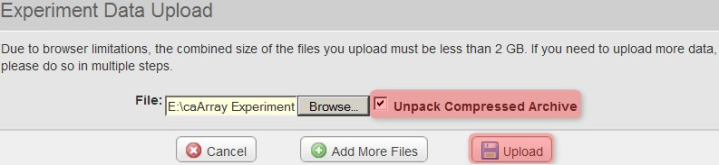
Back in the 'Experiment Data Upload' window, make sure that the box labeled 'Unpack Compressed Archive' is checked, then click on the 'Upload' button to begin uploading the file.
...