Page History
...
Splitting The Original SDRF File
Now that we_'_ve created batches of our array data files, our next step is to split the original SDRF file into multiple SDRFs, each corresponding to a single batch and referencing only the array data files from that batch.
...
To do so, first open the original SDRF file in Microsoft Excel or another tab-limited data viewer, as shown below: 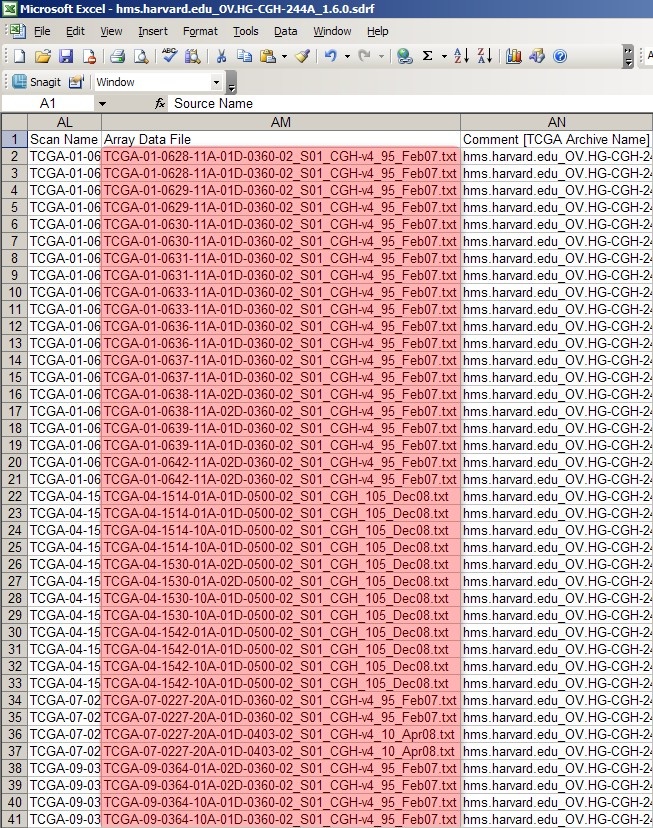
As you can see, the column headed 'Array Data File' lists the filenames of all the raw array data files from the experiment. The first 40 rows correspond to all the data files from the first batch we created in the previous section, Getting Started. We can generate a unique SDRF file for this batch by deleting all the other rows from the file -- except, of course, for the top header row -- and saving the modified file as a new SDRF with a different filename from the original. (The convention used in this tutorial is to prefix the original SDRF filename with a number representing the batch, followed by a period. For example, if the original SDRF filename is 'hms.harvard.edu_OV.HG-CGH-244A_1.6.0.sdrf', then the filename of the first, or 'zeroeth' batch, would be '0.hms.harvard.edu_OV.HG-CGH-244A_1.6.0.sdrf'.)
Once you've generated a new SDRF file, copy it over to its respective batch's folder. For example, '0.hms.harvard.edu_OV.HG-CGH-244A_1.6.0.sdrf' would be copied to the 'batch1' folder containing all the array data files from the first batch we created.
You can generalize this procedure to the entire original SDRF file, and thus all the batches from your dataset, by following these steps:
- Open the original SDRF file and locate the rows referencing the array files for the next batch
- Delete all other rows except for the top header row
- Save the modified SDRF as a new file with a filename unique to its respective batch
- Copy the newly generated SDRF to its respective batch's folder
Creating a Unique IDF File For Each Batch
Once you've generated a unique SDRF file for each batch, you must also generate a unique IDF file which references that SDRF file. You can do so simply by opening the original IDF file and editing the field 'SDRF Files' with the filename of the SDRF you wish to reference, as shown below: 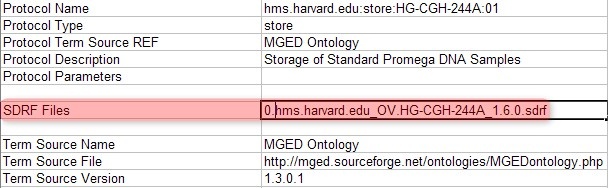
In this example, the originally referenced SDRF filename 'hms.harvard.edu_OV.HG-CGH-244A_1.6.0.sdrf' has been changed to '0.hms.harvard.edu_OV.HG-CGH-244A_1.6.0.sdrf', which is the SDRF for the first batch we created.
As with the SDRF files we modified in the previous section, be sure to save the modified IDF file as a new IDF with the same filename as its referenced SDRF, but with the 'IDF' extension instead of 'SDRF'. For example, the file which references '0.hms.harvard.edu_OV.HG-CGH-244A_1.6.0.sdrf' would be named '0.hms.harvard.edu_OV.HG-CGH-244A_1.6.0.idf'. Finally, copy this IDF file over to its respective batch's folder containing the referenced SDRF file and all the associated array data files.
You can repeat this procedure for all your batches. In summary:
- Open the original IDF file and locate the 'SDRF Files' field.
- Edit this field to reflect the file name of the SDRF file you wish to reference.
- Save the modified IDF file with a unique filename that is parallel to the referenced SDRF's filename.
- Copy the newly generated IDF to its respective batch's folder
Creating the Archives
Now that we've divided our dataset into batches and generated the corresponding IDF and SDRF files for each, our next step is to create a ZIP archive of each batch. Launch WinZip, click the 'New' toolbar button, and enter a name for your archive in the 'New Archive' dialog. We'll call ours 'upload.zip', as shown below.
...