This guide explains how to use the caBIG® Annotation and Image Markup (AIM) Template Manager for AIM Information Model Version 3.0. The intended audience for this guide is a biomedical researcher familiar with the AIM information model.
Topics in this guide include:
To Print the Guide
You can create a PDF of the guide. For instructions refer to the tip How do I print multiple pages?. If you want to print a single page, refer to How do I print a page?.
Getting Started with the AIM Template Manager
The AIM Template Manager allows you to generate a set of well-defined questions and answer choices to facilitate collecting information for a particular purpose, such as a The Cancer Genome Atlas Glioblastoma (TCGA GBM) study. These questions and answers are contained in an AIM XML template file that you can import into an AIM-enabled application. Aided by the information in the XML file, users of the AIM-enabled application can then annotate medical images using a controlled vocabulary and standard template. This results in simple and constrained annotations that are reproducible and consistent. Finally, the AIM-enabled application captures answers and then exports them as an AIM XML document or AIM DICOM SR, which can be sent to the AIM Data Service or DICOM store SCP, respectively.
You use the AIM Template Manager to design templates based on a lexicon of standard and user-definable terms. You can then collect multiple templates into template groups. You complete the process by downloading a template group as an XML file to your local computer.
AIM templates are based on the AIM template XML schema, which in turn is based on the AIM model.
Why Use the AIM Model?
Imaging reports contain both graphical drawings and medical knowledge in the form of annotations. These annotations are stored as unstructured text and separated from graphical drawings, which are typically in a proprietary format on an imaging system. Extracting this valuable medical information and combining them with drawings on another system is time-consuming and cumbersome to filter and search.
The AIM model begins to solve this problem by capturing the descriptive information of an image with user-generated graphical symbols placed on the image into a single common information source. AIM captures medical findings using standard vocabularies such as RadLex, SNOMED CT, DICOM, and user-defined terminology. Image information captured in the AIM model includes the anatomic entity and its characteristics, imaging observation and its characteristics, and inference. However, existing vocabularies used to describe medical images contain thousands of terms that make it difficult for users to find and then include them in their AIM annotations.
What is in an AIM Template?
An AIM template consists of a set of related questions for a study. It captures the name, version, description, UID, controlled term applied to the template, authors, and creation date of a template. It also has one or more components. Each component represents a study question that may have one or more answers. Components can be any of the following: anatomic entity, imaging observation, inference, and calculation.
Both anatomic entities and imaging observations are also described by their associated characteristics. Anatomic entity and imaging observation characteristics inherit the attributes of their respective component. Characteristics have annotator confidence that allows a user to enter a level of user’s confidence answering the question in terms of a percentage. A characteristic may also have a quantification value.
Working with Template Groups
Adding a Template Group
When you create a template group you create a container that holds individual templates.
To add a template group
- Click the Template Groups tab.
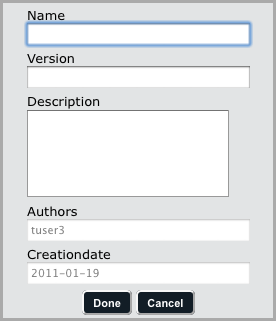
- Below the left panel, click . The new template group window appears as shown below.
- Enter the name of the new group and optionally a version number and description in the boxes provided. The author and creation date fields are pre-populated. You can edit the author by completing this procedure and then editing the template group.
- Click Done. The new template group appears in the Group Name panel.
Deleting a Template Group
Deleting a template group does not delete the templates within it.
To delete a template group
- Click the Template Groups tab.
- Below the left panel, click . You are asked to confirm the deletion.
- Click Delete to proceed with the deletion.
Editing a Template Group
You can edit the name, version, description, and author of a template group.
To edit a template group
- Click the Template Groups tab.
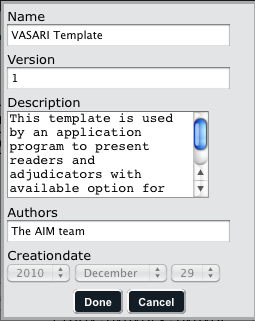
- Below the left panel, click . The selected template group's description appears as shown in the example below.
- Change the name of the new group, version, and description as needed. Note that you can change the author.
- Click Done. The new template group appears in the Group Name panel.
Copying a Template Group
You can create a copy of a template group to make it easier for you to customize it.
To copy a template group
- Click the Template Groups tab.
- Select a template group from the Group Name panel.
- Below the left panel, click . A copy of the template you selected is created with the name of Current Template Name copy and is listed in the Group Name panel.
Uploading a Template Group
You can upload a template group you downloaded in the past or received from someone else.
To upload a template group
- Click the Template Groups tab.
- Select a template group from the Group Name panel.
- Below the left panel, click . The upload window appears, as shown below.
- Click Browse to navigate to a location on your home drive where the XML file is that you want to upload. The AIM Template Manager will only accept template group files that have been validated by the AIM Template XML schema. This file could have been downloaded from the AIM Template Manager or it could have been created manually using the AIM template XML schema.
- Click Upload. The template group appears in the Group Name panel.
Downloading a Template Group
You can download a template group you create in the AIM Template Manager and then share it with others or save it for future use.
To download a template group
- Click the Template Groups tab.
- Select a template group from the Group Name panel.
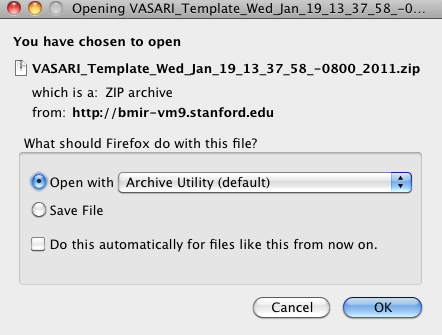
- Below the left panel, click . You are prompted to save the XML file on your hard drive. The example below shows that Firefox prompts you to save it to your hard drive as an archive file.
- Save the file or open it to verify the contents.
Working with Templates
Saving your changes
The AIM Template Manager automatically saves your work after each selection you make. An animated image appears to indicate when a save is occurring.
Creating a Template
To create a template
- Click the Templates tab.
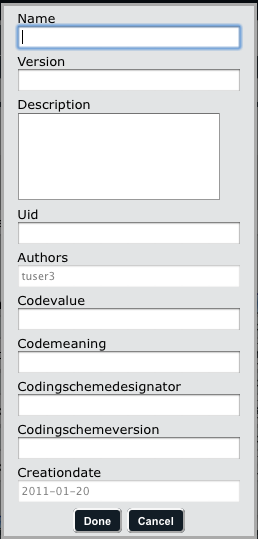
- Below the left panel, click . The new template window appears as shown below.
- Enter a name for the template and optionally any of the other fields. Note that you cannot change the author at this point but you can do so by editing the template later.
- Click Done.
- Add one or more components to the template. Components can be of any of the AIM classes, which include anatomic entity, imaging observation, inference, and calculation.
- Add one or more characteristics to each template component you add.
- Specify the allowed terms for each component characteristic.
Tip
Below the Template Components panel, click to expand all of the template components to see their characteristics or click to collapse the characteristics and just see a list of components. Within the template component row, click the same buttons to expand or collapse individual elements of the component.


