This chapter describes how to review results of TCIA database searches.
Topics in this chapter include:
Search Results Overview
In reviewing search results, it is important to review the hierarchy of submissions in TCIA.
Collection > Patient (Subject) > Study > Series > Images |
A Simple Search, Text Search, and Advanced Search each orders search results by Subject ID on the Search Results (by Subject) page. Clicking that Subject ID displays the studies and image series matching the search criteria for that subject. For more information, see 3 - Working with Images in TCIA 6.5.
You can view images associated with studies for the selected subject in various ways, including:
- viewing all study images in a DICOM web viewer,
- viewing thumbnails of all study images on the 3 - Working with Images in TCIA 6.5 page
- viewing selected images in your desktop DICOM viewer,
- viewing all study images in a cine loop,
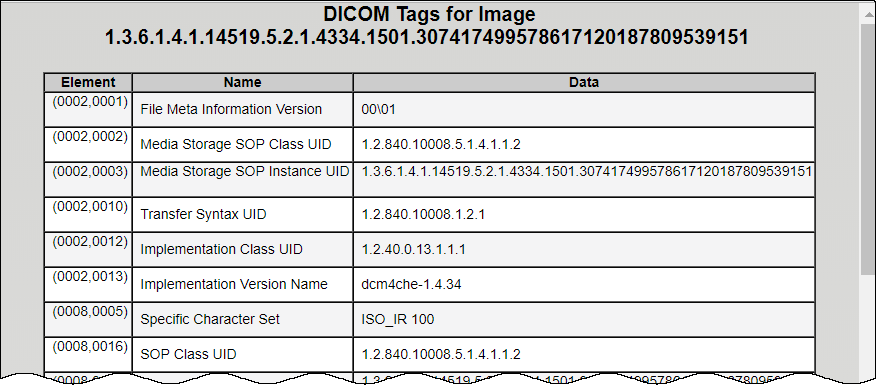
- or viewing the DICOM header of the first image in the series.
Retrieving objects for download
At any point in the process of reviewing results, you can add items - all data pertaining to a patient, study, or an image series - to your data basket. When items are in your data basket, you must take a subsequent step to download them.
When you download a series that has annotation files (indicated by Yes in the Contains Annotations column), they are automatically downloaded as well.
Search Results (Studies for Subject)
The following table describes the data available for each study and image series in that study.
Field | Description |
|---|---|
| DICOM Web Viewer link | Click this link to see all study images in the DICOM Web Viewer. |
Series | Series identification number |
Description | Description of the series |
Modality | Image modality |
Manufacturer | Name of the manufacturer of the image series |
Images | Displays the number of images in the series. This number includes visible images that meet the search criteria. |
| Thumbnails | Click this link to display thumbnails of the series' images. For more information, see Search Results (Images for Series). |
| Cine Mode | Click |
| DICOM | Click
|
Add to Basket |
For more information, see Managing the Data Basket. |
| Add a Study series to Basket | To add only the series in a single study in the search results to your basket, click |
Search Results (Images for Series)
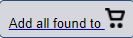
 icon in the Search Results (by Subject) page opens thumbnails of all images in the selected series. In this documentation, this page is called Search Results (Images for Series).
Click View Image under any thumbnail to save the image as a file or open it in the DICOM viewer.
Viewing Image Animation
- On the Search Results (Studies for Subject) page, you can launch an animation of thumbnails if there is more than one image in the series. Click
 in a series record in the search results.
OR - You can launch the animation of an image series from the data basket. In the View column of the data basket, click the magnifying glass symbol,
 , corresponding to the series you want to view. On the View Series Images page, click the View Series in Cine Mode link.
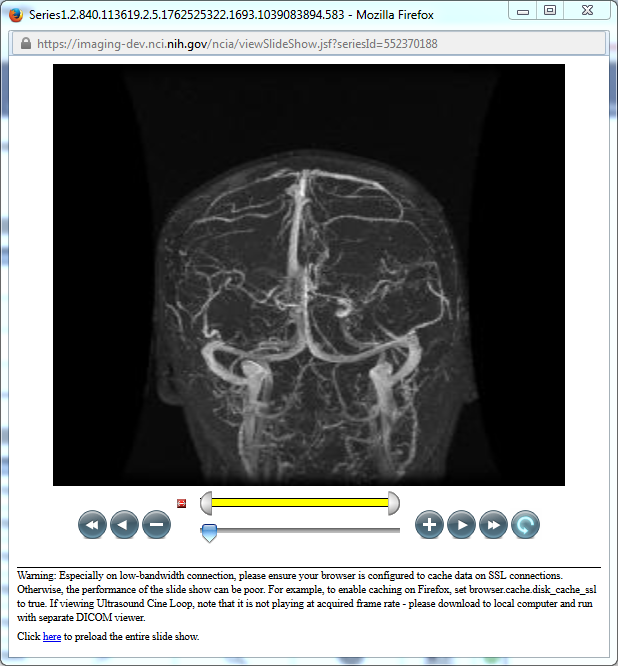
When the viewer opens (figure above), the animation controls display below the image. When you use the controls, NBIA proceeds to display the images sequentially, like a movie.
The following table describes the action of each of the animation controls.
Animation Controls | Action |
|---|---|
| Reset start and end. |
| Drag ends of the yellow bar to vary the range of images playing. |
| Click to return to the first image in the set. |
| Click to play animation backward through the series. |
| Click to stop the animation; click again to display one image at a time, moving backward through the series. |
| Drag the arrow to set which frame of the movie displays. This also monitors the progress of the animation. |
| Click to stop the animation; click again to display one image at a time, moving forward through the series. |
| Click to play animation forward through the series. |
| Click to progress to the last image in the set. |
| Click to cycle the animation forward or backward. Once set, the animation continues. |


Tip
If the animation is very sluggish, you may want to preload the entire animation by clicking the link at the bottom of the series animation page. Also heed the note at the bottom of the page, which reads:
Warning: Especially on low-bandwidth connection, please ensure your browser is configured to cache data on SSL connections. Otherwise, the performance of the slide show can be poor. For example, to enable caching on Firefox, set browser.cache.disk_cache_ssl to true. If viewing Ultrasound Cine Loop, note that it is not playing at acquired frame rate - please download to local computer and run with separate DICOM viewer.
Obtaining DICOM Viewers
Most image data and some associated data within The Cancer Imaging Archive (TCIA) is stored in DICOM format. There are a variety of both open source and commercial DICOM tools that could be used to manipulate and view these files. While TCIA does not endorse nor recommend any particular tool, here is a list of tools that we or our partners have used in our daily work. More information about DICOM is available.
Select Tools > List DICOM Image Viewers to open a page of selected links to freeware DICOM image viewers. This list is provided for your convenience. Many other DICOM viewers are available on the internet. This is not an endorsement of the listed viewers.
Before using the viewers
The images in this image repository need to be downloaded before you can view them using the viewers.
- ImageJ runs on Linux, Mac OS 9, Mac OS X, Windows, and the Sharp Zaurus PDA.
- FusionViewer open source & multiplatform PET/CT display software package
- OSIRIX (MAC OSX)
- AIM on ClearCanvas
- 3D Slicer
- MATLAB dicomread function and MATLAB dicominfo function (headers)
Downloading TCIA Images
Working with the Data Basket
As you search TCIA, you can add any data items to your Data Basket to download later. The items in your Data Basket remain there only for the current work session.
Adding Items to Your Basket
You can add the images associated with a subject, a single series, or the entire study to your data basket. You can also choose individual images to add to your data basket. When you have marked a record for addition to the data basket, it is highlighted in yellow.
- Click
 to select the record and
  to clear it.
 - To mark all records in the search results as records you want to add to your data basket, click the basket icon in the column header or click
 .
.
Managing the Data Basket
You select items to download by first searching for them in NBIA and then adding them to your data basket.
The following is an example of the My Data Basket page with just one image collection in it. The estimated download time and the total size of your data basket appear at the bottom.

The following table describes each item in the table.
Data Basket Field | Description |
|---|---|
Subject ID | Subject identification number |
Study UID | Study identification number |
| Study Date | Date of study |
| Study Description | Description of the study |
Series ID | Series identification number |
| Series Description | Description of the series |
Number of Images | Number of Images for series |
Image Size (in MB) | Size of the image file in megabytes |
Annotation File Size (in MB) | Size of the annotations file in megabytes. This column is N/A if there are no annotations. |
Remove | Remove the item from the basket. |
To delete all items from your basket, click the Empty Data Basket link. You can continue to add items to your data basket from the Search Results pages.
Deletion details
If the series you mark for deletion is part of a shared list, a message appears alerting you to that fact. The message also includes the name of the shared list and the shared list creator's email address. This gives you the opportunity to back out of the deletion. For more information see Working With Shared Lists.
You can now download the data in your data basket using the Downloader. You must install the application before you proceed with downloading.
Downloading the Data Basket
Tip
Disable popup blockers before you download the files. If you do not want to download the annotation files, deselect the Include annotation files in your download checkbox.
Once you are satisfied with your selections, click Download at the top left of the results table to use the Downloader.
Download Manager
Working With Shared Lists
TCIA provides a way for you to identify and label a collection of image series for you to use or share with other TCIA users.
Creating a Shared List
Who can create a shared list?
Anyone can create a shared list. Once you do so, you must record the exact name of the shared list to distribute to others who may want to use the list. That is the only way they can access it.
To create a shared list
You can create a shared list from data basket or the Tools menu. Procedures for both methods follow.
Data Basket
- Add an image series that you want to include in the shared list to the data basket.
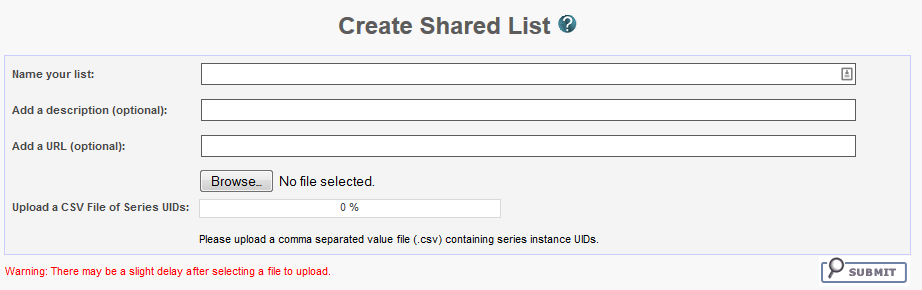
- Click the Create Shared List button.
- Do the following:
- Enter a Name for the list (required).
- Optionally, add a description and a URL. The URL links to relevant or more detailed information about the list.
- Click Browse to upload a file in comma separated value format (.csv) that includes all of the series instance IDs you want to be in the shared list. This file should have one series instance UID per line.
- Click Submit.
The image series from the uploaded file is added to the data basket.
Access to your list
NBIA warns you that not all public users will have access to your list if the list contains any non-public image series.
Menu Option:
- Click Tools > Create Shared List.
The Create Shared List page appears.
- On this page, do the following:
- Enter a Name for the list (required).
- Add Comments and a Hyperlink, where appropriate, which links to relevant or more detailed information about the list (optional).
- In the Upload File field, enter the name of a file that includes all of the series instance IDs you want to be in the shared list. This file should have a series instance UID per line.
- For your convenience, a Java tool is available to aid in generating a CSV of your series instance UIDs.
Download: ExtractSeriesUIDs.zip
Do the following to use this tool to generate the file to upload in the last field of our online Create Shared List form:- Download the zip file, then move it to a top-level directory of DICOM files you want indexed.
- Extract the zip file to the top level directory where your DICOM data resides (all sub-directories will be scanned). It should extract two things.
- Then run ExtractSeriesUIDs.bat which should flash a quick command line window and then automatically disappear.
A file with a name similar to SeriesUIDs.CSV is created as an output. - Enter the output filename into the form.
- Click Submit.
The image series from the uploaded file is added to the data basket.
Editing a Shared List
.csv file with all the series instance IDs for the list. You can only edit/delete shared lists you have created yourself.Shared List
From the data basket, you can export image series instance IDs to a .csv file for later use in creating or editing a shared list. See Exporting a Shared List for more information.
To edit a shared list
- Click the Edit Shared List link under Tools on the menu bar.
The Edit My Shared List page appears, displaying a list of shared lists you have created.

- Click the name of the shared list you want to edit.
List details appear.
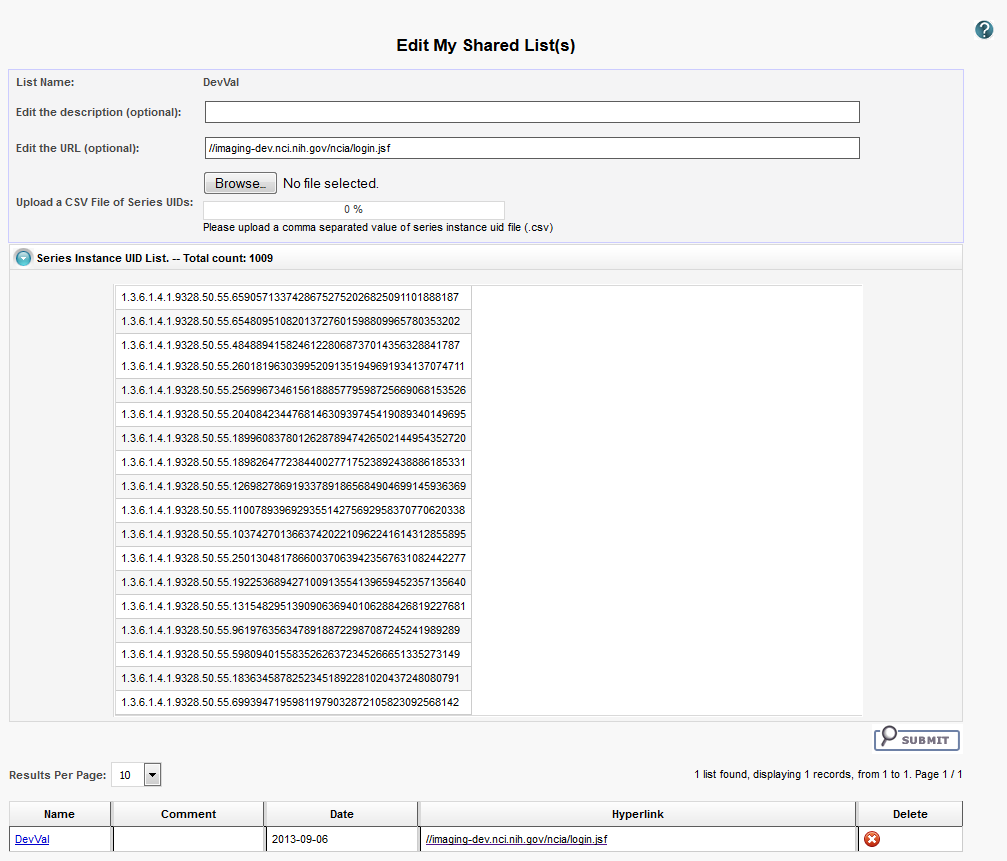
- In the description field, optionally enter a comment about the list or your edit.
- In the URL field, optionally enter a web address that provides more information about the shared list.
Click Browse to locate the file you want to upload. Doing this replaces the current shared list.
To delete a shared list
- Click Tools > Edit Shared List.
The Edit My Shared List page appears, displaying a list of Shared Lists you have created. - In the row of the shared list you want to delete, click
 .
.
Because editing a shared list is only possible by replacing it, you might consider backing up a shared list when you create it. To do so, export the shared list as a file when you create it. See Exporting a Shared List.
Searching a Shared List
Exporting a Shared List
.csv file.To export a shared list
- Above the data table, click Shared List > Export Series ID.
The shared list opens in the data basket.
The export begins immediately. A dialog box appears, prompting you to open (in Excel) or save the file. - Select to open or save the file.
Managing a Shared List
Permissions
This administrative feature is available only to logged-in users who have "manage visibility" privileges, as defined in UPT.
To delete a shared list, follow these steps:
- Click Admin > Manage Shared List.
The Manage Shared List page appears.

- Select a user name from the list.
That user's shared list(s) appear.
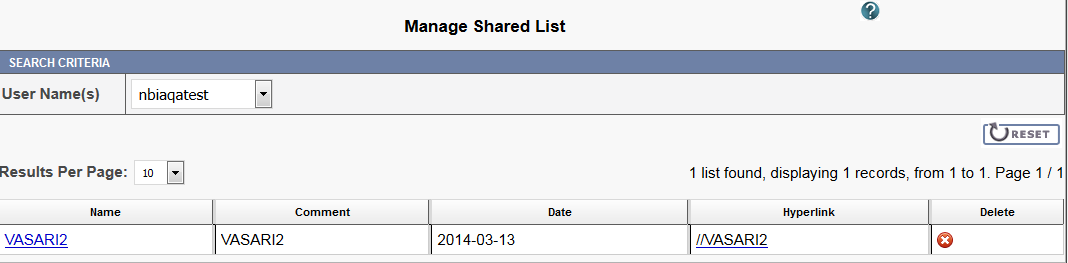
Click the name link to review the shared list's details or click
 to delete shared the shared list.