Uploading investigation data to the CSSI DCC Portal allows you to curate, manage, and reuse datasets in a standards-compliant way. The ISA-Tab specification  describes this standard and how to structure your investigation data to create an Investigation-Study-Assay (ISA) archive. This may involve configuring it using open-source software made for this purpose.
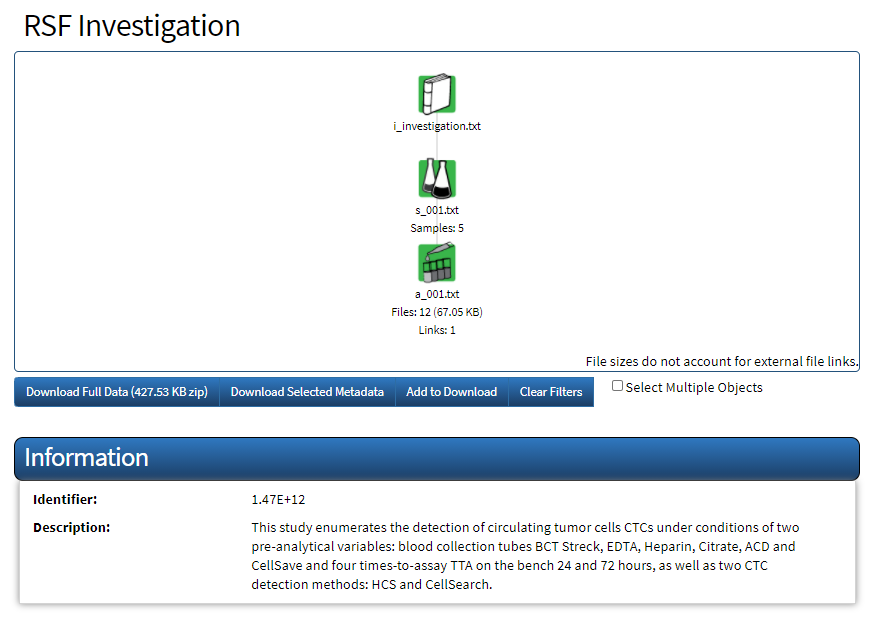
An ISA archive is a compressed (.zip) file containing multiple text files and data files. Each tab-delimited text file in an ISA archive describes the structure, meaning the column headers and row values when considered in spreadsheet format, of the investigation, study, and assay components of the archive. The data files correspond to each assay and are included in the archive in their native format, for example, Microsoft Excel. An ISA archive may also contain images and other files.
Only users who have registered for and logged in to the CSSI DCC Portal can upload investigation data. During registration, you must also select the I would like to upload Investigation data checkbox and be approved. For more information, refer to Registering to Use the CSSI DCC Portal.
You can upload a single ISA archive and save it to a folder. If you need an administrator to delete an investigation version from a folder, click the Contact Us link at the bottom of the screen.
Uploading ISA Archives
. This specification describes how to structure your investigation data to create an Investigation-Study-Assay (ISA) archive. This may involve configuring it using open-source software made for this purpose.The following pages describe how to upload ISA Archives.
Understanding Upload Errors
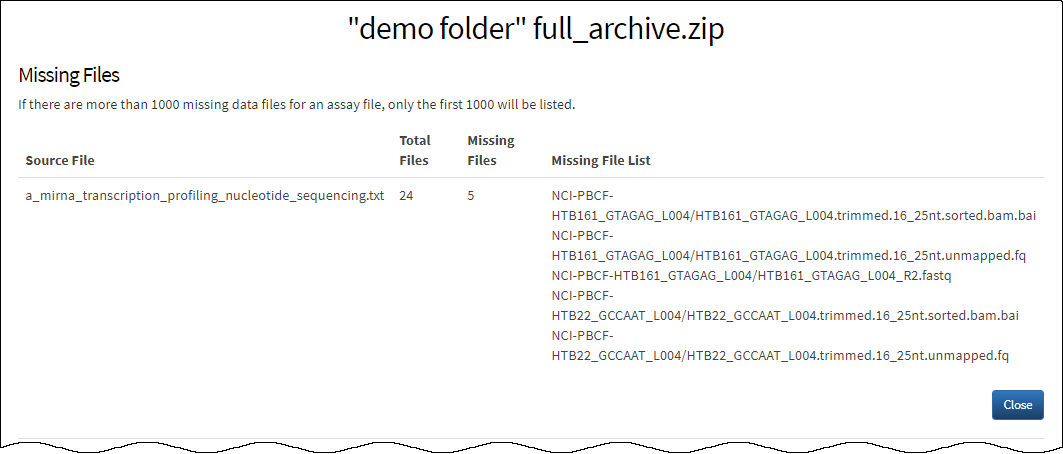
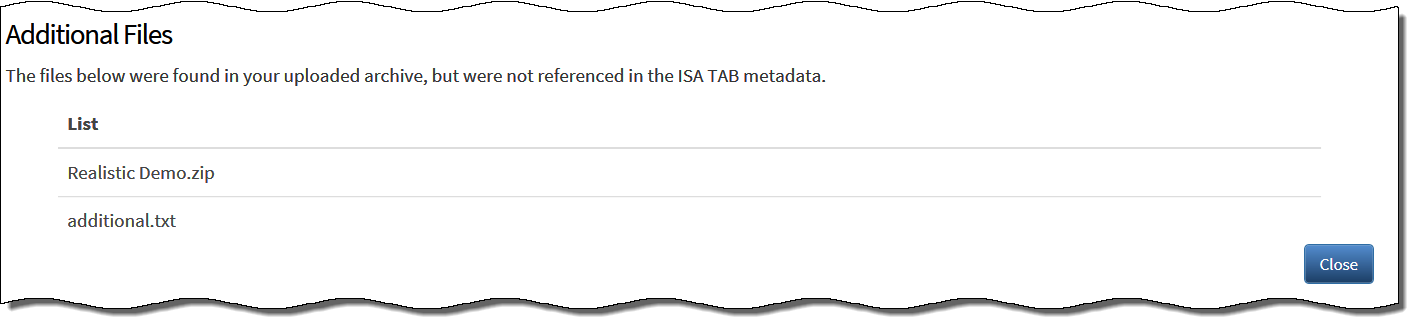
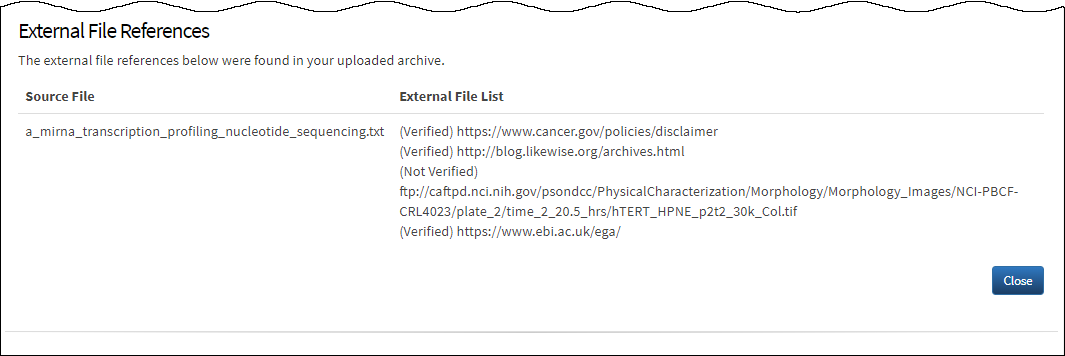
If your ISA archive does not meet those standards and conventions, you may encounter an error when you upload it to the CSSI DCC Portal. Your ISA archive will likely process successfully but the application will detail the error in the Status column. You may then want to address the error and upload again. A sample error message follows: CSSI DCC looks for errors in three types of files that are commonly in an ISA archive: After the upload completes, the error message appears in the Status column of the File Upload area on the Upload Single ISA Archive tab. It provides an overview of the error and a link to the details. Click the link in the status message. A page opens that details the status of the three types of files in the uploaded ISA archive. The Missing Files section details each missing data file referenced in the metadata of the assays: The Additional Files sections details files you uploaded that you didn't reference in the archive's metadata. The External File References section lists external file references in your uploaded archive and notes whether they are verified or not. If the portal can detect that the URL is valid without authenticating it, it appears in this list as “Verified.” In all other cases, it appears as “Not Verified.” File size is not tallied for external file references. . The ISA tools site provides additional technical information about validating ISA archives.Missing Data Files: File processed successfully. 1 files referenced in the assay(s) were not found. Click here to view the missing file lists (limited to 1000 entries each).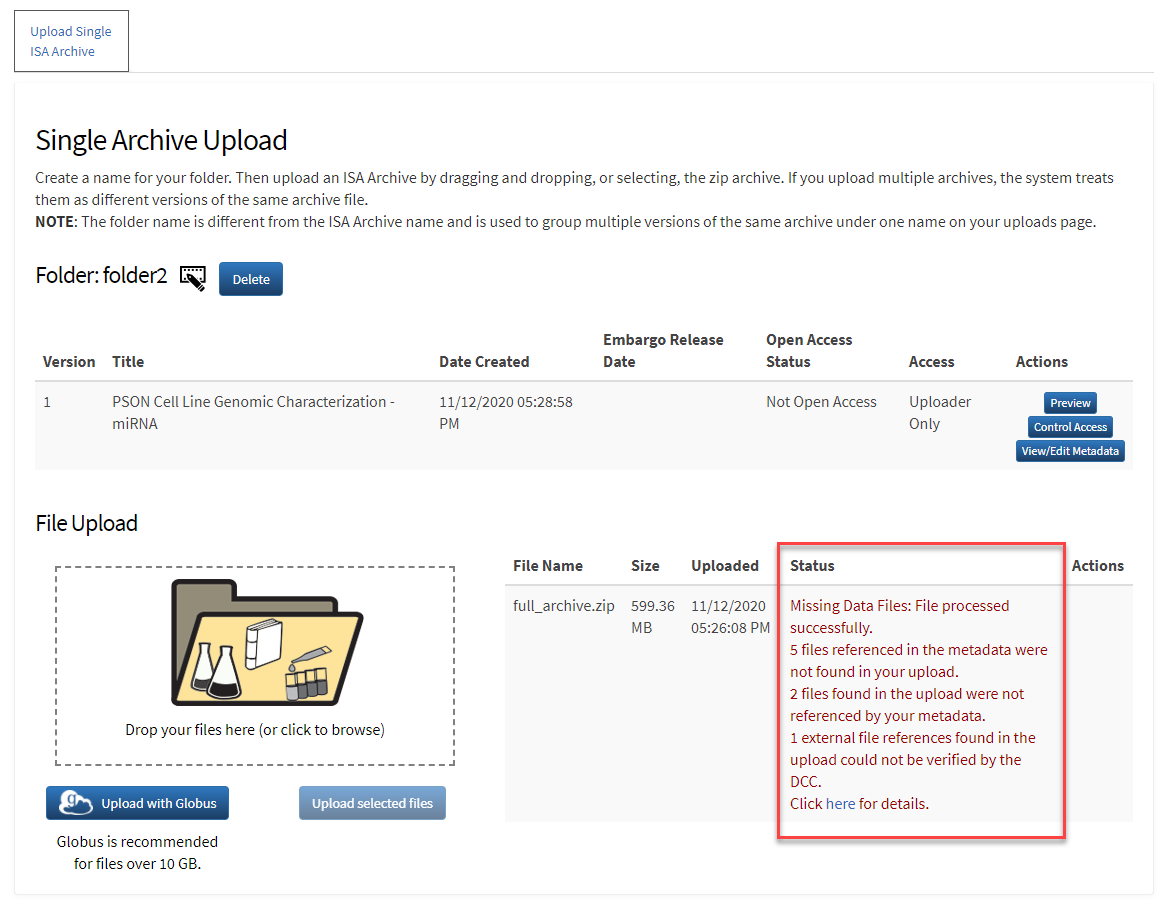
Controlling Access to Investigation Data
You must have the role of uploader or higher to control data access. Your administrator determines your role. When you assign access, you assign it to one or more groups rather than individual users, though a single group could contain a single user. Anyone with upload privileges can create and manage these groups, but you must create the group(s) before you upload. The following page family describes how to control access to investigation data.
Making an Investigation Open Access
Editing or Removing the Embargo Date for an Investigation
In the Comments field, provide any comments you want to associate with this request. Click Submit. The system changes the status of the investigation version to Request pending as of <date time>. An administrator processes your new request. When that administrator has approved your new request, the system changes the status of the investigation version (on the Upload ISA Archives page) back to Open Access approved, Embargoed. When system has made the investigation version open access, the system sends you an email notification with "CSSI DCC Portal Investigation Granted Open Access" as the subject line. 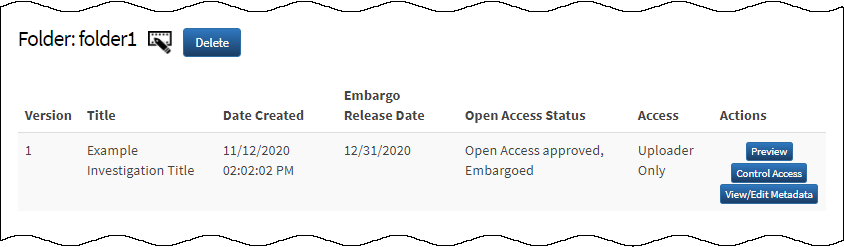

Viewing Open Access History
While you should associate only one investigation with a folder, you can upload multiple versions of an investigation file to that folder, and then request open access for one of those versions. You may want to do this if you change your investigation data or need to fix it due to an upload error. Each time you upload a new investigation file to a folder, the version number increases by one. Each folder can have only one open access version.
Each time an administrator or the system makes an investigation version open access, the system automatically removes the open access status from the version that previously had that status. Here are some examples:
- If version 1 of your investigation currently has open access status, and then an administrator makes version 5 open access, the system automatically removes the open access status from version 1.
- Or, if version 5 currently has open access status, and then an administrator makes version 1 open access, the system automatically removes the open access status from version 5.
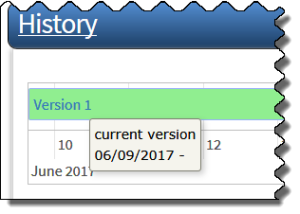
CSSI DCC tracks the date and time each time an administrator makes an investigation version open access. Use the history timeline to switch between current and previous versions of the investigation file. You can download a previous version. You can view the history for investigation files to which you have access.
To view the history of an investigation file
- Browse or search for an investigation. For instructions, refer to Browsing Investigations or Searching Investigation Data. The Investigation Details page appears.
- Scroll down to the History section of the page. Consider taking the following actions:
- The current version number appears above the timeline. You can hover over the version number to see the date when this version became the current version. In this example, Version 1 became current on 6/9/2017.
When an investigation has multiple versions, they appear on the timeline as well. The version that is currently selected is always green. In the example below, the current version is selected, so it appears in green. The current version is also open-ended to the future until another version has the open access status.
The white space between versions, as in the example below, indicate times when no version of the investigation file was open access.

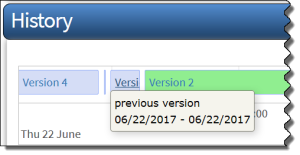
- To select a previous version, hover the mouse over the timeline. If the version you want to select is not immediately visible, move the scroll wheel on the mouse down to move left and up to move right until you see a previous version. In this example, a previous version was current only on 6/22/2017.
- Click the previous version to select it. The Investigation Details page appears. The top of the page displays the selected version number and a link to the current version. You can download this previous version, as described in Downloading Investigation Data.
- The current version number appears above the timeline. You can hover over the version number to see the date when this version became the current version. In this example, Version 1 became current on 6/9/2017.