Working with Array Design Files in caArray
Topic: caArray Usage
Release: Up to caArray 2.X
Date entered: 12/18/2009
Introduction
One of the most frequently asked questions from the new caArray users is: "Where can I obtain the array design file for my experiment?". Although the array providers' websites are still the best places to obtain the most updated array design files (for more details, see caArray 010 - Where are the Array Design Files for caArray? Where are the Array Design Files for caArray?), many array design files are now available to download at the NCI public caArray server, a new feature made available in caArray version 2.3.
In this KB entry, we will explain how to download, edit, delete and replace an array design file in caArray.
Download an existing array design file
After login to caArray, the option to manage an array design will be available in the Curation section in the left menu. To select a file to download, follow the steps below:
- Click "Manage Array Design" in the left menu section (Arrow 1).
- All the design files that have been imported into caArray will be displayed in the main data area (Arrow 2).
- Locate the array design file of interest, select "Download" (Arrow 3) to launch the download.
Download of an existing array design file

Upload a new array design file
Any registered caArray user can upload, validate, and import the array designs from a supported array provider. If a desired array design file is not found in the caArray, the user can initiate the file upload into caArray:
- Click Import a New Array Design (Arrow 4 in the preceding illustration).
- This opens the New Array Design dialog box.
- Enter the appropriate information in the fields provided on Array Design Details form.
New Array Design Dialog with Form Completed
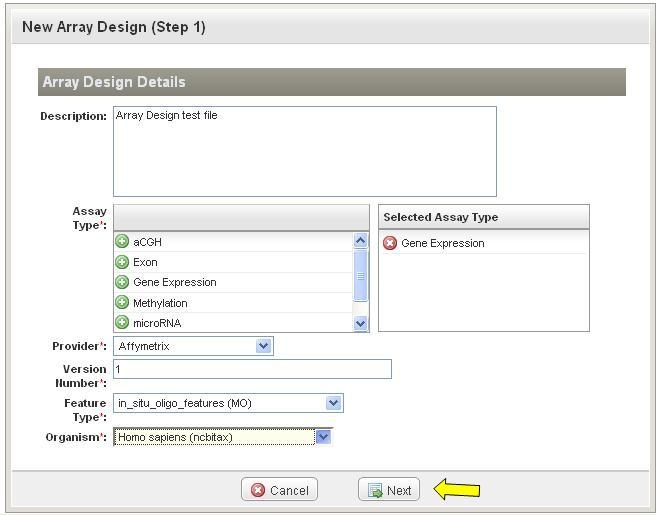
The required fields are the Description (Array Design test file in the example), Assay Type (select, Gene Expression in the example), Provider (Affymetrix in the example), Version Number (1 in the example), Feature Type (in_situ_oligo_features (MO) ni the example) and Organism (Homo sapiens (ncbitax)).
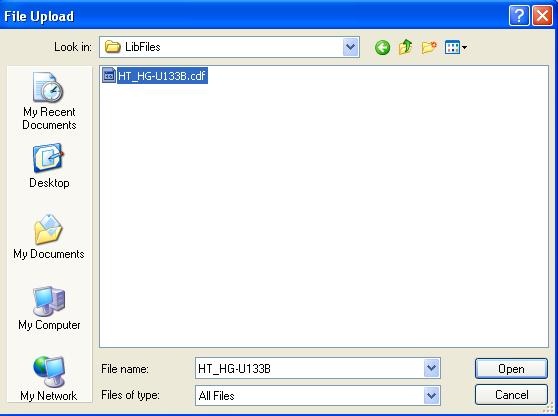
- Click "Next" to select an array design file of interest.
Selecting an array design file
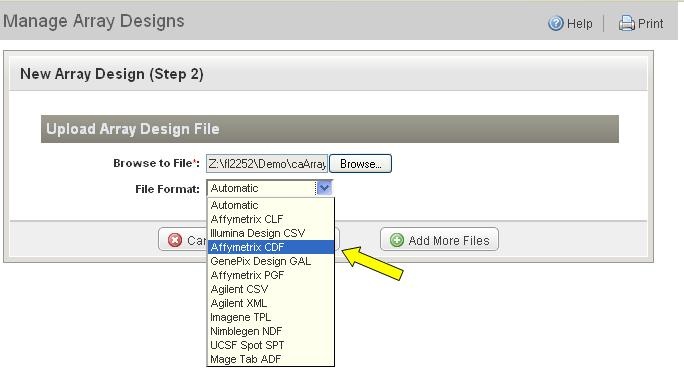
- Identify the array design file format in the drop-down list.
Selecting the Array design file format
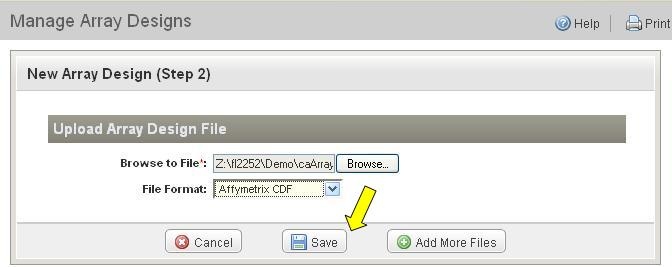
- Multiple array design Files can be submitted to upload at the same time. Click on "Add More Files" to select a new file. After all of the files are selected, submit the files to upload by clicking "Save".
Submitting files to upload
Validate an array design file
- After the array design file is uploaded, caArray will automatically initiate the validation process. If the file is from a supported array provider, caArray will mark the file as "Imported" after the validation.
Array Design Files, Imported and Importing (Being Validated)
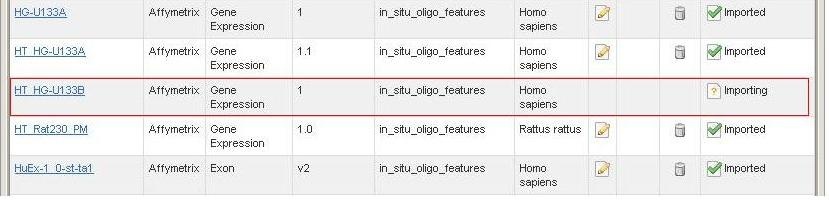
- For more information on the different states of the array design files, refer to caArray 017 - What is the meaning of the caArray Status of Importing - Imported versus Imported Not Parsed?, the section "caArray Status of Importing: Imported vs Imported Not Parsed".
Array Design Files, Imported

Delete, Edit and Replace an array design file in caArray
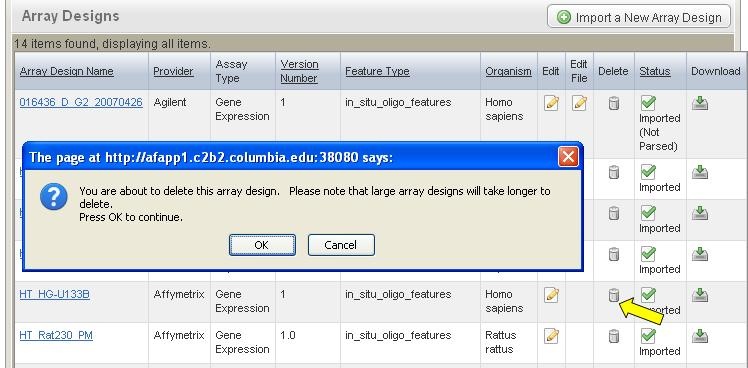
Delete an Array Design
After data has been imported into an experiment, the array design associated with that data cannot be removed from the experiment's list of array designs. Conversely, once an array design has been imported, the file associated with it cannot be changed. Array designs that are not associated with an experiment can now be deleted. To delete an array design, follow this step:
- On the row corresponding to the array design, click the Delete icon (arrow in the image below).
- A confirmation window will pop up. Once you click the "OK" button, the file will be physically deleted from caArray.
Array Design Files with Delete Icon and Confirmation Window
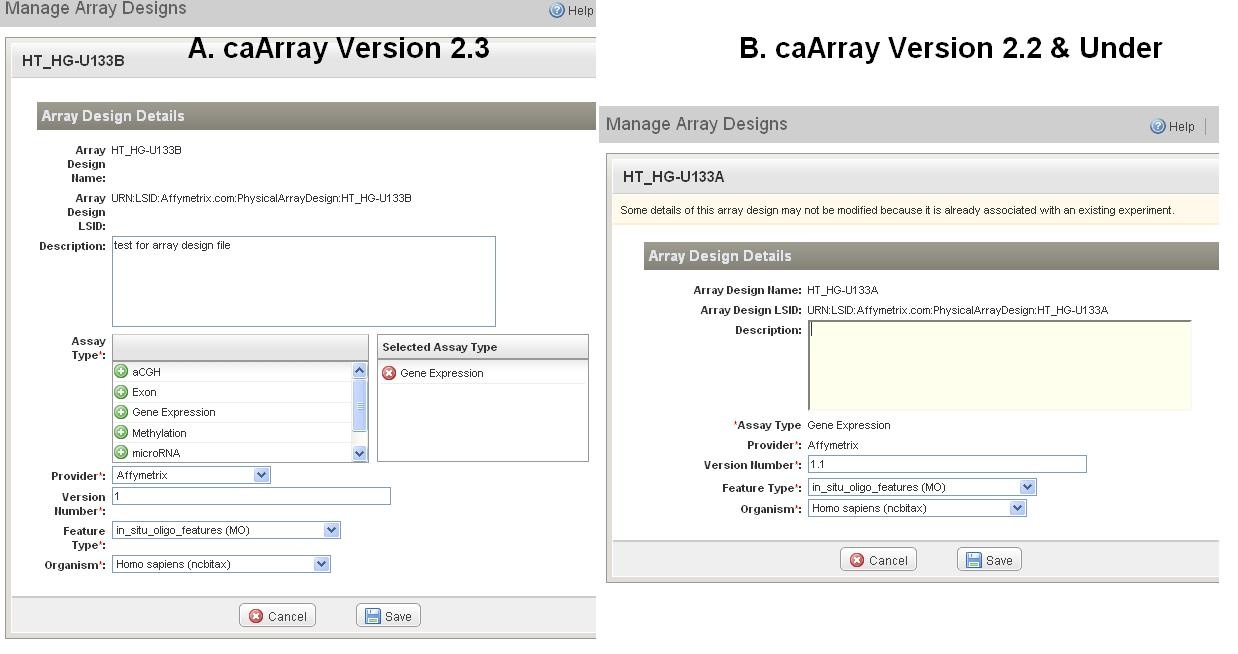
Edit an Array Design
In caArray 2.2, any logged in user can edit an array design. To edit an array design, follow these steps:
- On the row corresponding to the array design, click the Edit icon.

- The required fields become editable; enter any edits.
- Please note, the editable fields are limited for the array design files uploaded prior to caArray 2.3. Starting with caArray 2.3, all required fields become editable.
Array Design Details Dialog Open for Editing in V2.3 and V2.2 and Under with Fewer Fields Open for Editing
Replace an Array Design
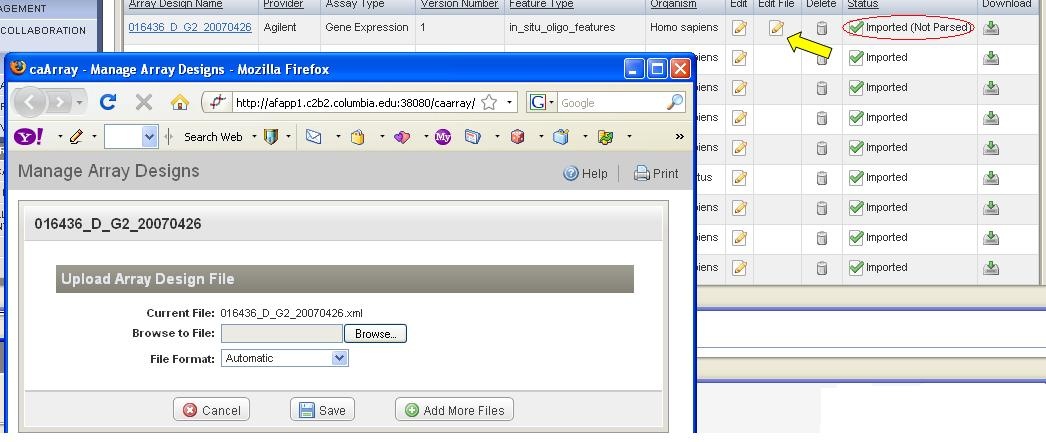
Once an array design has been imported and parsed into caArray, the array design file associated with it cannot be changed. You will have to delete the existing one and upload a new one. This can be done only if there is no experiment data associated with this array design file.
The only array design file that can be replaced is the one imported without validation and parsing. (For more information on the definition of different file types, refer to caArray 016 - Which file can be parsed into caArray? What is the benefit of file parsing? Files Recognized by caArray.)
To replace an array design file, follow these steps:
- Find the file that is replaceable (the file with a status of "Imported (Not Parsed)" (circled in red in the illustration).
- Click on "Edit File" icon (Arrow) to activate "Upload Array Design File" Window.
- Browse and find the new array design file.
- Save the new file by clicking the Save button.
Replacing an Array Design File
Have a comment?
Please leave your comment in the caArray End User Forum.