Page History
...
- Enter or change (if editing) the name and/or description.
- Select or verify the checkbox to specify if you want to allow public access to the study.
- For the study log feature, click View Log or Edit Log. See #Study Log for details about the log.
- Click Save.
Info title Note You can save the study at any point in the process of creating it. You can resume the definition and deployment process later.
- If you choose to add a logo for the study, click the Browse button corresponding to Logo File in the upper right of the Edit Study page. Navigate for the file, and click Browse. The file name displays above the Upload Now button.
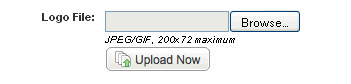
- Click the button to upload the logo then click Upload Now. Once you save the study (or its edit), the logo displays in the center of the page. On the home page for the study, the logo displays in the upper left, above the sidebar.
To continue creating the study, you can add subject annotation data sources, genomic data sources or imaging data sources.
...
- Click View Log on the Edit Study page to simply review an existing log. The log records all steps comprising activity in the study, with the most recent displaying at the top of the log.
- To edit a log, click Edit Log on the Edit Study page.
- Add an appropriate description/annotations to the individual log entries.
- Check the Update box next to the description, then click Save to save the edits. The descriptions will now be available when any user views the log.
See also on page 12 #Study Log.
Working with Annotations – An Overview
One of the most important factors in creating a study in caIntegrator is in properly annotating the data. Each annotation has a definition you must identify. Because the process can be relatively quite complex, you might want to review the following steps for working with annotations.
Annotation workflow summary:
- Add an annotation group. This optional step is for users who have a rigid data dictionary of all annotations relevant to the study. This step can also be helpful in cases where a study has many annotations. For more information, see #Adding an Annotation Group.
- Add subject annotation data. This consists of multiple sub-steps.
- Add a new subject annotation data sources file. This step uploads the file and starts the workflow for assigning uploaded data definitions. See , step .
- Edit the annotations. This step opens the Define Fields for Subject Data page. See , step .
- In the Define Fields for Subject Data page, review possible definitions in the annotation group associated with this study. See .
- Assign the visibility of each annotation definition. See , step .
- Locate and verify the assignment as "identifier" for one annotation. See .
- Review, verify and assign definitions for each annotation. You can do this in one of four ways:
--Accept existing default definitions as described in the associated annotation group. See .
--Create or manage definitions manually. See .
--Search for and use definitions existing in other caIntegrator studies. see .
--Search for and use definitions from caDSR. see .
- Load the Subject Annotation Source. Up until this point, you can periodically save your work with the annotations, but before you can deploy the study, you must complete this step.
- Deploy the study. See .
...