Page History
...
- Click the Create New List link in the left sidebar. This opens the Manage List page, shown in the following figure.
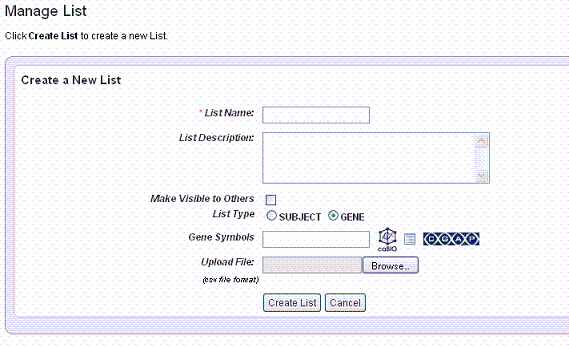
- Enter a name for the gene or subject list.
- Enter a description (optional).
- Select Make Visible to Others if you want the list to be visible to anyone who views the study. This selection places the list in the Global List folder in the left sidebar under Saved Lists. In any box where you can select lists, the term 'Global' will identify any list so identified when the list is created.
- Select the List Type, Subject or Gene.
- If you select Subject, enter the Subject IDs in the text box that appears. Proceed with step 7.
- If you select Gene, proceed with step 6.
- For Gene Symbol, enter one or more gene symbols in the text box or click the icons to locate genes in the following databases. If you enter more than one gene in the text box, separate the entries by commas.
caIntegrator provides three methods whereby you can obtain gene symbols for creating a gene list:. For more information, see #Choosing Genes. - If you so choose, you can upload a gene or subject ID list. For the Upload File field, click the Browse button to navigate to a .csv file made up of gene symbols. caIntegrator converts the comma-separated content to a gene list.
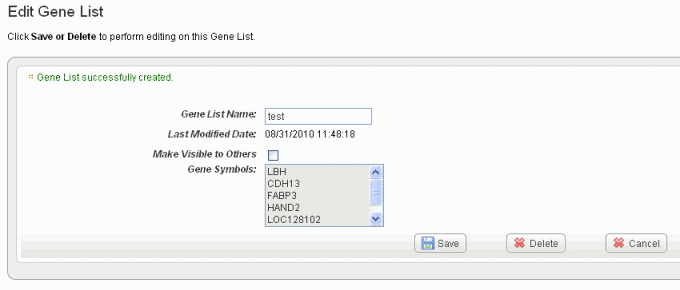
Wiki Markup Click *Create List* at the bottom of the page. caIntegrator now opens the Edit \[Subject or Gene\] List page which shows the name and symbols of the newest gene list, shown in the following figure. !edit gene list80.png|vspace=4, border=1, alt="The Edit Gene List for reviewing, editing the name or deleting a gene list. The Edit Subject List page is comparable."!
...
To view a gene list or subject list in caIntegrator, under Study Data in the left sidebar, click Saved Lists > Global Lists, or My Lists. Select the list/analysis you want to open. The system displays gene or subject lists that have been saved for the open study.
You can initiate the following functions on this page:
- Click on any of the list names or the list icon (
 ) to rerun the query from which the gene or subject list was first created. If the list is a gene list, in the query results, you can click on the gene information icon (
 ) to open the Cancer Genome Anatomy Project (CGAP) showing metadata for the gene.
 - Click the edit icon (
 ) to open an Edit Gene/Subject List dialog box. On this page you can review the list of gene symbols or subject IDs included in the list shown in the following figure.
Wiki Markup In the Edit \[List Type\] dialog box, you can perform the following tasks:
...
Wiki Markup To rename the list in the *\[List Type\] List Name* text box, enter the new list name.- You can change the visibility of the list in the appropriate check box.
- To delete the list, click the Delete button.
- Click Save to save your changes or Cancel to leave the page without making changes.
Once a list is created, you cannot edit the list contents.
| Include Page | ||||
|---|---|---|---|---|
|
Imaging Data Results
In reviewing imaging search results, it is important to understand the hierarchy of submissions in NBIA. For more information, see #Relationship of Patient Subject to Study to Series to Images.
...
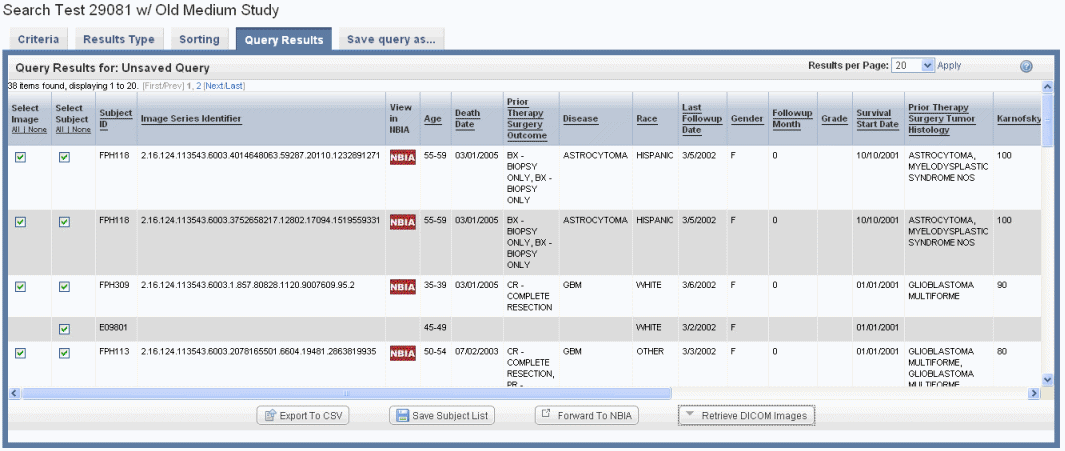
If your annotation choice on the Columns Results Type page identifies annotations such as tumor size or tumor location, the search results display image series subsets that have those annotations, or any annotations you check on the Results Type page. The check boxes work in conjunction with buttons at the bottom of the results page, shown in the following figure. By expanding display parameters, you can view complete details for image search results.
...
Retrieving DICOM Images
On the caIntegrator imaging data Search Results page, you can click the Retrieve DICOM Images button which is linked to results you have selected by row. caIntegrator retrieves the corresponding image(s) from NBIA through the grid. NBIA organizes the download file by patient ID, StudyInstance UID, and ImageSeries UID, and compresses it into a zip file. When caIntegrator notifies you that the file is retrieved, the DICOM Retrieval page indicates whether the retrieved files are Study Instance UIDs or Image Series UIDs, shown in the following figure. For more information, see the note below.
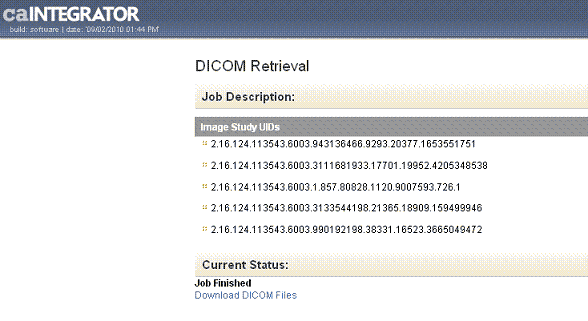
Click the Download DICOM link to download and save the file. caIntegrator unzips the file and displays the list of images in the file. To open the DICOM images, you must have a DICOM image viewer application installed on your computer. For more information, see http://dicom.online.fr/fr/download.htm.
In the search results, not all of the subjects in the data subset may be mapped to image series IDs. If you select a mixture of subjects, some of whom which have image annotations as indicated by an image series ID and some of whom which do not have image annotations (no image series ID), when you click the Retrieve DICOM Images button, NBIA retrieves the images for the entire NBIA study instance UID that includes the image seriesIDs you checked.
...
If your query does not have image annotations and all check boxes are selected, results will go up to image series UID and gives all image series in it. Search results may ultimately depend on how the study was created. For example, if no image series display in query results, it means they were not mapped in the study. In that case, the results "move" up to Study Instance UIDs. See
To best understand this, it is important to review the hierarchy of submissions in NBIA. For more information, see #Relationship of Patient Subject to Study to Series to Images.
...
If you are searching a study that has image data and image annotation(s) for at least one image series, you would follow these steps:
- Open a study in caIntegrator that has imaging data associated with it that points to the production NBIA server.
- Make Run a query that will have image series or subjects (patients) who are associated to Image Studies and select a few of those patients subjects in the check box.
- Click the Retrieve Dicom Images button. Note that it aggregates to the image study.
- Now go back to Results Type tab, select all image annotations and run the query again.
- Select an image series type column and click the Retrieve Dicom Images button. caIntegrator now aggregates to the Image Series that were selected and not the Image Study.
- Select a row that doesn't have image series data, and a row that does, and push the button. This should aggregate to the study for the rows selected.
- Click Forward to NBIA. You should see the same types of aggregation for these tests.
...
| Include Page | ||||
|---|---|---|---|---|
|
...