Page History
...
| Show If | |||||||||
|---|---|---|---|---|---|---|---|---|---|
| |||||||||
|
To manage permissions:
- Use one of the following methods to locate the permissions icon for a collection or file:
- Search for data as described in Searching for Data via the GUI. The search results page appears. Locate the permissions icon for the collection or file of interest. (Within the results list, you might need to scroll to the right.)
- Browse for the data and view details as described in Viewing Metadata via the GUI. The Collection page or Data File page appears, listing all attributes for the collection or data file.
- Click the permissions icon (
 ). The Permissions page appears.
 - Consider sharing the data with one or more users or groups:
- At the bottom of the page, click Add UserPermission. The Add User Permission dialog box appears.
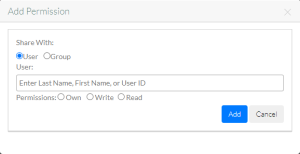
Specify whether you want to share the data with users or groups. - In the User or Group field, start typing a value:
- In the User field, start typing a user's first name, last name, or user ID. The system suggests names of matching users as you type. Select one of the suggested names. Repeat this process to add additional users.
- In the Group field, start typing a group name. The system suggests names of matching groups as you type. Select one of the suggested names. Repeat this process to add additional groups.
- In the Permissions field, select Own, Write, or Read.
- Click Save. The system adds the selected users or groups to the list on the Permissions page and displays a message to indicate whether the permissions for the collection or file were updated successfully.
- At the bottom of the page, click Add UserPermission. The Add User Permission dialog box appears.
Consider changing the permission setting for a user or group:
Click Edit.
In the row for the user or group of interest, select the permission level you want that user or group to have. The following table describes each permission level:
Include Page About Permission Levels About Permission Levels Click Save. The system displays a message to indicate whether the permissions for the collection or file were updated successfully. Also, the system sorts the list alphabetically by type (group or user) and then by user name. If you had changed the permission level for a user or group to None, that user or group disappears from the list.
- Ask the specified user or group of users to log out of DME and log in again.
...