Page History
...
- Log into caIntegrator via the application's main Web page.

First log into caIntegrator via the application's main Web page. In this example, I've logged in with my username (hd2266).
- Each installation of caIntegrator can host several studies. When you first log in, you will be taken to the home page of the default study, which in this case is entitled 'jagla-00034'. Since this is not the study we want to add data to, you will want to bring up a list of available studies by clicking on the 'Manage Studies' link under the 'STUDY MANAGEMENT' menu in the navigation panel to the left.
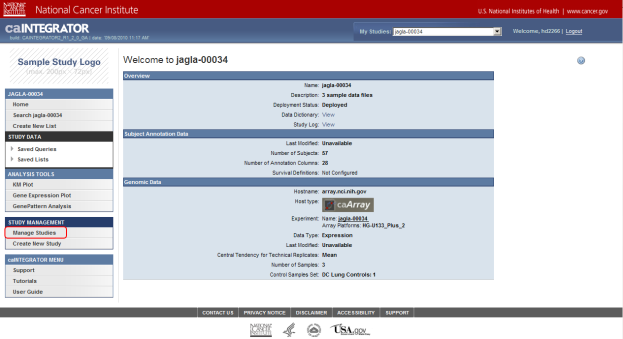
Once you log in, you are taken to the home page of the default study, which in this case is 'jagla-00034'. The study we want to add data to is 'Demo Study for ICR Folks', which you can access by clicking on the 'Manage Studies' link (highlighted in red).
On the Manage Studies page, find the study entitled 'Demo Study for ICR Folks' in the table of studies, then click on the 'Edit' link under the Action column at the far right of the table.
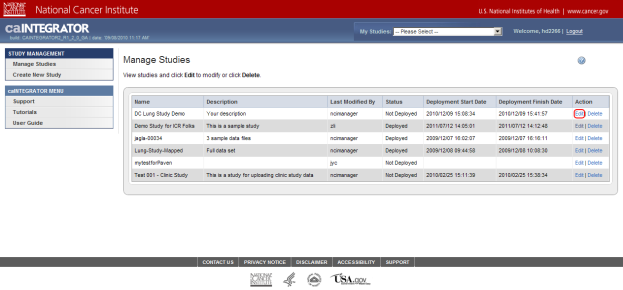
You can edit the study entitled 'Demo Study for ICR Folks', which is at the top of the study list, by clicking on the 'Edit' link (highlighted in red).
...
Note that this study already has some subject annotation and genomic data loaded. The annotation data is in the form of the CSV file 'subject_annotation_DC_Lung_Study_111210.CSV', while the genomic data is in the form of a link to the address of the caArray server which hosts the data (array.nci.nih.gov), as well as an experiment identifier (jacob-00182) which references the particular experiment containing the data of interest. Later in this tutorial, we will examine in depth how to load more of this data into the study.
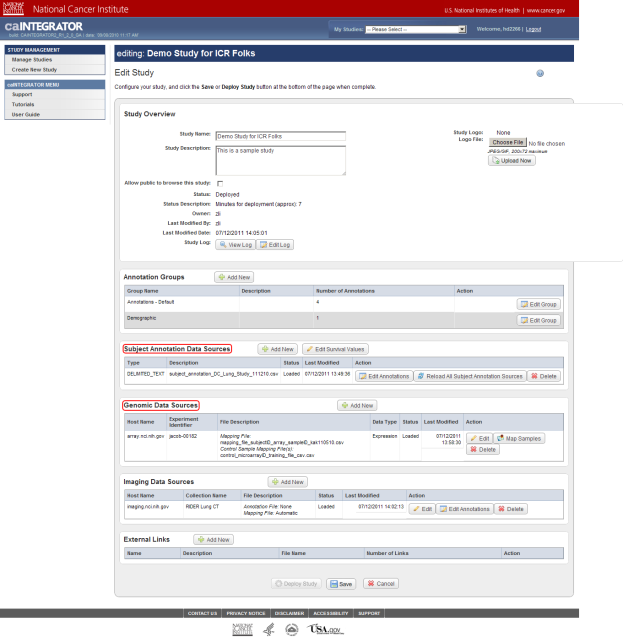
This study already has subject annotation and genomic data loaded; they are listed beneath their respective headings, which are highlighted in red. Later in this tutorial, we'll learn how to load more data into this study.
...
- Now we're ready to load additional subject annotation data into the 'Demo Study for ICR Folks'. As mentioned before, you'll need the data in the form of a CSV file containing at least one field with a unique ID for each subject in the study. The CSV file we'll use in this tutorial is called 'subject_annotations_tutorial.CSV'. A partial screenshot of the file appears below as viewed in a Microsoft Excel 2007 window.
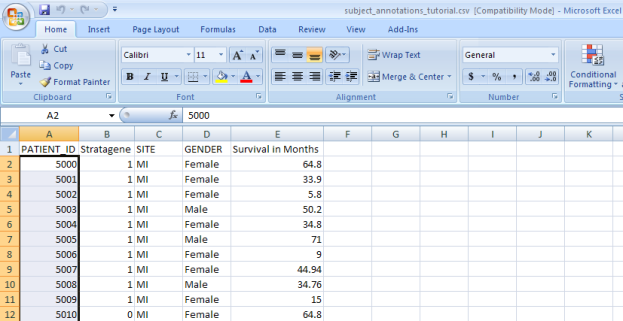
This data came from a fictional multi-site study that compared gene expression between lung adenocarcinoma patients and healthy controls. The nature of the data itself is irrelevant to our purpose here. The relevant aspect is that the data is categorized into five fields, which are represented by columns in the spreadsheet.
...
To upload your data file, first click on the 'Add New' button to the right of the 'Subject Annotation Data Sources' heading.
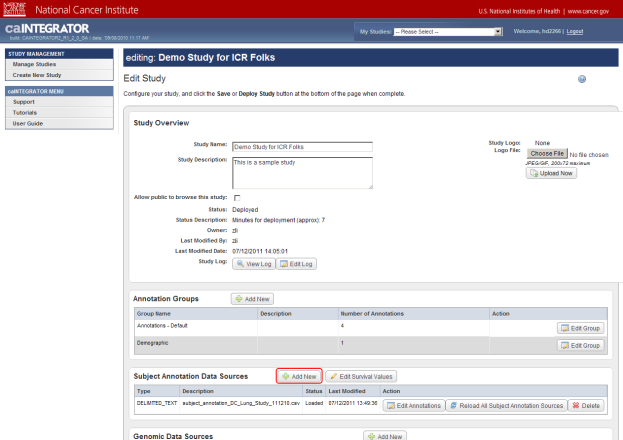
You can load a new subject annotation data file into the existing study by clicking on the 'Add New' button (highlighted in red).
- When you click on the button, the area below it will expand to display additional options. Click on the 'Choose File' button in the expanded area.
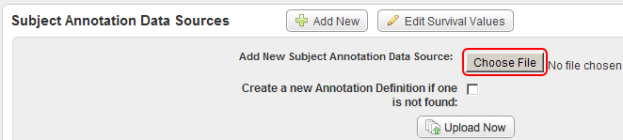
When you click on the 'Add New' button, the area below it will expand. Click on the 'Choose File' button (highlighted in red) in the expanded area.
- When you click on the 'Choose File' button, you'll be prompted for the location of the data file with an Open dialog. Locate the CSV file containing your subject data, click on it, then click on the 'Open' button.
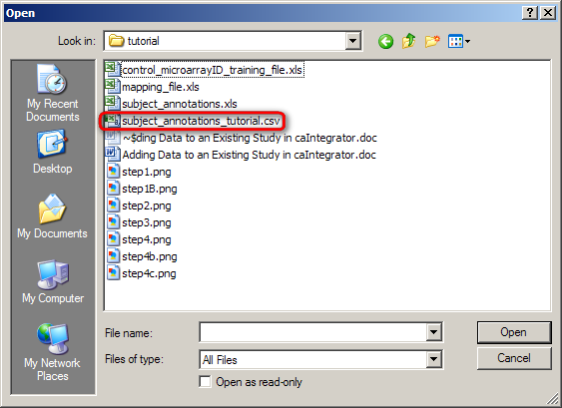
In this example, we click on the 'subject_annotations_tutorial.CSV' file (highlighted in red), then click on the Open button. Your own annotations file will be named differently.
- Once you open your annotations file, you'll be taken back to the Edit Study page, where you can click on the 'Upload Now' button at the bottom of the area to load the file into the study.
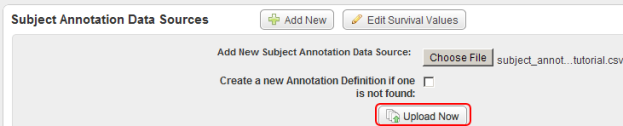
Click on the 'Upload Now' button (highlighted in red) to load the subject data into the study.
- Once you've uploaded the data, you'll encounter another page prompting you to define the various fields for your subject data. Since these fields were already defined when the study was created, we don't need to modify them. Just click on the 'Save' button at the bottom of the page to continue.
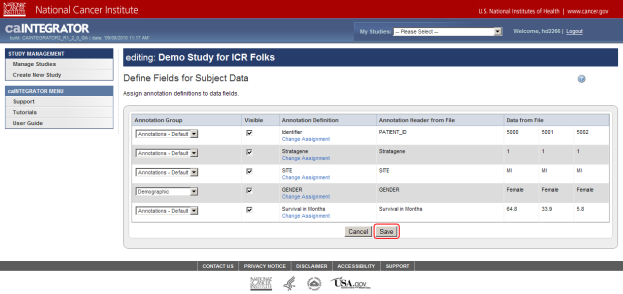
Click on the Save button (highlighted in red) to confirm your annotation field definitions.
- Back on the 'Edit Study' page, the newly uploaded source will now appear in the table beneath the 'Subject Annotation Data Sources' heading. Notice that the status of this source appears as 'Not Loaded' under the Status column. To change this, click on the 'Load Subject Annotation Source' button under the Action column.

The newly uploaded source now appears in the second row (highlighted in red) of the Data Sources table. Click on the 'Load Subject Annotation Source' button under the Action column to load the source.
...