This page describes how to create an empty collection from the Browse page or the Register Collection page. The following conditions must be true for the existing collection in which you intend to create the empty collection:
- Your user account has the Write or Own permission level on the existing collection.
- That existing collection has been configured to contain another collection.
To create a collection:
- Log in as described in Logging In via the GUI. The Dashboard appears.
- Select a method:
- If you are not familiar with the data destination, browse for it, as described in Browsing for Data via the GUI. Navigate to and right-click the existing collection in which you want to create your new collection. Click Add Collection. The Register Collection page appears.
- If you are familiar with the data destination, select this method: In the left panel, click Register > Collection. The Register Collection page appears.
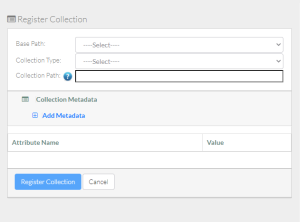
If you browsed to the data destination, that portion of the page has only the Collection Type and Collection Path fields, with a system-generated collection path already specified.
If the Base Path field is available, select the base path specified by your group administrator. An information icon (
 ) appears next to the Base Path field and the system begins to populate values in the Collection Type field and the Collection Path field. (If you are a group administrator and want the Collection Type field to list more collection types, contact NCIDataVault@mail.nih.gov.)
Consider examining the valid hierarchies for the selected base path. To do so, click the information icon next to the Base Path field. A Valid Hierarchies chart appears indicating the collection type or types allowed within each collection type. In the chart, a check mark indicates each collection in which you can register data files.
To close the Valid Hierarchies chart, click elsewhere on the page.
- Specify the rest of the data destination:
If there is more than one collection type, select one for the new collection. For guidance on selecting a collection type, refer to your group administrator. For some collection types, the system displays a list of required metadata attributes. (If you are a group administrator and want to adjust the metadata attributes required by the collection type, contact NCIDataVault@mail.nih.gov.)
- Unable to render {include} The included page could not be found.
- Consider hovering over the information icon () for each attribute. A tooltip appears with information about that attribute.
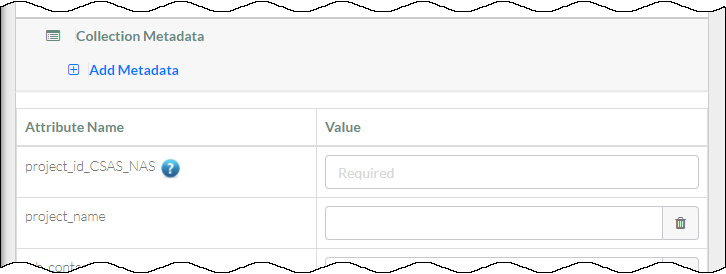
- Specify the collection metadata:
- To add a metadata attribute:
- Click Add Metadata, visible on the right or left side of the page. A blank attribute row appears.
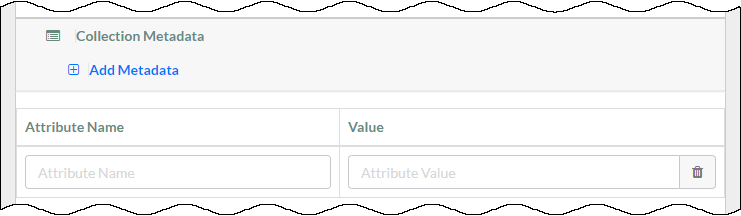
- Specify a unique attribute name.
- Click Add Metadata, visible on the right or left side of the page. A blank attribute row appears.
- In each attribute row, specify a unique value that describes the content you are registering. The character limit for each metadata value is 2700.
Example Attribute Example Value data_owner Jane Doe project_id 1234567890 sample_name L1 project_start_date 2020-12-31 For some date attributes, such as project_start_date, the system expects the "yyyy-MM-dd" format, as in the above example.
- Unable to render {include} The included page could not be found.