<?xml version="1.0" encoding="utf-8"?>
<html>
{{FAQ
release=caIntegrator 1.2 |
entrydate=August 31, 2010 |
topic=CaIntegrator Usage |
Qtext= |
Atext= |
Step 1: select a study
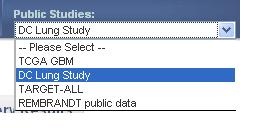
The pathway search can be done in either a private or a public study (no login required). In the example below, we used the public study, hosted on caIntegrater's public domain: https://caintegrator2.nci.nih.gov/caintegrator2![]()
Select a study from the drop-down list in the top tool bar (DC Lung Study in this example).
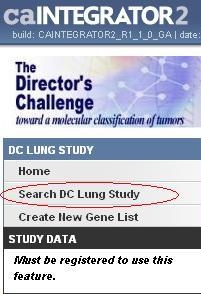
Step 2 : Initiate Search within the study
The left menu bar hosts the options available within the study. Click on Search DC Lung Study from the left menu bar
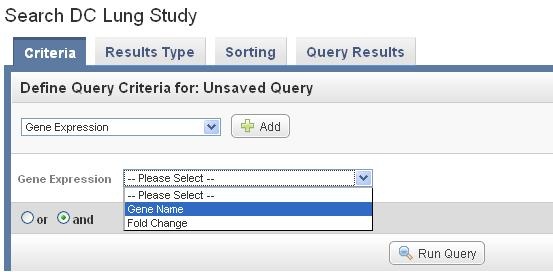
Step 3 Initiate Search for the gene
Select Gene expression under the Criteria tab in the main section of the study, and Click on Add next to the option. After the field of Gene Expression appears, select Gene name
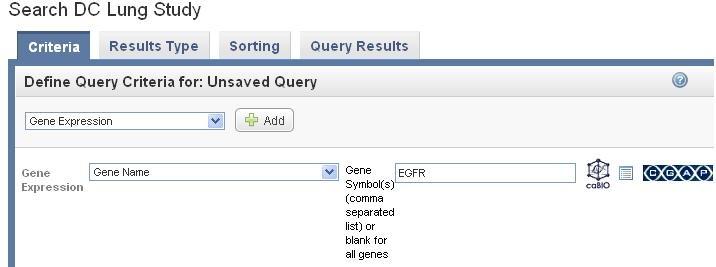
Step 4 Search for pathway in caBio
Click on caBIO icon at the right hand side to launch the search in caBio.
Put a search term in the field, and select pathways from the drop down menu (the left figure).
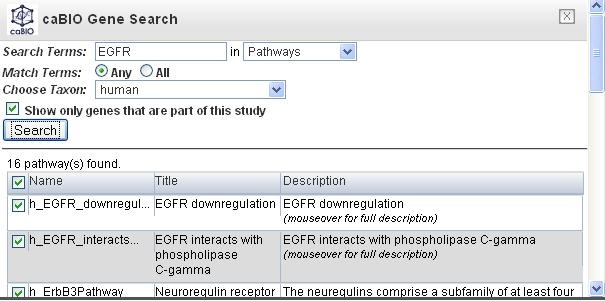
In this example, EGFR was used and there are 16 pathways found in the result.
Step 5 Search for pathway gene
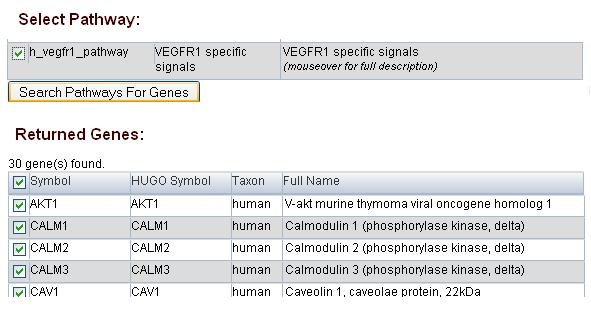
User can select one or many pathways interested in to do the search, although the the list of gene returned will be large when the multiple pathways selected. In the example below, we selected one pathway : h_vegfr1_pathway (top portion of the figure) for the search and received 30 genes returned.
Step 6 Using pathway gene
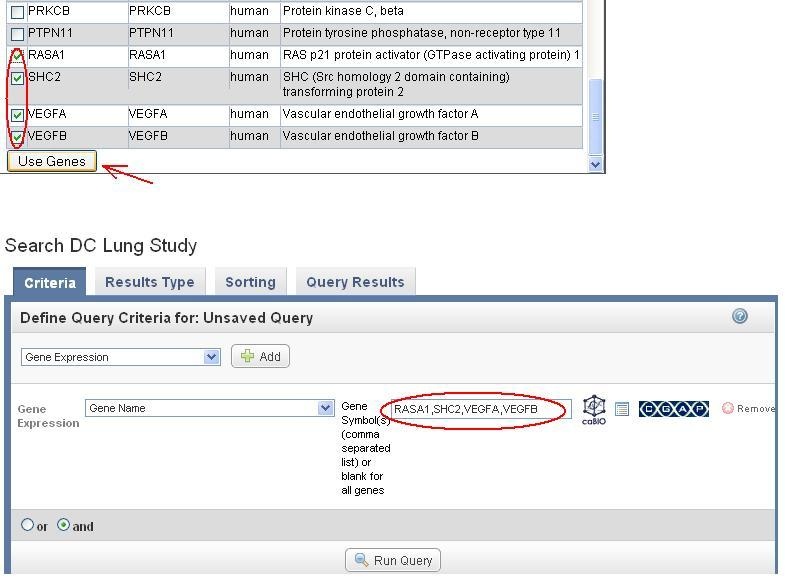
Select pathway genes interested and click on "Use Genes" (top portion of the figure below). The selected genes are populated in the Gene Symbol box in the original Gene expression query (step 3 ) above (the lower portion of the figure).
}}
</html>