Question: How can I build caArray from the source code in the NCI repository?
Topic: caArray Installation and Upgrade
Release: caArray v2.4.1.1 and higher
Date entered: 01/17/2012
Answer
Below is a step-by-step illustrated tutorial on how to build the application from source. It covers the following:
- How to check out the source code from the repository using a Subversion (SVN) client
- How to manually create the requisite database schema
- How to configure the 'properties' files from the source with local installation settings
- How to invoke the build process from the command line
- How to launch the caArray server once the build has completed successfully
- How to access the application's login page via your Web browser
The tutorial is designed for use in a Windows environment, but can easily be adapted to work in Linux as well.
Note
Due to recent changes in the NCI caArray source code repository, the process described in this tutorial only applies to v2.4.1.1, which is the latest version as of this writing.
Note
This tutorial is based on the readme.txt file in the NCI caArray source code repository at https://ncisvn.nci.nih.gov/svn/caarray2/tags/2.4.1.1/.
Prerequisites
1) Before proceeding to check out the code, ensure that the following are already installed on your machine:
- The Java 2 SE Development Kit (JDK) v1.5, available for download at:
http://download.oracle.com/otn/java/jdk/1.5.0_22/jdk-1_5_0_22-windows-i586-p.exe
Warning
The build process described in this tutorial only works with version 1.5 of the JDK; it will not work with any other versions, earlier or later.
- Apache Ant 1.7.0 or later, available for download at:
http://mirrors.ibiblio.org/apache//ant/binaries/apache-ant-1.8.3-bin.zip
- MySQL v5.0 or later, available for download at:
http://filehippo.com/download/file/3518c972e6317bff1a5caacae83b83cf1057fceca08180ebd44ad9a0ba01444b/
- A command-line Subversion (SVN) client of your choice. The one used in this tutorial is the Collabnet Subversion Command-Line Client v1.74, available for download at:
http://www.open.collab.net/servlets/OCNDirector?id=CSVN1.7.4WINC32 (registration required)
2) Once all the above are installed, ensure they are configured as follows:
- The PATH and JAVA_HOME Windows environment variables must be set to the the installation path of the JDK binaries. The default path in Windows is:
C:\Program Files\Java\jdk1.5.0_22\bin
- The PATH and ANT_HOME Windows environment variables must be set to the installation path of the Ant binaries. The default path is:
C:\ant
- The PATH Windows environment variable must be set to the installation path of the SVN client binaries. The default path in Windows is:
C:\Program Files\CollabNet Subversion Client
- The ANT_OPTS environment variable must be set to the value "-Xmx256m"
- The MySQL server must be configured with a secure password for the root user, and this password must be recorded for future reference
Checking Out The Source Code From The NCI Repository
To begin checking out the caArray source code from the NCI repository, first create a new folder (i.e., C:\source), then open up a command-line window, navigate to that folder, and enter the following:
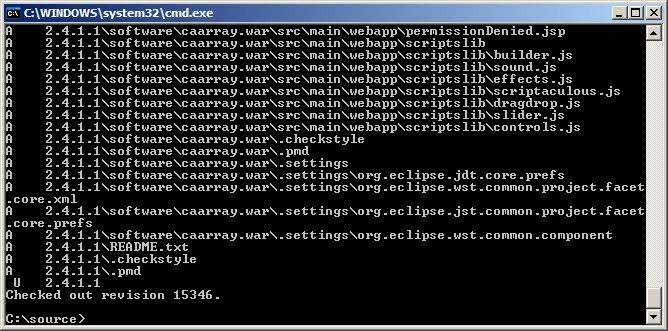
svn checkout https://ncisvn.nci.nih.gov/svn/caarray2/tags/2.4.1.1/
The source files will then begin downloading from the repository server into the folder you created. Depending on the speed of your Internet connection, it may take over half an hour for the checkout to complete, as the source contains thousands of files distributed over hundreds of folders.
You'll know when the checkout is complete when the command-line window shows a message stating, 'Checked out revision x', where x is the revision number, as shown in the screenshot below:
Manually Creating The Requisite Database Schema
It is possible to have Ant automatically generate the empty database schema required for the caArray installation. However, it is preferred to create these schema manually via the MySQL command line client.
Before doing so, you will need to derive a name for the database caArray will use to store genomic data, as well as a username and password for the user who is granted access to that database. In this example, the database name is db1, the username is user1, and the password name is password1.
Now, log into the client using the root password you set when installing the database server, then enter the following SQL commands line-by-line, substituting your own database name, username, and password as needed:
CREATE DATABASE db1 DEFAULT CHARACTER SET latin1;
GRANT ALL ON db1.* TO 'user1'@'localhost' IDENTIFIED BY 'password1' WITH GRANT OPTION;
GRANT ALL ON db1.* TO 'user1'@'%' IDENTIFIED BY 'password1' WITH GRANT OPTION;
Warning
The single quotes around the username and password in the code snippet above are not optional and can not be omitted -- they are part of the MySQL syntax.
The client will respond with a confirmation that the issued queries were successful, as shown in the screenshot below: 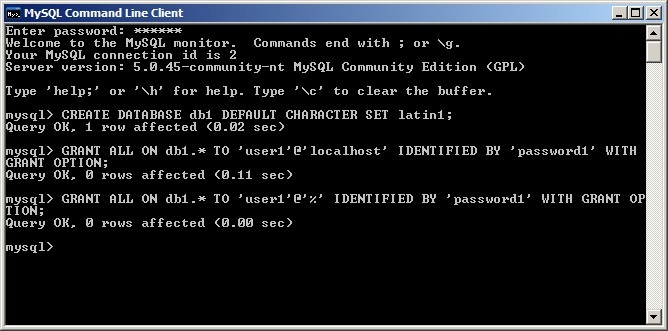
Configuring The 'Properties' Settings Files
The caArray installation settings are mainly specified by a source file, install.properties, whose path is:
$CAARRAY_HOME/software/master_build/install.properties
where $CAARRAY_HOME represents the root folder into which the caArray source was checked out (C:\source in this example).
A second file, local.properties, specifies additional settings. This file is not included in the repository -- you must manually create it yourself by opening a plain text editor and saving a blank file with the filename local.properties to the following path:
$CAARRAY_HOME/software/build/local.properties
These files must be customized with the settings specific to your local environment before starting the build process. These settings include:
- The username of the root account you established when installing MySQL ('root' by default), as specified by the database.system.user property
- The password of the root account you established when installing MySQL, as specified by the database.system.password property
- The name of your database server (usually the same as the Windows name of your workstation or server), as specified by the database.server property
- The port your database server is installed on (47210 by default), as specified by the database.port property
- The database name you established when manually creating the database schema, as specified by the database.name property
- The username of the user to whom you granted access to this database, as specified by the database.user property
- The password of the user to whom you granted access to this database, as specified by database.password property
- The path to which caArray should be installed, as specified by the application.base.path property
The install.properties file contains several other properties aside from the ones listed above, but these others do not need to be customized and can be left at their default values.
The blank local.properties file you created previously must be populated with all the properties listed above and their respective values, plus an additional field, jboss.home, which specifies the name of the subfolder within the root installation folder to which the JBoss server will be installed. The value of the jboss.home property is derived from the value of the application.base.path property in install.properties, with the text '\jboss-4.0.5.GA' appended. For example, if the value of the application.base.path property is C:\caArray, the corresponding value of the jboss.home property would be C:\caArray\jboss-4.0.5.GA.
Invoking The Build Process From The Command Line
Launching The caArray Server Upon Build Completion
Accessing The Application's Login Page Via Your Web Browser
Have a comment?
Please leave your comment in the caArray End User Forum.