Question: How Do I Associate An Imported Array Design With An Experiment?
Topic: Working With Array Design Files
Release: v2.0 and above
Date entered: April 24, 2012
Answer
In caArray, before an experiment can be successfully created, the array design(s) for platforms used in that experiment have to be imported first. Afterwards, the array designs can be associated with the experiment in one of two ways:
Approach 1
The most common way to associate the array designs is to select them when the experiment is created, as shown in Figure 1 below. By selecting array design(s) this way, you are telling caArray that the selected array design(s) correspond to the data files to be uploaded.
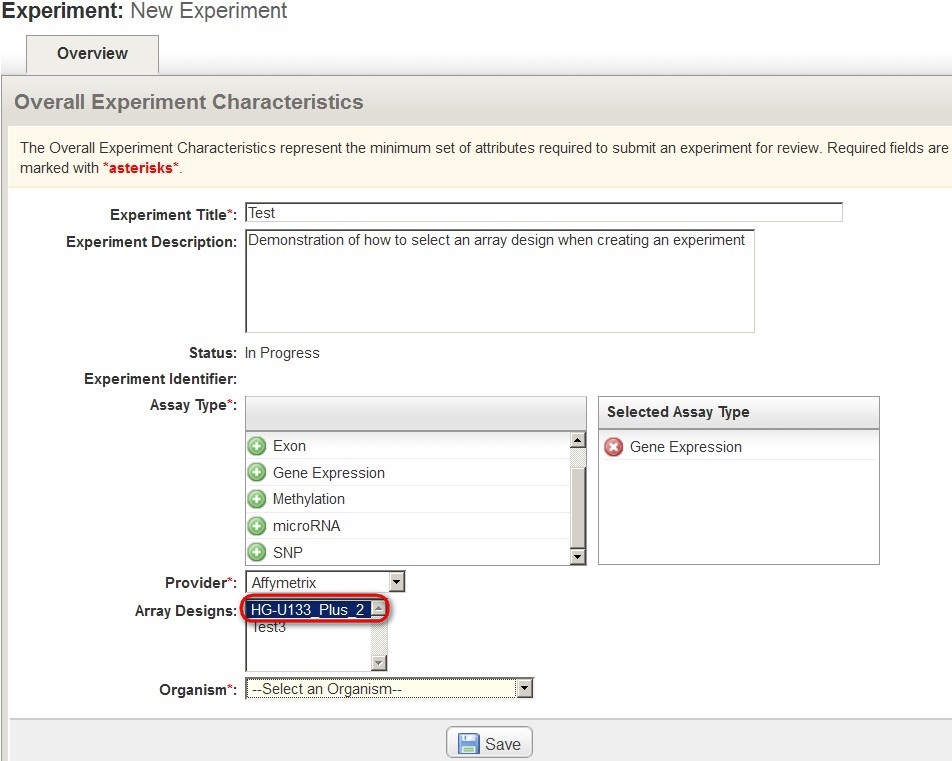
Figure 1. On the caArray 'New Experiment' page, the 'Array Designs' box lists all the array designs that have been imported into the experiment. Any designs you select from this list will become associated with the experiment and all the data files uploaded to it.
If only one array design is selected, caArray will associate all uploaded data files with that array design and will parse the data accordingly.
If more than one array design is selected, and if the data and sample annotations are in the MAGE-TAB format, additional information needs to be provided in the form of a SDRF metadata file, which is in the CSV file format. In the SDRF file, which lists all the experiment's samples, a column named “Array Design REF” shows the array design reference for each sample, as shown in Figure 2 below. This allows caArray to associate the correct array design with its corresponding array data files.

Figure 2. The 'Array Design REF' column in the SDRF metadata file shows the array design LSID references for each listed sample from the experiment.
When entering the array design information into the SDRF file, be sure to pay attention to the syntax of the LSID reference. The correct reference syntax for most array designs supported by caArray can be found on the NCI instance of caArray at https://array.nci.nih.gov/caarray/home.action. Once you log in, click “Manage Array Designs”, then click on the array design that your data files use, and capture the value for “Array Design LSID”, as shown in Figures 3 and 4 below.
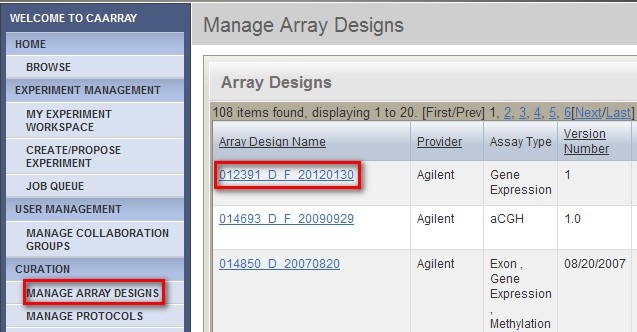
Figure 3. To find the LSID reference for an array design, first log in to the NCI caArray instance, then click on 'Manage Array Designs' (highlighted in red) in the left-hand navigation pane and click on the desired array design from the 'Array Designs' page.
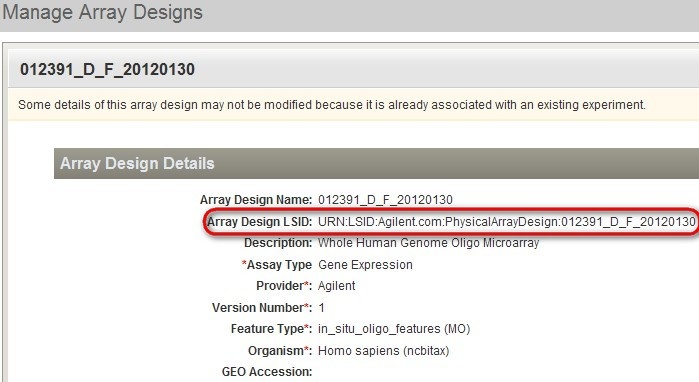
Figure 4. For the array design you selected from the 'Manage Array Designs' page, the 'Array Design Details' heading lists several attributes of the array design, including the LSID reference (highlighted in red). This reference can be captured and entered into your SDRF file.
Remember to remove the “URN:LSID:” prefix before you add the array design reference to the SDRF file column. For example, if the original LSID is:
URN:LSID:Agilent.com:PhysicalArrayDesign:012391_D_F_20120130
then the corresponding value to be entered into the SDRF file is:
Agilent.com:PhysicalArrayDesign:012391_D_F_20120130
Approach 2:
A user can choose not to specify any array design when creating an experiment (notice that in Figure 1, the array design field on the web page is not marked by a red asterisk, meaning that field is not required). Instead, s/he can specify the array design(s) in a SDRF file as described above. Please pay attention to the syntax.
Have a comment?
Please leave your comment in the caArray End User Forum.