Introduction
This document is a section of the [WIP LJJ LexEVS 5.x Installation Guide].
This section provides requirements, instructions, and troubleshooting information for installing the LexEVS Remote API environment.
Preliminary considerations
- The LexEVS 5.x Supported Platforms are the same for this environment as they are for the Local Runtime.
- Before installing the LexEVS Remote API environment you must have a [LexEVS Local Runtime] installed and working.
- It is not required that you load a terminology into the Local Runtime in order to complete the installation of the Remote API environment. However, using the Remote API requires that a terminology be loaded into the Local Runtime.
- The Remote API environment has additional LexEVS 5.x Prerequisite Software Supported beyond the Local Runtime. The additional web application server does not have install steps given in this guide. The web application server can be on the same server or a different server from the Local Runtime.
- Complete the [Downloading and Installing the LexEVS Remote API] steps below.
Once you have completed the additional prerequisite software install, the Remote API environment install steps, and the verification test as described in this guide then you should be ready to start using the Remote API features to meet the needs of your application. Not counting prerequisite software products the installation and verification should not take more than 30 minutes.
Downloading and Installing the LexEVS Remote API
Step |
Action |
||||||||||||||||
|---|---|---|---|---|---|---|---|---|---|---|---|---|---|---|---|---|---|
1. Download the latest version of the LexEVS Remote API WAR file from the right. You have a choice between WAR files tailored for JBoss or Apache Tomcat installations. The location you have chosen to save this on your computer will be referred to as the |
LexEVS Remote API Includes the Java runtime and dependencies, the Java distributed API, and the caCORE SDK-generated services. This can be deployed to an Apache Tomcat or JBoss container. lexevsapi51.tomcat.war lexevsapi51.jboss.war |
||||||||||||||||
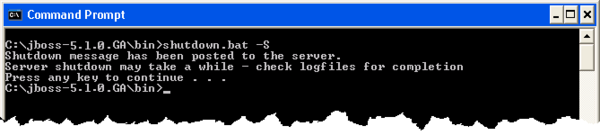
2. Shut down your application or servlet container. This presumes that you have already installed a web server as outlined in LexEVS 5.x Prerequisite Software Supported. The command to do the shut down will be web server specific. See the documentation for your web server for information on how to do this. There may be many alternatives.
|
|
||||||||||||||||
valign="top" |
3. Rename the WAR file.<br> Unknown macro: {SAVE_DIRECTORY}
</tt> and rename the file, like this:<br> /lexevsapi51. Unknown macro: {WEB_SERVER}
.war Unknown macro: {SAVE_DIRECTORY}
/lexevsapi51.war'''''
<br>'''''copy \lexevsapi51.war Unknown macro: {WEB_SERVER_HOME}
{DEPLOYMENT_HOME}''''' Unknown macro: {SAVE_DIRECTORY}
'' is the location of the downloaded file '' is the brand of the web server Unknown macro: {WEB_SERVER_HOME}
'' is your application server home directory Unknown macro: {DEPLOYMENT_HOME}
'' is the Web Archive deployment directory for your application server
<br>Set <tt>LG_CONFIG_FILE</tt> to the path of the lbconfig.props file of your LexEVS installation like this: Unknown macro: {LEXEVS_HOME}
\resources\config\lbconfig.props''''' Unknown macro: {LexEVS_HOME}
'' is the install directory of LexVES Copy/paste the examples below as a starting point for this file:
For all ways of accessing the coding scheme, security must be set up. The example at the right shows access by '''Name, URI, and Formal Name''', but others are possible too.
<br><tt>MedDRA=gov.nih.nci.system.dao.security.MedDRASecurity</tt>
{DEPLOYMENT_HOME} directory but may be different for some servers. |
Add a line to the file in the same part of the XML where other properties are set like this:
'''''<attribute name="Properties">org.LexGrid.LexBIG.caCore.Properties=
</attribute>'''''
<br>where ''
'' is the location and file name of <tt>lexevs.properties</tt> established in a previous step
In Tomcat placing the file in the conf dir or the /webapps/lexevsapi5x/WEB-INF/classes directory should suffice.
<br>JBoss example:
<br><tt><attribute name="Properties">org.LexGrid.LexBIG.caCore.Properties=C:\jboss-4.0.5.GA\server\default\conf\lexevs.properties</attribute></tt>
<br>is added to this file between the <tt><mbean></tt> tags.
:'''Note:''' In some server installations you may not have authority to modify this file. In that case you can simply move the <tt>lexevs.properties</tt> file somewhere on the web application servers class path.
[[Image:jboss_properties_service.PNG]] |
- |
}'' |
==Testing the LexEVS Remote API==
{| class="wikitable" style="width:900px;" border="1"
!style="width:300px;background:#CCCCCC;"|Step
!style="width:600px;background:#CCCCCC;"|Action
- |
|
valign="top" |
1. Start your application or servlet container if it is not already started. The start command will be web server specific. See the documentation for your web server for information on how to do this. |
[[Image:jboss_start.PNG]] |
- |
|
valign="top" |
2. Verify the installation by opening a browser to |
<br>'''''<nowiki>http://
/
</nowiki>'''''
<br>where ''
'' is the address of your server (domain and optionally the port number)
<br>''
'' is the name of the WAR file you placed in the server directories for deployment.
<br>
<br>For example:
<br><tt><nowiki>http://localhost:8080/lexevsapi51![]() </nowiki></tt>
</nowiki></tt>
<br>
<br>If you are using <tt>localhost</tt> then your browser must be running on the same server as LexEVS.
[[Image:EVS_Home.PNG]] |
- |
} |
If you see the Enterprise Vocabulary Services "Welcome to LexEVS" web page then you have successfully installed the LexEVS Remote API.
'''Congratulations!'''
==Troubleshooting==
*If the Local Runtime environment is properly installed and tested then the Remote API environment should have few problems.
*If you receive deployment errors in JBoss and are unable to see the EVS home page then you may not have configured the properties attribute in JBoss's properties-service.xml.
*You may also need to adjust the path in lexevs.properties where lbconfig.props location is defined.